4 Ways to Fix Always Keep on This Device Missing on OneDrive
If you find "Always keep on this device" missing from OneDrive, it is usually because you did not turn on Files On-Demand on OneDrive. If not for that reason, there are 3 other methods for you to solve this issue.
Missing "Always keep on this device"
Hi, I'm here to ask you why is "Always keep on this device" missing in my right-click menu on OneDrive. Have you experienced the same question? How can I solve the "Always keep on this device" option missing problem?
Question from answers.microsoft.com
How to Get “Always keep on this device” on OneDrive
“Always keep on this device” is a special feature of OneDrive Files On-Demand, which includes 3 other options: Share, View online, and Free up space. “Always keep on this device” is designed to always keep certain files in the OneDrive folder available, even when there is no network. That is to say, when you set up certain files with the “Always keep on this device” option, there would be a copy of these files locally all the time.
Therefore, if you want to configure “Always keep on this device” for files on OneDrive, you should activate OneDrive files On-Demand first off. If you are suffering from OneDrive Always keep on this device missing on Mac or Windows, there is a possibility that you have not turned on Files On-Demand or there are some problems with your OneDrive installation or log-in. You can refer to the following solutions with image navigation.
Fixes to “Always keep on this device missing” on OneDrive
Before starting to fix the “OneDrive always keep on this device missing” issue, you should wait to make sure that the data sync between the OneDrive folder and the OneDrive cloud has been finished. If not, you may find OneDrive Always keep on this device and OneDrive free up space not showing in right-click menu correctly.
Solution 1. Turn on Files On-Demand
As mentioned above, checking if you have turned on Files On-Demand is the first solution considered for the disappearance of the Always keep on this device option.
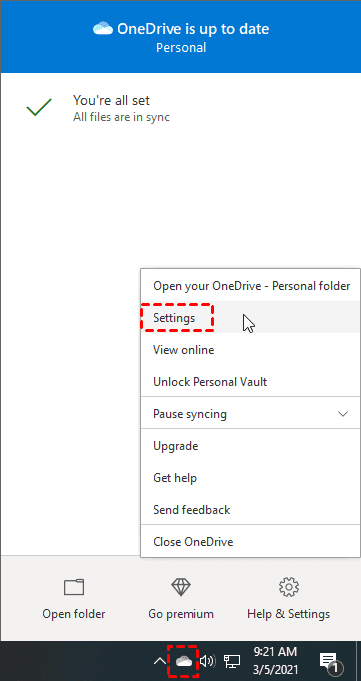
1. Click on the OneDrive icon in the Windows taskbar, hit Help & Settings to select Settings.
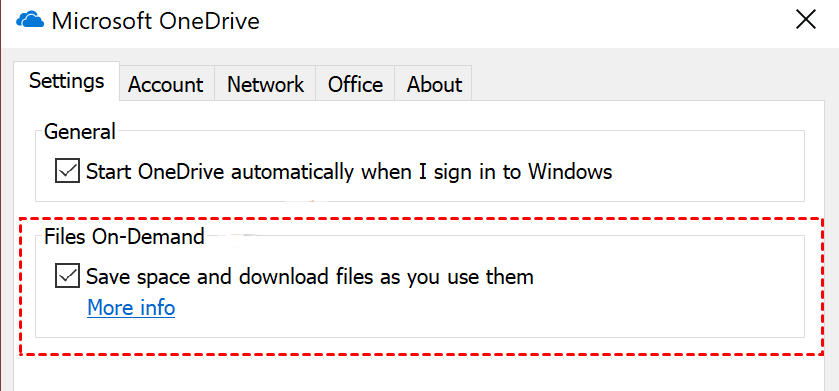
2. Go to the Settings tab and check the box below File On-Demand. And press OK.
After setting, you can go to the OneDrive folder and see if the “Always keep on this device” option comes out. If your OneDrive Files On-Demand does not work, you can reboot the computer or restart OneDrive to have a try.
Solution 2. Log out and log back into OneDrive
If your login information is incorrect or an internal error in the OneDrive program is causing the “OneDrive missing always keep on this device” problem, you can try exiting the program and logging back again.
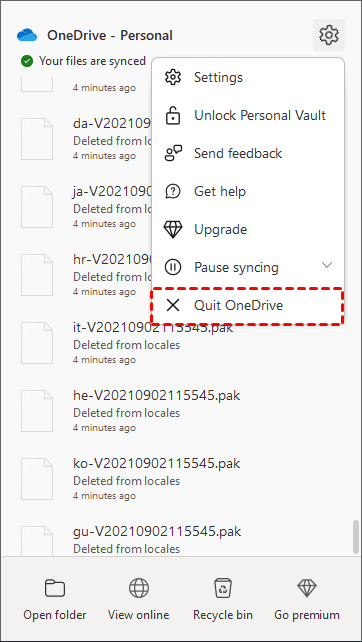
1. Tap on the OneDrive icon in the notification area, click on Help & Settings > Close OneDrive, and make sure it.
2. Open the OneDrive tool or search for OneDrive in the Windows search box to restart it to see if the problem persists.
Solution 3. Reinstall OneDrive
Sometimes, the cause of “always keep on this device missing on OneDrive” may be the wrong installed version of OneDrive or your OneDrive has not being updated to the latest version in time. You can uninstall your OneDrive, and then, download and install the latest OneDrive version to see if this problem will be solved.
1. Click the Windows Start button and pick Settings.
2. Head over to Apps. Then, locate Microsoft OneDrive in the Apps & feature list.
3. Click on it to choose Uninstall.
4. Download and run OneDrive again to verify if you can get “Always keep on this device” on OneDrive.
Solution 4. Turn to an error-free OneDrive alternative
There is no guarantee that “Always keep on this device missing” or such kinds of problems will not recur after being fixed. When the problem reappears, resolving it will take a lot of time. The most trouble-free solution is to switch from OneDrive to another zero-error OneDrive supplant. CBackup can meet all your needs.
This cloud backup tool provides Windows users with local to cloud backup and cloud to cloud backup capabilities. Specifically, it enables you to automatically backup files to OneDrive, Dropbox, and Google Drive, and easily restore backups whenever you need. Also, it is designed to migrate data between clouds in simple clicks and it has no limitations in file size and data transfer speed.
To use CBackup to backup computer files to OneDrive:
1. Install the CBackup desktop application. Register an account for CBackup and log in to the client.
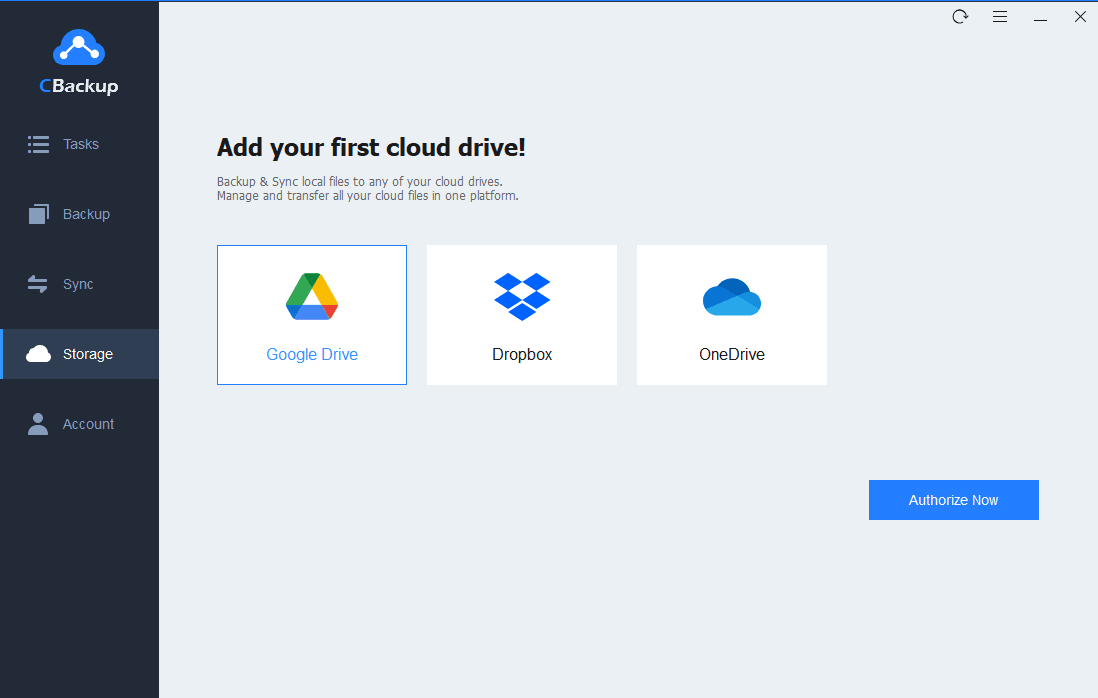
2. Select Storage on the left panel, tap on OneDrive, and click Authorize Now. Then, follow to step to grant OneDrive to connect with CBackup.
3. Click on the Backup tab, and hit the Backup PC to Public Cloud button.
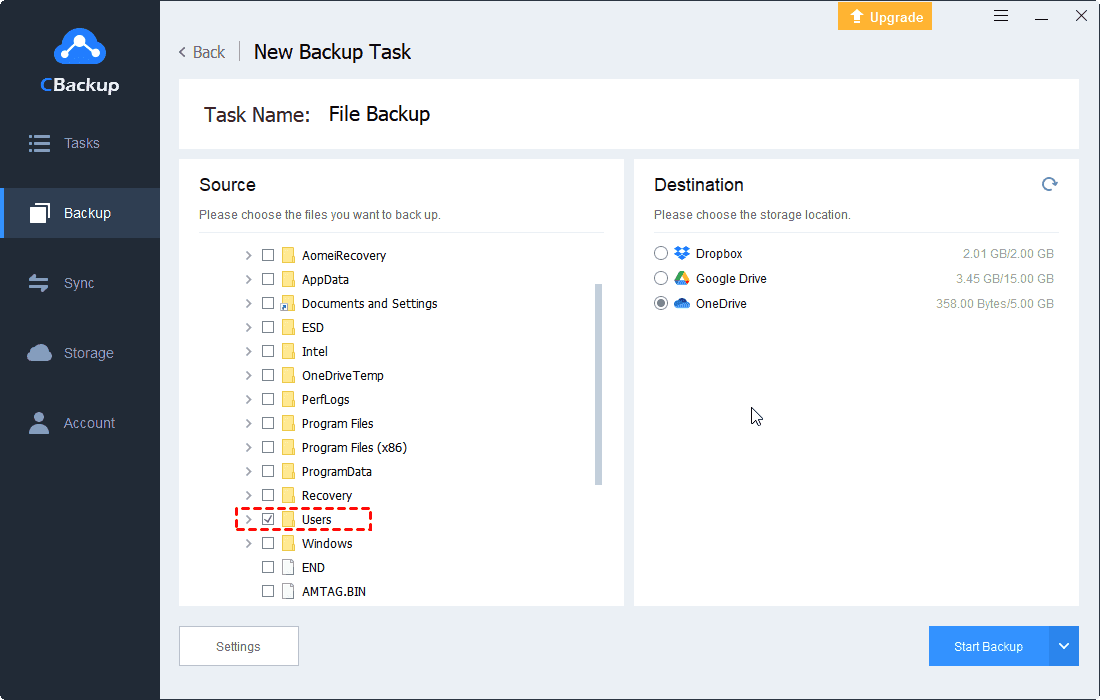
4. Choose the documents you want to back up to OneDrive in the Source tab. Then choose your OneDrive cloud as the backup destination.
5. You can go to Settings > Scheduler to schedule a weekly backup to OneDrive if you need it (optional). Click the Start Backup button to get OneDrive to back up your data.
To backup OneDrive to other clouds with CBackup:
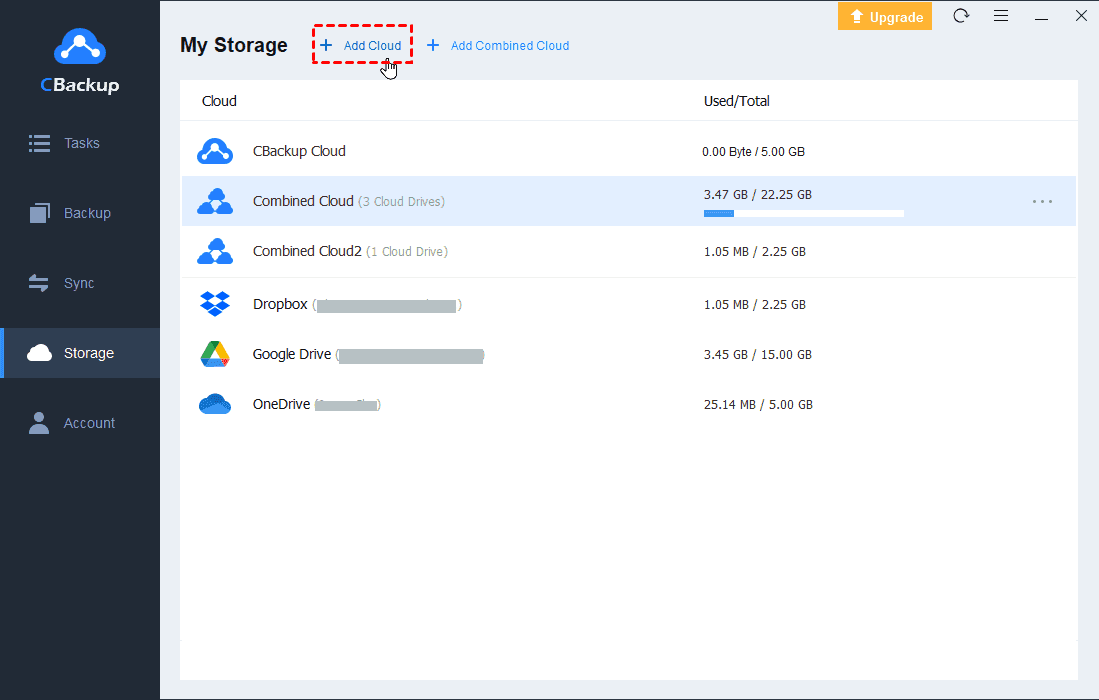
1. Add another cloud or another OneDrive account to CBackup by clicking Storage > Add Cloud and completing the authorization.
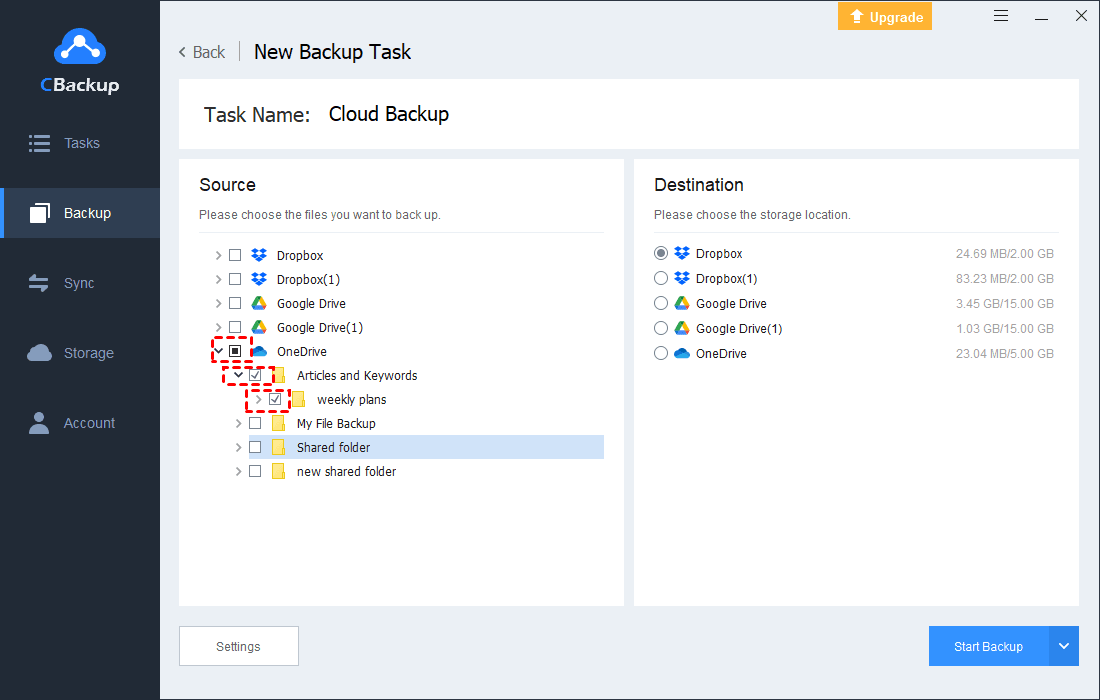
2. Pick the Backup Public Cloud to Public Cloud option when you create a new task.
3. Select OneDrive or certain OneDrive files, and choose the cloud where you want to save OneDrive data.
4. Hit Start Backup to transfer photos from OneDrive to Google Drive or Dropbox with hands down.
Written in the end
This page includes some quick fixes to the "Always keep on this device missing from OneDrive" problem. No matter which solution you take to solve the problem, please keep in mind that you can use CBackup as an alternative to OneDrive for free computer file backups and can help you to back up your OneDrive files effortlessly if needed.
Free Cloud Backup & Sync Service
Transfer files between cloud drives, combine cloud storage to gain free unlimited space
Secure & Free


