How to Automatically Save Screenshots to OneDrive with Ease
This page describes how to automatically save screenshots to OneDrive. And a tip to expand OneDrive space will be provided in this article. Please read on to learn more information.
Can I save screenshots to OneDrive?
Nowadays, capturing screenshots on Windows 10 PC or Mac is really simple as long as users click the mouse or press the Win + PrntScr key. Once done, the screen dims indicating the screenshot is captured and ready for your view in the User/Pictures/Screenshots folder.
However, saving too many screenshots on local storage will take up much space, so, many users want to save screenshots to cloud storage like OneDrive. And to save time and effort, users wonder how to automatically save screenshots in a folder to OneDrive.
Actually, saving screenshots to OneDrive is an easy job. Because OneDrive offers a setting that can force the captured screenshots to be auto-saved to a special folder in the user’s OneDrive profile, which is then synced to the Microsoft Cloud.
How do I automatically save Screenshots to OneDrive?
In the following contents, you will learn how to automatically save screenshots to OneDrive on Windows 10 PCs, and Mac with the useful feature that offered by OneDrive. The following steps are also applicable to save screenshots to OneDrive for business.
Part 1. Save screenshots to OneDrive on computer
Actually, OneDrive offers a feature that you can enable to save screenshots automatically. Then, as long as you perform a standard screen capture using the appropriate keyboard commands, screen captures will not only auto-save to the OneDrive. And a small notification will be displayed at the bottom right corner of your screen.
On Windows PC
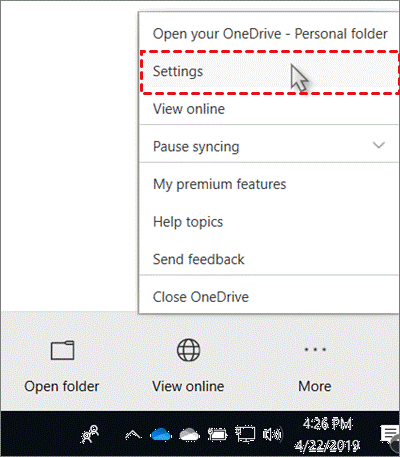
Step 1. Download OneDrive on your computer and install it first. If you have set up OneDrive app on your computer, select the white OneDrive cloud icon in the Windows taskbar notification area.
Step 2. Select OneDrive Help & Settings icon > Settings.
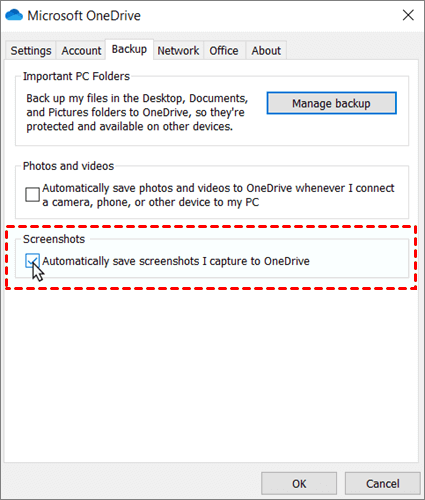
Step 3. On the Backup tab, check the Automatically save screenshots I capture to OneDrive box. Click OK to save the changes.
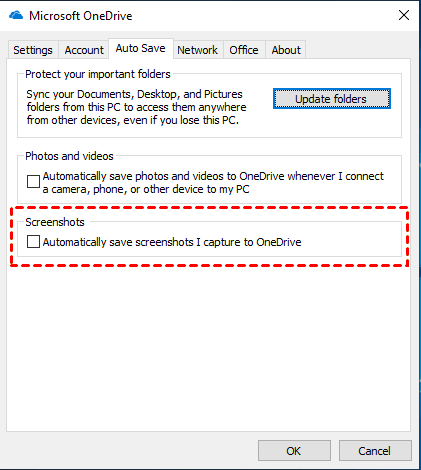
✎Note: If you are using OneDrive for business, you can find the Automatically save screenshots I capture to OneDrive setting under Auto Save tab.
◆Notifications:
☛Screenshots can't be more than 10 GB in size.
☛If you no longer want to automatically save screenshots to OneDrive, you can turn off this setting.
☛If you don't want to upload screenshots immediately after taking them, you can temporarily turn off your network connection before you take screenshots.
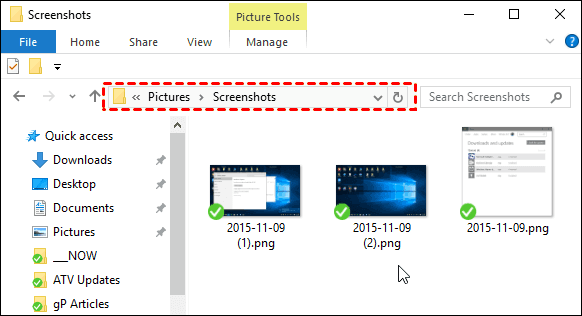
Generally, the screenshots you capture will be saved to the "OneDrive/Pictures/Screenshots" folder on your PC and automatically uploaded to your online storage. You can get to the folder in File Explorer by opening OneDrive in the left folder pane.
On Mac
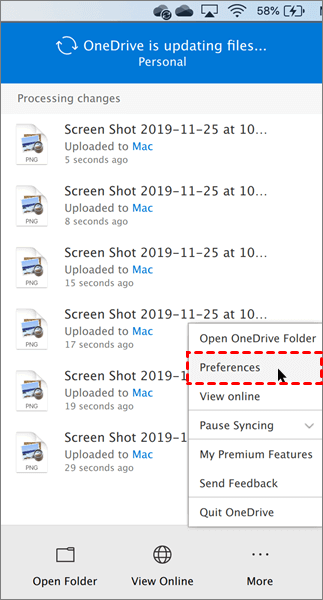
Step 1. Download OneDrive on your computer and install it first. If you have set up the OneDrive app on your computer. Click the OneDrive cloud icon up in your Menu bar.
Step 2. Select OneDrive More icon > Preferences.
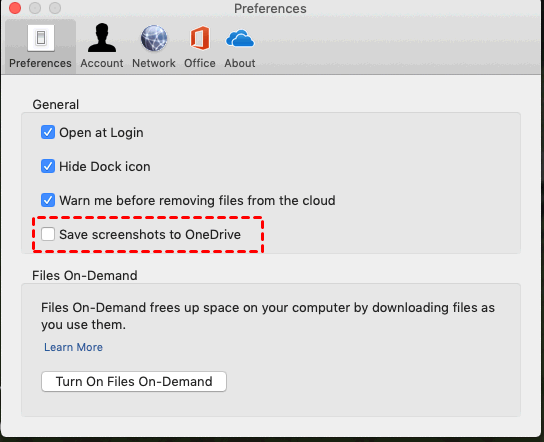
Step 3. On the Preferences tab, check the Save screenshots to OneDrive box.
Bonus tip: how to expand your OneDrive backup space
As we all know, OneDrive offers 5 GB of free storage space only. However, screenshots will take up much space after saving them to OneDrive. If you are using a OneDrive free account, your storage space will be consumed quickly. But don’t worry, there is a way to expand your OneDrive backup space without pay any fee.
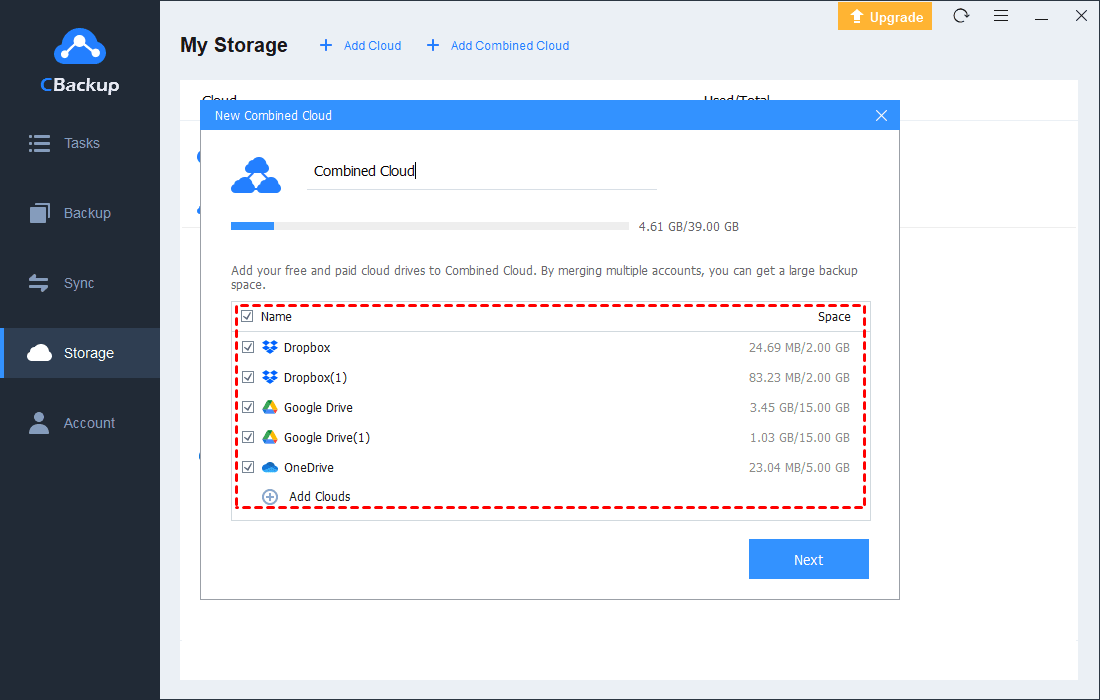
To expand your OneDrive backup space for free, you can take advantage of a third-party tool like CBackup. This is a cloud backup service that offers a free feature to help you combine the free storages space of multiple free OneDrive accounts into a huge, even unlimited backup space.
After combination, you can backup your local files including screenshots, videos, documents, and so on to this combined cloud with CBackup. And Google Drive, Dropbox are also supported by CBackup, you can merge Google Drive accounts, Dropbox accounts or merge different brands of cloud storage accounts into one according to your needs.
Step 1. Download CBackup and follow the wizard to finish the installation. It will be installed in a short time.
Step 2. Run CBackup, sign up for a CBackup account, and sign in.
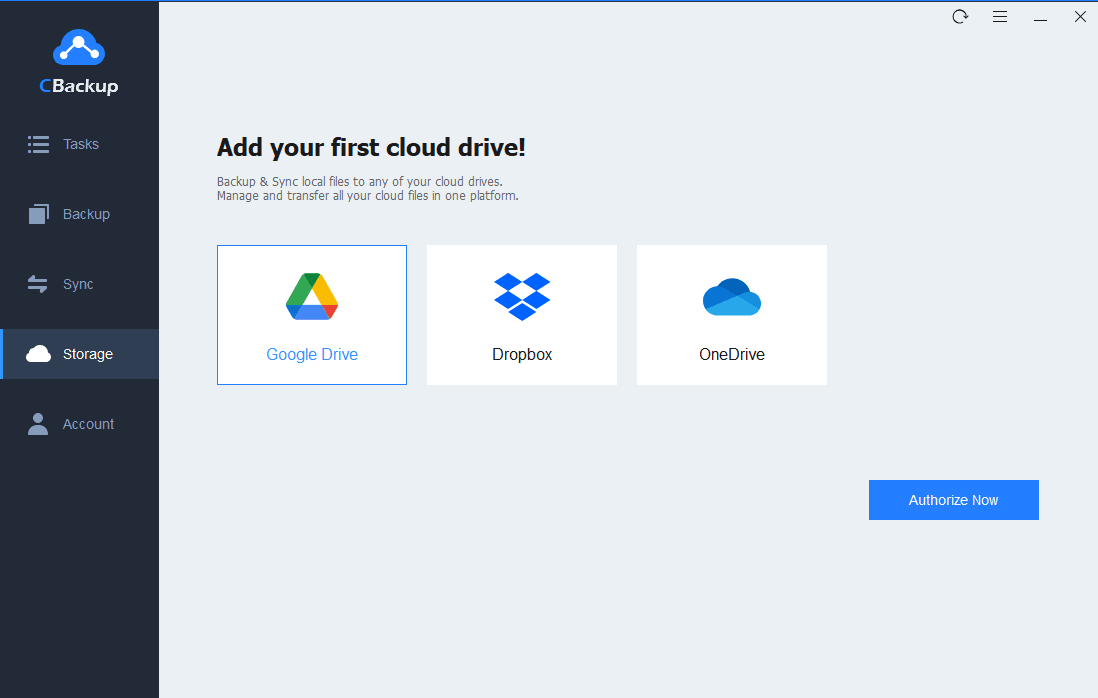
Step 3. Click Storage on the left side, then choose OneDrive and hit Authorize Now. Then follow the on-screen guide to allow CBackup to access your OneDrive files.
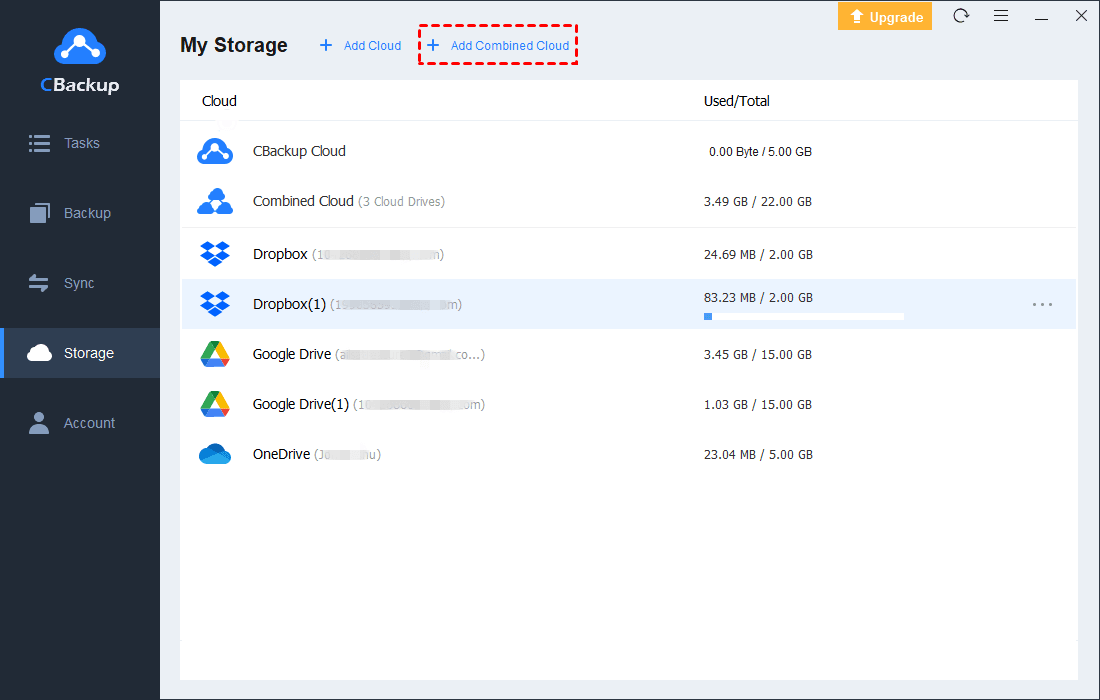
Step 4. After adding, all your OneDrive accounts are listed under Storage tab. Click the + Add Combined Cloud option.
Step 5. Tick the box next to the cloud storage account that you want to combine. After checking, click on Next > Combine. Then, you will have a Combined Cloud in your clouds list.
Now, you could save much more screenshots to the combined OneDrive cloud storage space with Backup PC to Combined Cloud feature under Backup tab.
Conclusion
That’s all about how to automatically save screenshots to OneDrive. In fact, with the special settings of OneDrive, it is very easy to automatically save screenshots on Windows 10 PCs or Mac for most users.
If you need huge backup space but don’t want to upgrade your OneDrive account, you can try to expand your OneDrive backup space with CBackup for free. And besides storage combination, CBackup also offers many useful services like PC cloud backup, cloud to cloud backup, and so on, you can try it for free at any time.
Free Cloud Backup & Sync Service
Transfer files between cloud drives, combine cloud storage to gain free unlimited space
Secure & Free


