How to Backup Files to External Hard Drive without Effort
This post will show you the step-by-step guideline to backup files to external hard drive. At the same time, it also introduces a better way to protect your files.
Why need to backup files to external hard drive?
To backup your files, there many kinds of methods, like NAS backup, online storage backup, external hard drive backup, etc. However, once your computer suffers some disaster or error, the files backed up on your computer will be at risk. So, backing up files to external hard drive becomes a safe option.
♦ Easy to carry. Today's external hard drives are easy to carry around. Users can take it with them anywhere, which means they can access their files from anywhere.
♦ Cost-effective. External hard drives are not very expensive while offering great backup capabilities. It's just that the storage space it offers is limited.
♦ Fast backups. Backing up files to an external hard drive does not require a stable network connection, so this method saves you backup time.
Thus, you can backup files to external hard drive for your data security. This post will introduce the best 3 ways to achieve it.
Best 3 ways to backup files to external hard drive
After knowing the advantages of external hard drive, you may want to know how to back up files to external hard drive. Don’t worry, please read on to learn more about these easy steps.
Way 1. Use File History
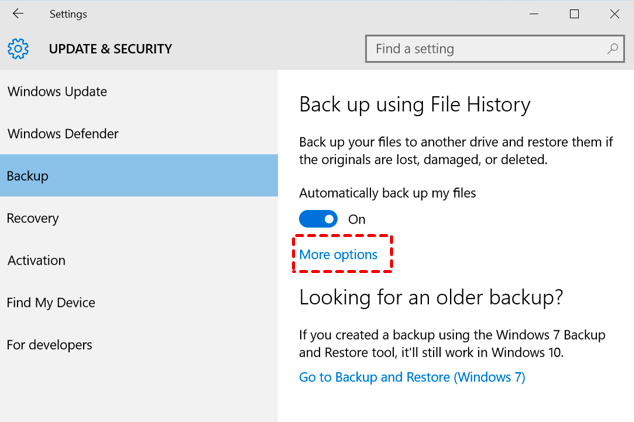
If you are using Windows operating system, File History, a built-in backup tool, can help you backup files to external hard drive on Windows 10/11/8/XP. Here are the simple steps:
1. First, connect your external hard drive to your computer.
2. Find File History on your computer and run it.
3. Select Add a drive to choose your external hard drive.
4. Go to the More options section to configure the backup settings. After that, click Back up now to begin your backup task.
Way 2. Use Backup and Restore
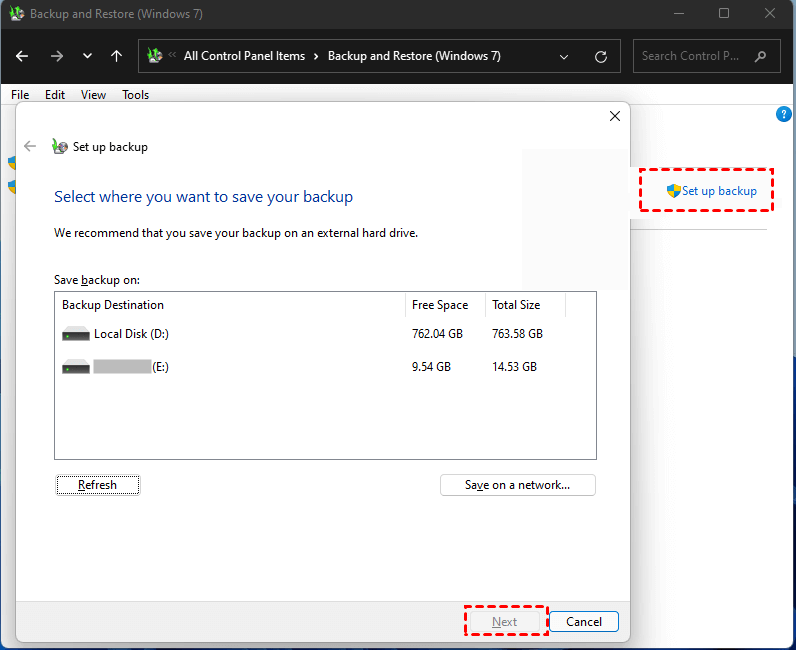
Backup and Restore has been a free built-in backup tool since Windows 7 appeared. So it can also help you backup files to external hard drive on Windows 11/10/8/7/XP. Let’s see the step-by-step guide to use it:
1. Connect your external hard drive to your PC.
2. Open the Backup and Restore, select the Set up backup option.
3. Choose the external hard drive, then select Next.
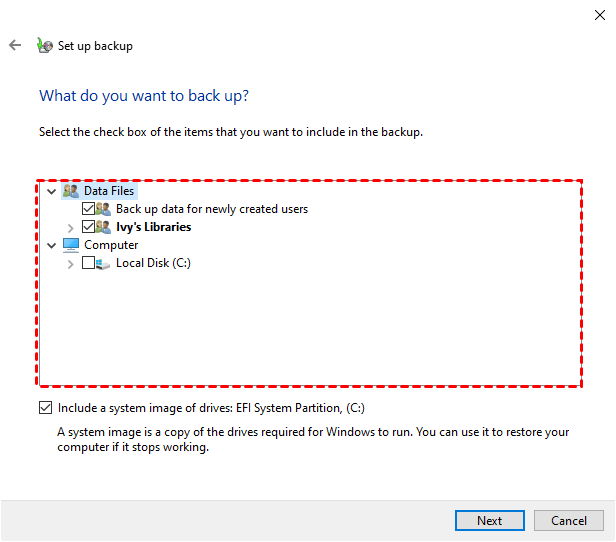
4. Check the Let me choose option, then click Next.
5. You can choose the files on your computer to backup, and click Next.
Way 3. Use free Windows backup software - AOMEI Backupper Standard
Here we also introduce the free Windows backup software - AOMEI Backuppepr Standard, to help you automatically backup files to external hard drive with its scheduled backup feature. If you want to have a try, just follow these steps:
1. Download the AOMEI Backuppepr Standard and launch it. Connect your external hard drive to your computer.
2. In the Backup tab, choose File Backup.
3. Next, click Add File or Add File to add your files or folders on PC.
4. Select the folder icon to choose the external hard drive as the backup destination.
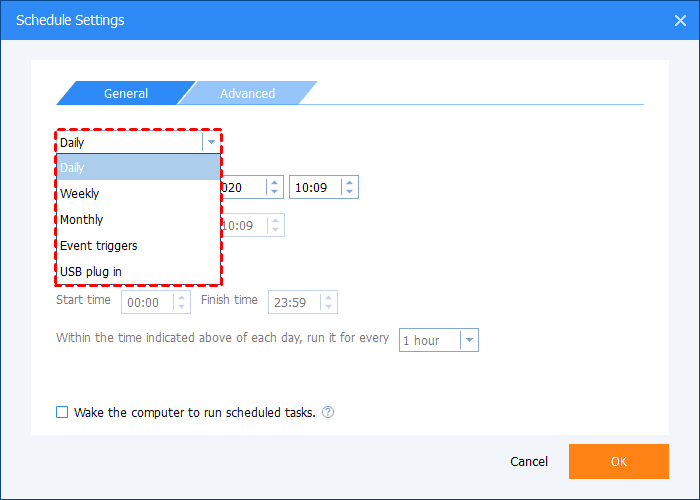
5. If you want it to back up your files automatically, you can click the Schedule icon to set up scheduled backup settings.
6. After the above, you can click Start Backup to backup files to external hard drive.
Better protection for files - backup files to cloud
Although there are many advantages of backing up files to an external hard drive, in this age of high information technology, users may need a more convenient way of backing up that performs better in terms of storage space. That's why we also introduce you unlimited cloud backup as a solution.
Here we provide the best cloud backup option - CBackup. CBackup has endless possibilities when it comes to storage space. Most cloud backup software will offer free storage space to users. But you always need more storage space, you can not only pay for a subscription plan but also use the combined cloud storage feature in CBackup to merge unlimited cloud drive accounts to gain more backup space for free. CBackup allows you to add most mainstream cloud drives to it, including Google Drive, OneDrive, Dropbox, etc.
What’s more, CBackup has a backup and restore function, so if your files are accidentally lost or attacked, you can use the feature to restore them quickly. And, if you back up your files to CBackup, you can access your files on any Windows device without carrying around an external hard drive with you.
Now, let’s see how to backup files to a cloud drive via CBackup for free:
1. Download and install the CBackup desktop app. Sign up for a new CBackup account, then launch the client and log into it.
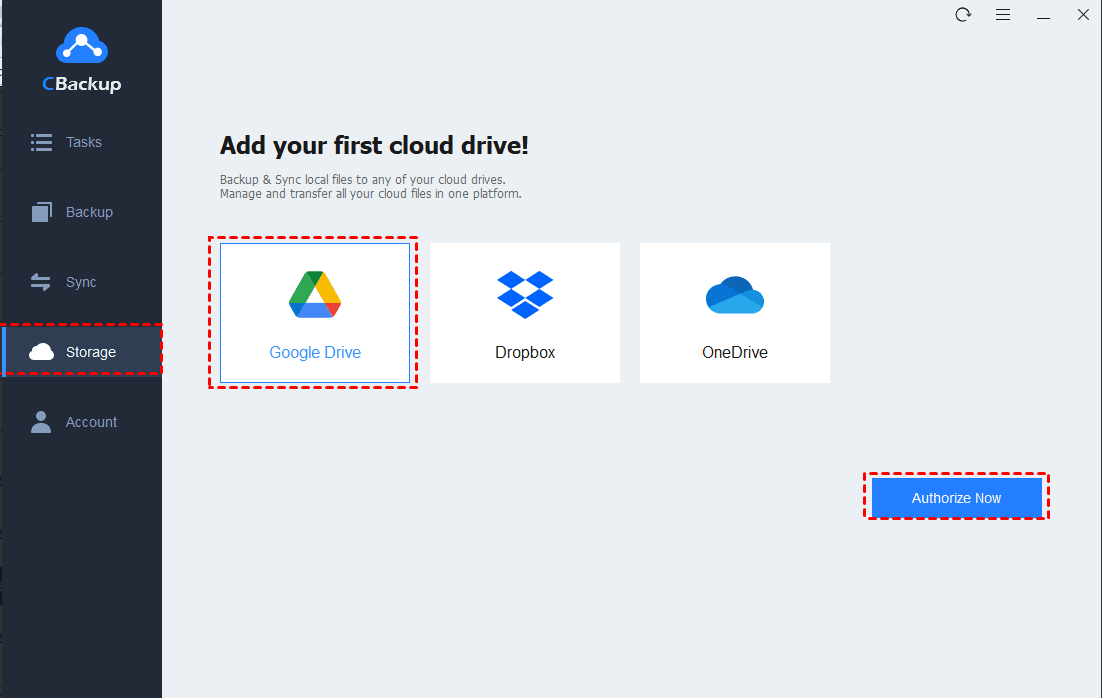
2. First, select the Storage tab. Here we take Google Drive as an example. Select Google Drive > Authorize Now, then please follow the instructions to grant CBackup access to your Google Drive.
3. Click on the Backup tab and click the Backup PC to Public Cloud button.
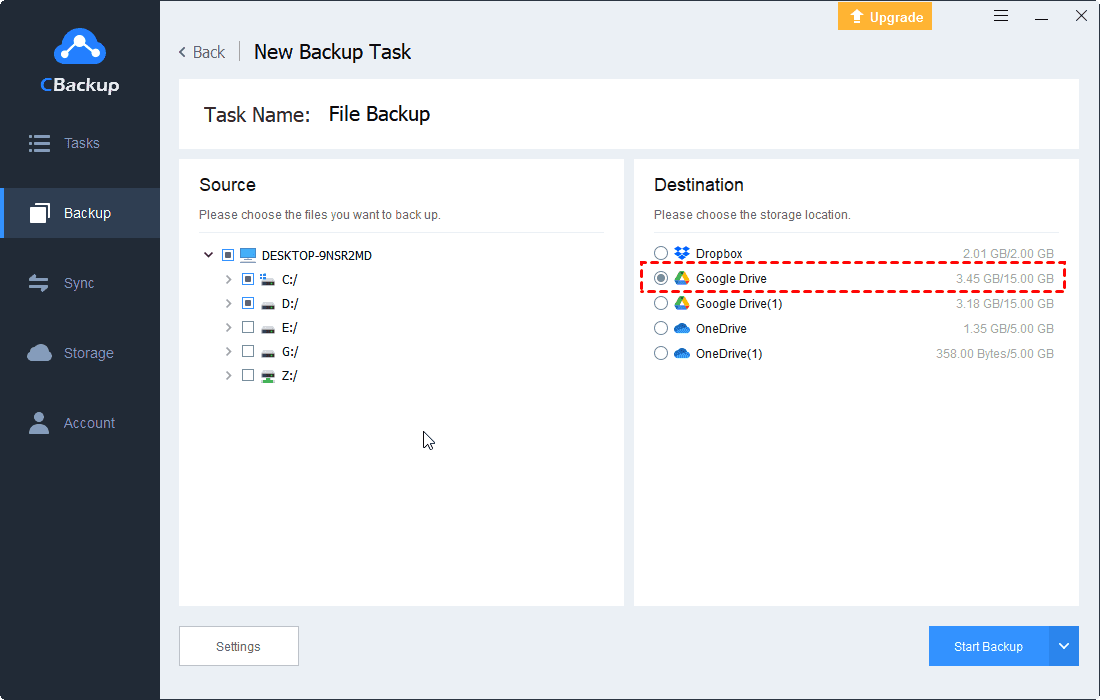
4. You can type in Task Name to name the backup task, add local files on your computer. Select the Google Drive account you added as the Destination.
5. Finally, click the Start Backup button to backup your files to the cloud.
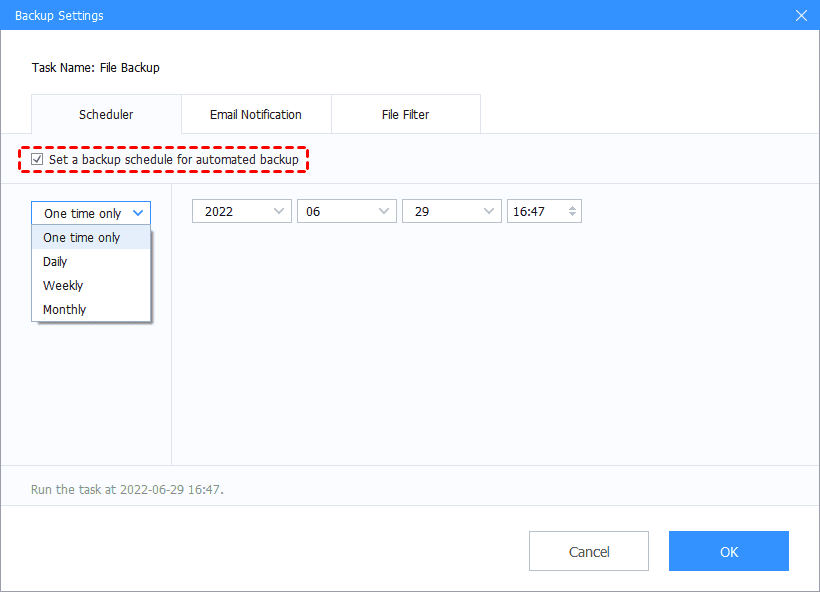
► Note: If you want to set up an auto backup task, you can go to the Backup Settings to set up Scheduler, which will help your backup tasks perform regularly and automatically, saving much time and effort for you.
Conclusion
After reading this article, we believe you have known how to backup files to external hard drive in different ways. And you could also consider backing up files to the cloud with the free cloud backup software - CBackup. With CBackup, you can use many great features like cloud to cloud backup, cloud to cloud sync, combined cloud storage, and so on.
Free Cloud Backup & Sync Service
Transfer files between cloud drives, combine cloud storage to gain free unlimited space
Secure & Free


