How to Backup Hyper-V Machines Easily | 4 Ways Included
This article concludes with 4 easy ways to backup Hyper-V machines. After looking through the introduction, you could pick the method that suits you best.
What are Hyper-V machines?
Microsoft Hyper-V is a local hypervisor that creates virtual machines on x86-64 systems running Windows. A server computer running Hyper-V can be configured to expose a single virtual machine to one or more networks. Starting with Windows 8, Hyper-V replaces Windows Virtual PC as the hardware virtualization component of the client version of Windows NT.
Hyper-V is designed to provide users with more cost-effective virtualized infrastructure software. Working with it can reduce costs, improve hardware utilization, optimize infrastructure and increase productivity. During the creation of a Microsoft Hyper-V virtual machine, the virtual hard disk space is very large, up to 2040 GB.
To protect your data on Hyper-V machines, backing up Hyper-V machines is the best option. If you have regular backups of it, then if your computer suffers an attack or natural disaster, your data loss will be less devastating and perhaps most of it can be recovered.
4 ways to backup Hyper-V machines
If you want to protect your data better, here are 4 easy methods of backing up Hyper-V machines.
Way 1. Backup Hyper-V machines with Windows Server Backup
To backup Hyper-V machines, you can use the built-in Windows Server Backup (WSB), which allows you to set up incremental backups in Windows Server system. If you want to use this solution, please follow these steps:
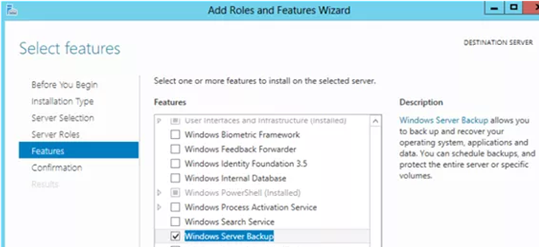
1. First, you need to install the WSB component. Please go to the Server Manager console, and run this command:
Install-WindowsFeature Windows-Server-Backup -IncludeManagementTools
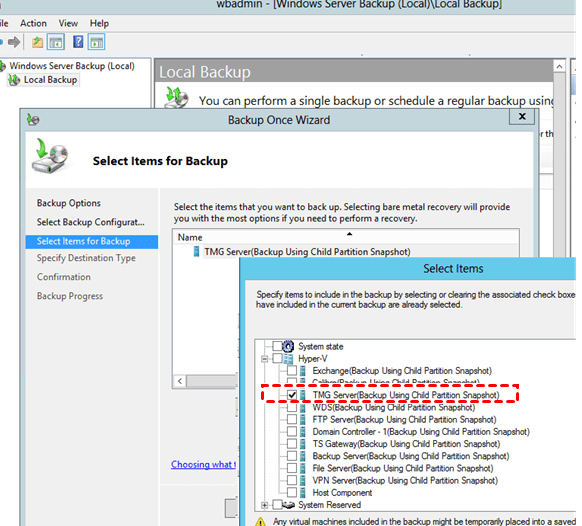
2. In the GUI console, start a simple wizard. Select Hyper-V machines that need to be backed up. And you can select the backup destination and schedule.
Way 2. Use Hyper-V Manager to export Hyper-V machines
According to the 3-2-1 backup strategy, you’d better store your data on 2 different devices. Thus, for backup purposes, exporting Hyper-V machines to local storage is also a method. You can use Hyper-V Manager to export Hyper-V machines easily. This method can be used in Windows Server 2008 R2 or Windows 7 and other later systems. Just follow the following steps:
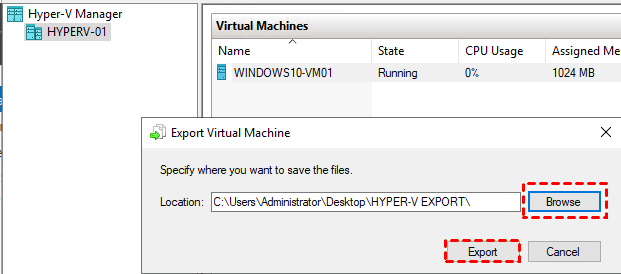
1. Go to the Hyper-V Manager, find your Hyper-V machines, and right-click on them to select Export.
2. In this window, tap Browse to choose the target location for Hyper-V machines.
⇒ Note: In the Status column, you can monitor the progress of the export operation.
3. After exporting, the target location will contain the virtual hard disks, Hyper-V Manager configuration files, and snapshots.
Way 3. Use PowerShell to export Hyper-V machines
You can also use PowerShell to export Hyper-V machines. It allows you to export Hyper-V machines in Windows Server 2012 or Windows 8 and other later systems.
1. Run the PowerShell as Administrator. And run the following cmdlet to export Hyper-V machines:
Export-VM -Name “VMNAME” -Path “LOCATION”
2. After finishing the export, you can see the correct files in the below window.
⇒ Note: If you want to export all your Hyper-V machines, use this cmdlet:
Get-VM | Export-VM -Path “LOCATION”
Way 4. Use free cloud backup software - CBackup
You should have heard of cloud storage, a popular backup solution that backs up files to the cloud, safe from the risk of natural disasters, physical failures. Thus, if you are looking for the best way to backup Hyper-V virtual machines, maybe you can consider using cloud backup.
For this, we will introduce a free cloud backup service for Windows - CBackup, which can help you backup and restore Hyper-V virtual machines easily. CBackup provides a great PC to cloud backup feature to back up computer files to cloud storage like Google Drive, Dropbox, OneDrive. Besides, CBackup also gives each account 5GB of free cloud storage, called CBackup Cloud, and you can back up files to it as well.
Let’s see how to use CBackup to backup Hyper-V machines easily:
1. Download and open CBackup on your Windows PC. Sign up for a CBackup account, then log in to the client.
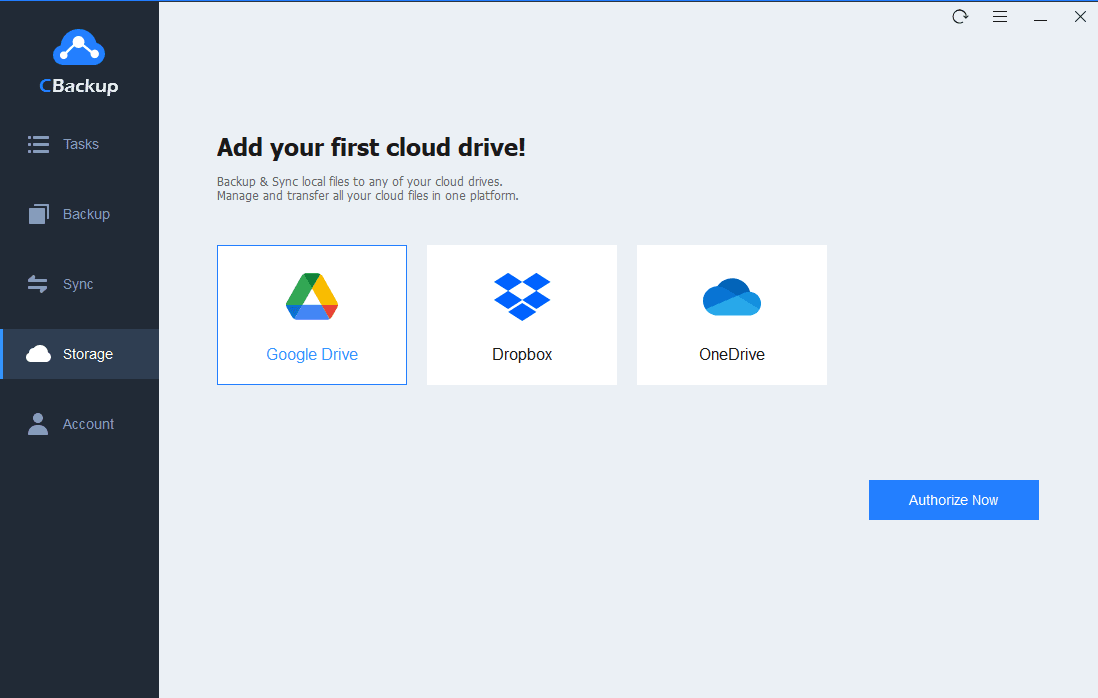
2. Select the Storage part. You can select a cloud drive to save your files in Hyper-V machines.
3. Click on the Backup tab > the Backup PC to Public Cloud button.
4. You can change the Task Name. Then, select files from your Hyper-V machines. Select the cloud drive account you just added. Then, click the Start Backup button to backup Hyper-V machines to any cloud storage directly.
Tip: Get more free backup space for Hyper-V machines
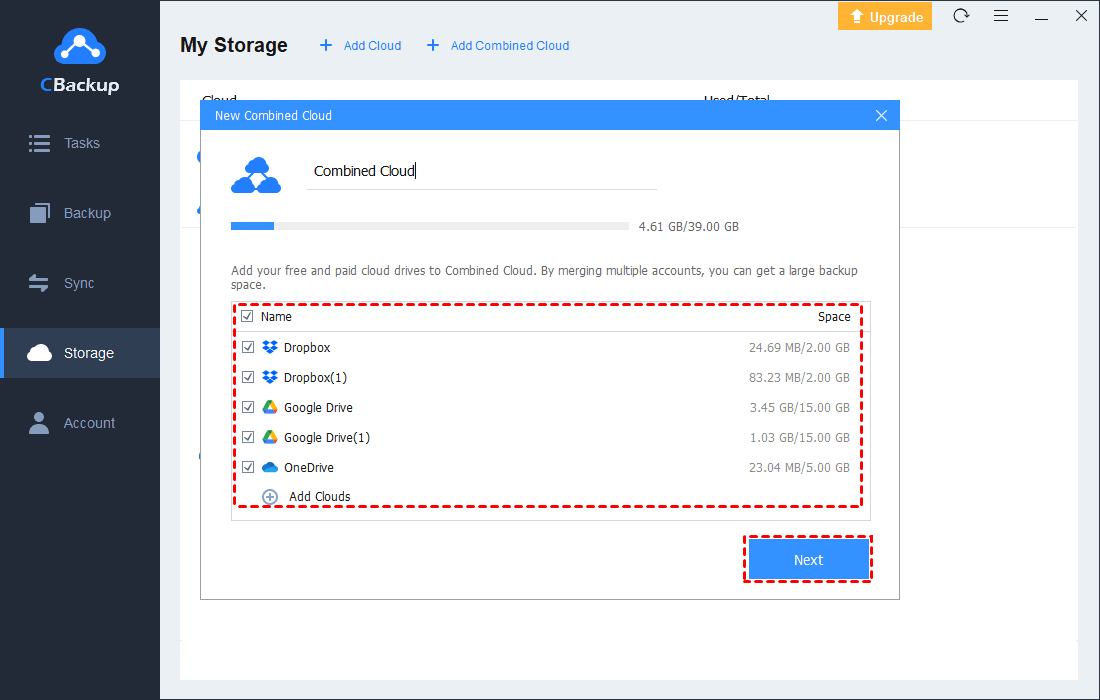
If you have lots of Hyper-V machines files that need to be backed up, you may need large backup space. But most cloud drives provide larger cloud storage with subscription plans. Wanna get more backup space for free? CBackup can meet your needs with its combined cloud storage feature.
In this way, you can merge multiple Google Drive accounts or other cloud drive accounts to enjoy all the free cloud storage in them. Here are detailed steps for it:
1. After adding your cloud drive accounts to CBackup, choose the Storage button, then you will see an + Add Combined Cloud in the menu, select it.
2. Check all the cloud storage accounts that you want to combine, then click Next > Combine.
3. Then, there will be a Combined Cloud in your clouds list. You can regard it as a backup destination for your Hyper-V machines.
Written in the end
That’s all about backup Hyper-V machines, we hope these methods can be helpful for you. If you want to protect your data better, maybe you can consider using cloud backup software like CBackup. It can expand your cloud storage for free as well. Why not have a try?
Free Cloud Backup & Sync Service
Transfer files between cloud drives, combine cloud storage to gain free unlimited space
Secure & Free


