Backup OST File in Manual/Auto Ways on Windows 10 (Free)
How to backup OST files in Outlook? Here in the article, you’ll be guided to backup Outlook OST files with both manual and auto methods for free on Windows 10.
Basic information about OST files
Are you confused by how to backup OST files in your Outlook? Numerous people tend to rely on office software for work today, like Microsoft Exchange, Office 365, etc., which generates OST files. In this post, you will get kinds of useful knowledge of OST file and efficient solutions to backup your OST.
1. What is an OST file?
An OST file (short for Offline Storage Table) is an offline folder located in Microsoft Outlook. And it is created when you log in to MS Outlook with your MS Exchange, Office 365, or IMAP accounts. OST offline folders enable users to work offline and the Exchange Server will help sync changes that you make automatically with internet connections.
2. How to find OST file location
Many users may be curious about how to open OST file in Outlook. Here, you can find OST file in Outlook by doing this: (It applies to MS Outlook 2013 and above versions)
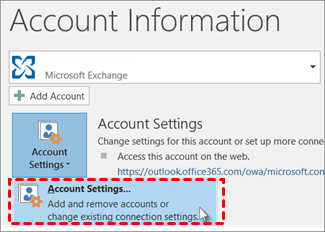
Step 1. Launch your MS Outlook and go to File > Info. Then click on Account Settings and select Account Settings again.
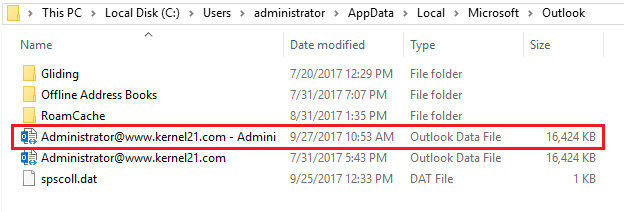
Step 2. Click on Data Files and choose the .OST file from the list. Then click the Open File Location… option. Then you can open the location where your OST file is stored.
3. Difference between OST file and PST file
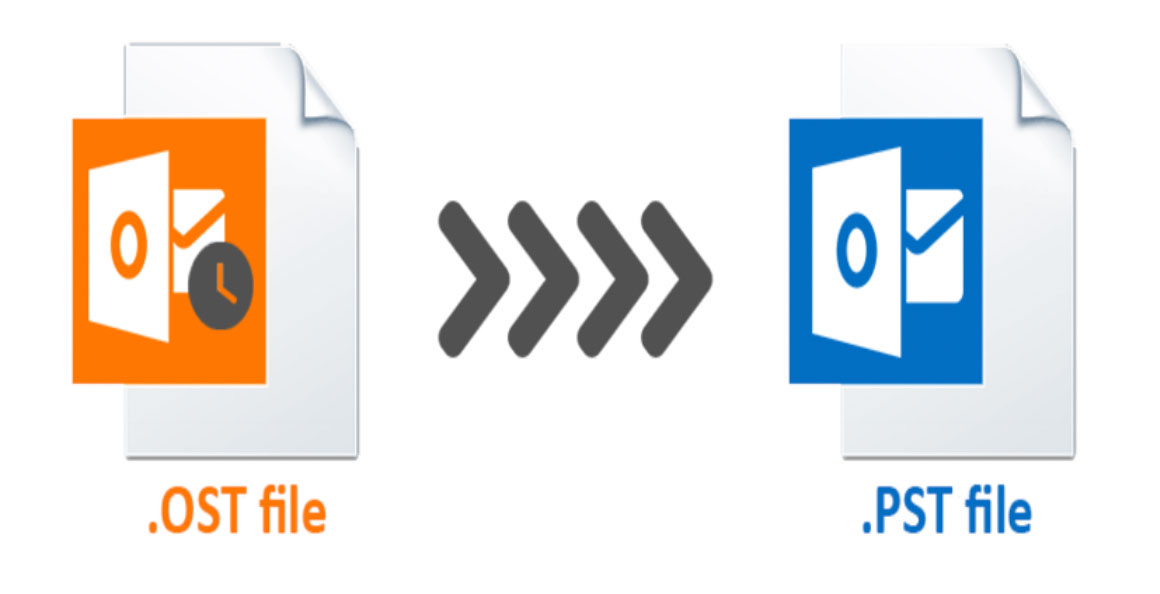
If you wanna backup Outlook OST file, you have to know the difference between OST file and PST file. PST, short for Personal Storage Table, is an exclusive file format created by Microsoft, and saves data in users’ local drive. With OST format, you can read, reply, compose and view the files offline, while PST files are only used for Outlook backup.
Do I need to backup Outlook OST file?
After knowing basic information about OST files, let’s continue our topic now. Do you need an Outlook backup for OST? Absolutely. Although the Exchange Server will sync OST, there are plenty of potential risks of OST files. Please read the following content.
☛Data security and accessibility:
Mistaken data deletion from the Exchange server would lead to data loss on the OST file and you’re unable to access it offline.
☛OST sync issues:
Configuring an Exchange account in Outlook normally requires complicated settings and authentications, so you may encounter unknown sync issues.
☛OST files corruption:
This may be caused by the abrupt shutdown, virus intrusions, malware, hardware issues, bad sectors, software disruptions, etc.
☛Unavailability of Exchange Server:
Your Exchange Server may be down, crashed, or under maintenance when you need OST files.
So it is necessary to make a backup for your OST files. How can you do? Never mind. Keep reading to find answers now.
3 basic manual methods for OST file backup
Here are 3 basic solutions to manually backup your OST file. Please check them one by one and choose the one you prefer.
Method 1. Drop from OST to PST
For this method, you have to create a new PST file in your Outlook. After the PST file is created correctly, the connection between Exchange Server and Outlook will be established, and you can easily drag and drop OST data to the new PST file created just now.
This method can be used for a small scale of file backup, but, it’s quite slow and complex for bulk data backup. Besides, it requires an Exchange Server connection.
Method 2. Outlook Import/Export
The second method to backup offline OST file is taking advantage of the Outlook Import/Export feature. Outlook Import/Export allows you to backup Exchange OST file to PST file format, which also requires a connection with Exchange Server and available OST file.
Here is how to do it.
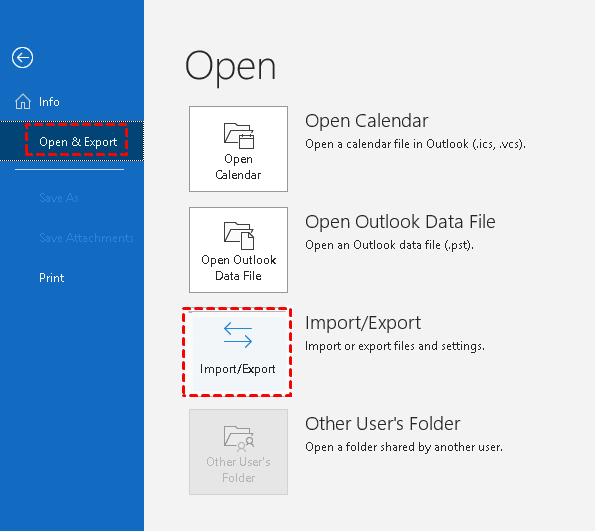
1. Launch your Microsoft Outlook application on PC and click on File > Open & Export > Import/Export.
✎Note: In Outlook 2007, just select File > Import and Export, and in Outlook 2010, go to click File > Open > Import.
2. In the opened Import and Export Wizard window, select Export to a file option and click Next.
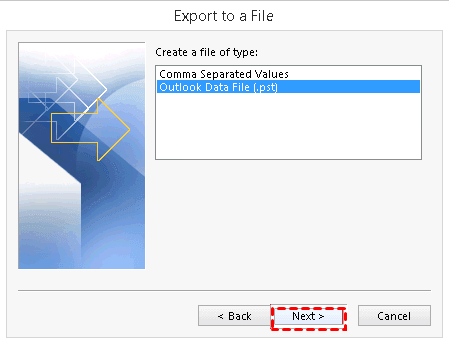
3. In the Export to a File window, select the Outlook Data File (.pst) option and click on Next.
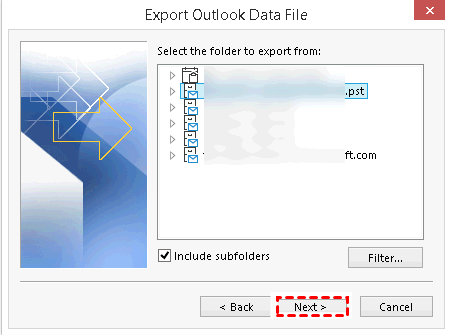
4. Next, in the Export Outlook Data File wizard, select the OST file root folder you need, check the Include subfolders box and click Next.
5. Click Browse to change the default saving location, select the option to manage duplicate items as you need, and then click on Finish. In this way, you can convert OST to PST.
Now, please wait for the export process to get completed.
Method 3. Archive OST
Another way for you is to archive OST in Outlook. Outlook offers its users to archive its files, including the OST files, to PST via the Archive feature using the Cleanup Tools. Let’s check out the archiving process with the steps below.
1. Likewise, open up your Outlook application. Go to the File menu and in the Info section, select Cleanup Tools > Archive from the drop-down menu.
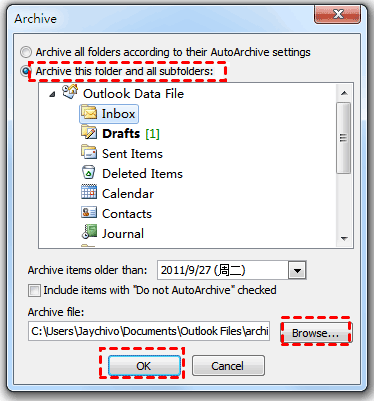
2. After that, tick the second option “Archive this folder and all subfolders”, and select the folder of the OST format. You can add date range if needed, and click the Browse option to find the saving path for the archived PST file. Click OK.
Once done, the OST file archiving process will start, and the file will be saved at the specified location as you set it.
Tools for Outlook automatic backup
If you think that it’s inconvenient to backup OST file in Outlook 365 in manual ways, there are some recommendations for third-party tools to make an auto-backup for Outlook, and you can backup PST Files or OST files.
✿Safe PST Backup: It can not only help you conduct PST and OST file backup, but also mail archiving, and data migration projects. What’s more, it supports an incremental automatic data backup in Outlook.
✿OutlookBackupAddin: It allows you to automatically backup your OST/PST files with multiple services. Apart from PST/OST file backup, this tool can configure the backup frequency and target directory.
All these tools can help you backup OST/PST files automatically. You can choose one to have a try if you like it.
Auto backup OST/PST file to the secure cloud on Windows 10
Actually, besides the methods mentioned above, you can also try professional cloud backup services to backup your OST file or any PC files on Windows 10, which not only satisfies your basic backup needs with ease, but also offers a much securer backup at higher speeds. Do you wanna have a try?
CBackup offers free services to make local-to-cloud backup easily with 10 GB of free CBackup Cloud storage. You can enjoy its wonderful software design to make a fast, simple and automatic PC file backup on Win 11/10/8.1/8/7/XP. Besides, you can also backup files to the public clouds, like Google Drive, Dropbox, OneDrive, etc.
Please follow the steps to export OST files to CBackup using CBackup.
Step 1. Download and install CBackup on your Windows 10, sign up for free and log in to it.
✿Optional: If you need to backup files to Public Cloud with CBackup, please click the Storage option, then select your cloud drive and hit Authorize Now. Then follow the instructions on the pop-up to connect CBackup with your other cloud drive account.
✎Note: CBackup offers high security for our online data with the OAuth authorization system, it will not save your login information, such as cloud account and password, so please feel relaxed to use it.
Step 2. To backup OST files in Office 365/Outlook, please click on the Backup tab and select the Backup PC to CBackup Cloud.
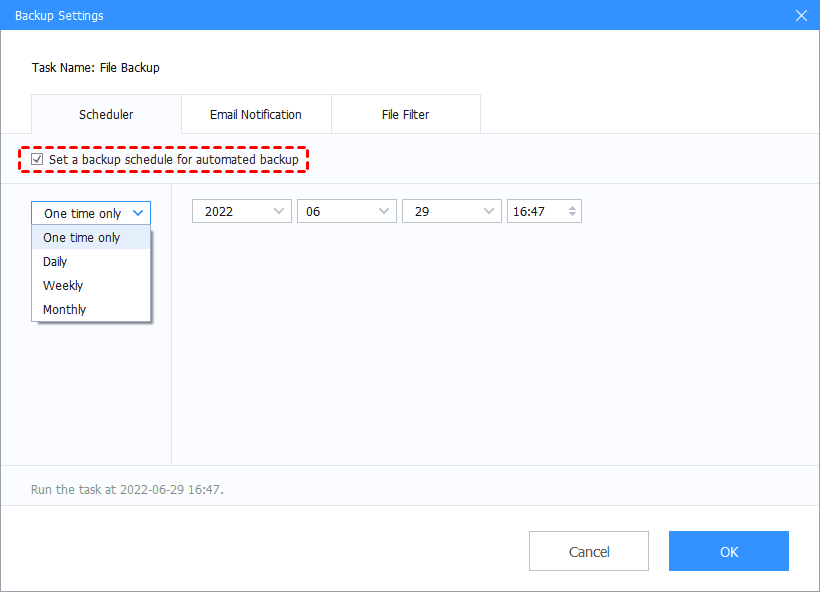
Step 3. Select the OST files and click on the Settings option to set a scheduled backup. Then, choose a mode according to your needs, such as One time only, Daily, Weekly, Monthly.
✎Note: If you have OneDrive accounts, you can make a file backup to OneDrive with CBackup, like backup Outlook emails to OneDrive, by selecting Backup > Backup PC to Public Cloud.
Step 4. Press the Start Backup button to backup OST files to CBackup Cloud easily.
✎Note: If CBackup Cloud storage is insufficient for you in the future, you can upgrade or use combined cloud service to get free unlimited cloud storage.
Restore OST file from backup
What if you wanna restore OST files after you made a backup with CBackup? Very simple. To restore your OST file from backup, you can do as follows:
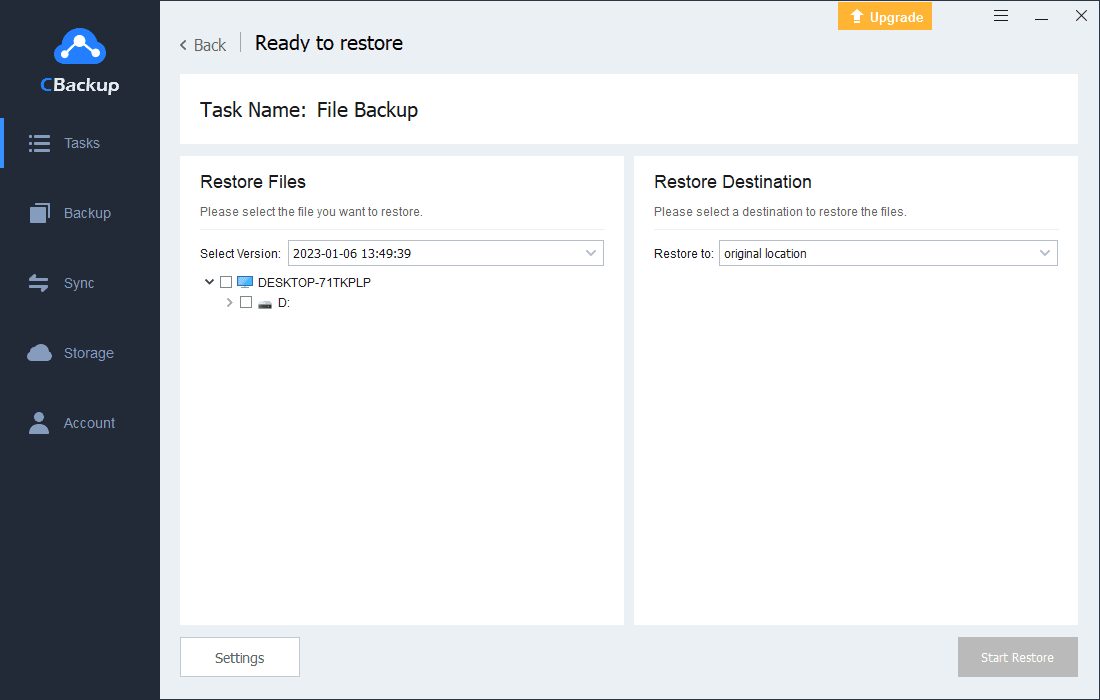
Step 1. Launch your CBackup at first, and find the backup task you need to recover, and then click the three-dot tab of the task line, and select the Restore option.
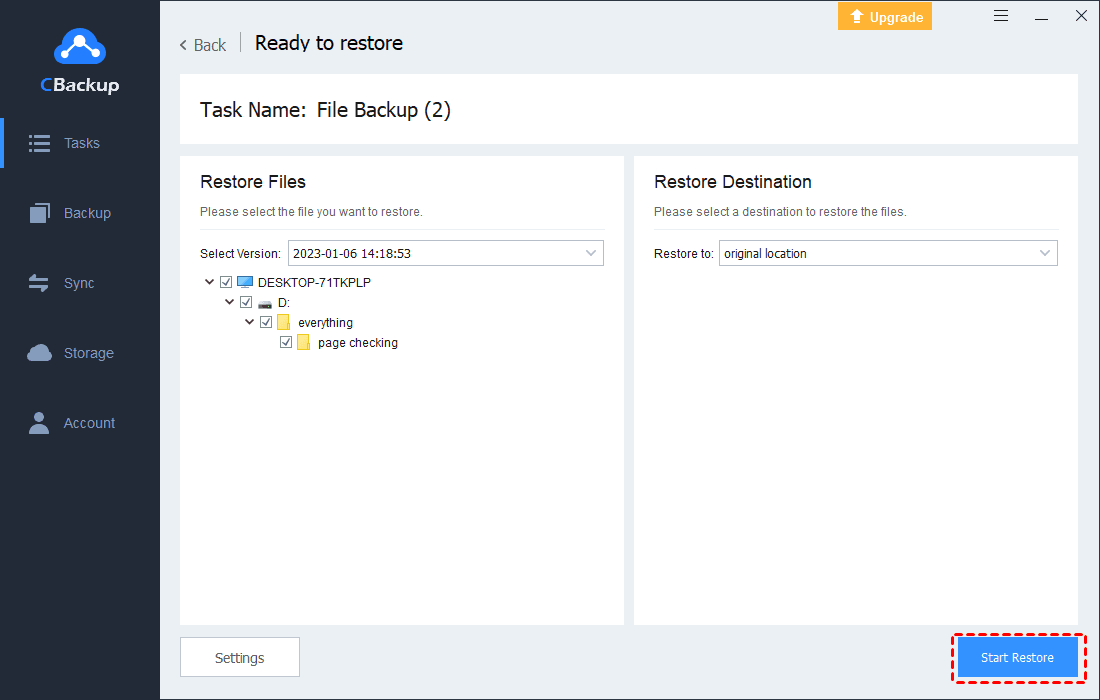
Step 2. Then, click on Select Version on the left to choose the backup version you want to restore, and tick the files you need to restore.
Step 3. Click the box behind Restore to, and select original location or other location on the right to save the restored files, and hit Start Restore to get your OST files restored with ease.
Wrapping things up
Although it challenges to backup OST file for you, you can always refer to these various ways mentioned in the article, including 3 basic manual methods, 2 third-party tools for Outlook backup and the best backup service for PC file backup on Windows 10. All these solutions will be helpful for you.
Free Cloud Backup & Sync Service
Transfer files between cloud drives, combine cloud storage to gain free unlimited space
Secure & Free


