Quickly Change Google Drive Folder Location in 2 Ways
This post will give you 2 solutions to change Google Drive folder location. In addition, an easy way to upload files to Google Drive folder is also introduced.
How do I change Google Drive from C to D Drive?
My C drive is low on memory and I would like to move my Google drive to my D drive to free up space. How do I do this and ensure Google photos keeps syncing and updating to the new location from all my devices?
Once you set up the Google Drive desktop uploader, there will be a Google Drive folder on your computer. But like the situation in the user case, you may want to move Google Drive folder from C drive to D drive to free up C drive space. Or, you want to choose another location for your Google Drive folder and need to change Google Drive folder location now. For this, you can choose an effective method in the following part.
How to change Google Drive folder location in 2 ways
To change Google Drive location, there are 2 different ways that you can try in the Drive for Desktop client. Here are the detailed introduction and steps of the 2 methods.
Way 1. Change Google Drive folder location in Settings
Generally, you can change folder location Google Drive Settings. If you have the Drive for Desktop on your computer, please try this method as follows:
1. Run Drive for Desktop and click on its icon in taskbar. Click on the gear icon > the Preferences option on the pop-up menu.
2. Then you can see the present Google Drive folder under the Local cached files directory tab. Just click on the Change option next to it.
3. In the pop-up window, choose the new location you want to save the Google Drive folder.
4. After changing, there will be a window asking you to restart the Google Drive client. Please press Restart now.
5. After the Google Drive desktop change folder location process is finished, you will receive the message saying “Local cached files directory changed”.
Way 2. Change Google Drive folder location when switching sync option
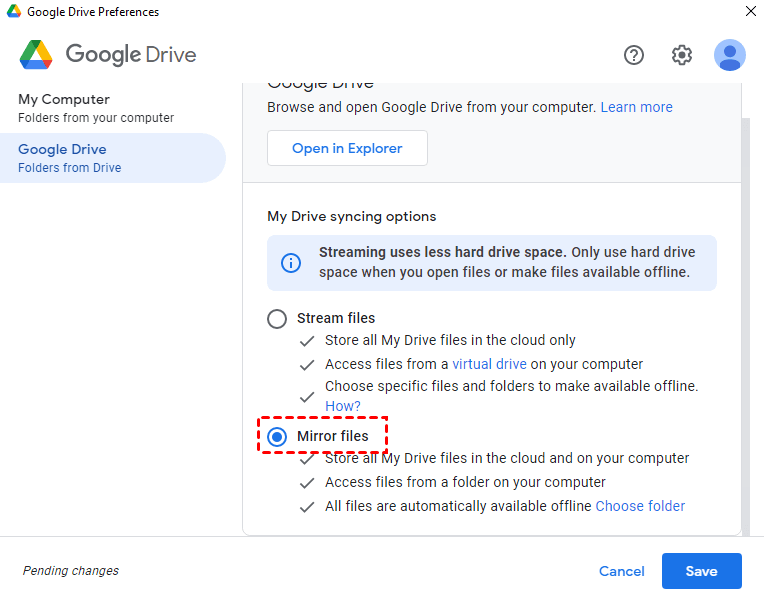
There are two syncing options in the Google Drive client: Stream files and Mirror files. You can learn some differences between them:
- If you choose to use Mirror files, the local folder will be synced between your computer and the cloud. All the mirror files can be accessed in the local folder.
- If you use Stream files for your data, they will not take up your hard drive space. But you need to make files available offline if you want to access them without a network connection.
When you switch from Stream files to Mirror files you can change Google Drive folder location. Please refer to the easy tutorial:
1. In Google Drive, choose Google Drive on the left panel. Click on the Mirror files option on this page.
2. Next, you will see the pop-up window to let you confirm the My Drive folder location. It will tell you the default location of My Drive folder. And you can click on Change folder location to select a new location for it.
Tip: Save local disk space and perform Google Drive sync
To save local disk space, it is advisable for you to uninstall Drive for Desktop and turn to use an easy cloud service named CBackup to upload files to any of them directly. After that, you can delete local files to free up disk space.
CBackup is a professional cloud service that provides comprehensive backup and sync features. Thus, you can upload any type of data to Google Drive like upload documents, videos, programs, or upload photos to Google Drive, etc. You will not meet any Google Drive errors with CBackup.
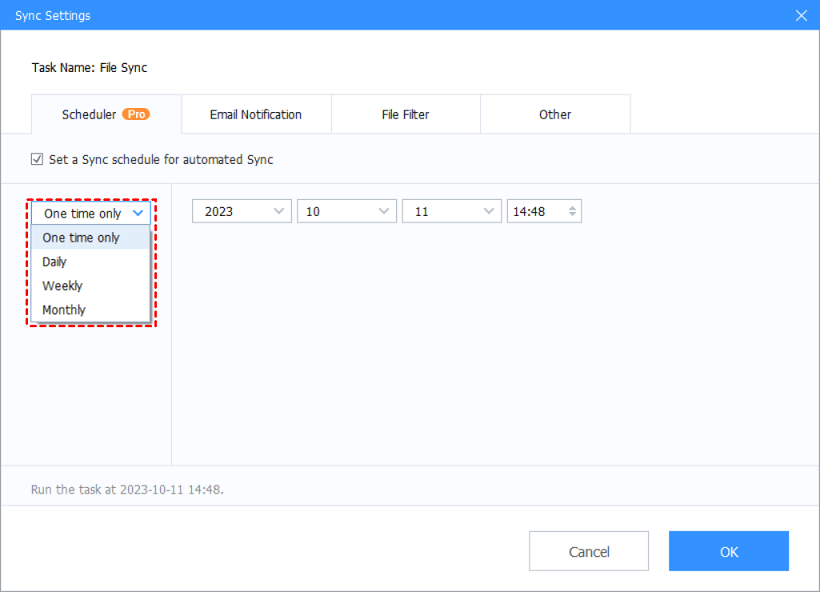
What’s more, you can create Google Drive schedule upload by using the Scheduler feature in CBackup to set up auto sync daily, weekly, or monthly.
Let’s see how to upload files to any Google Drive folder via CBackup. You can get the CBackup client for free first.
1. Sign up for an account and open it to log into your account.
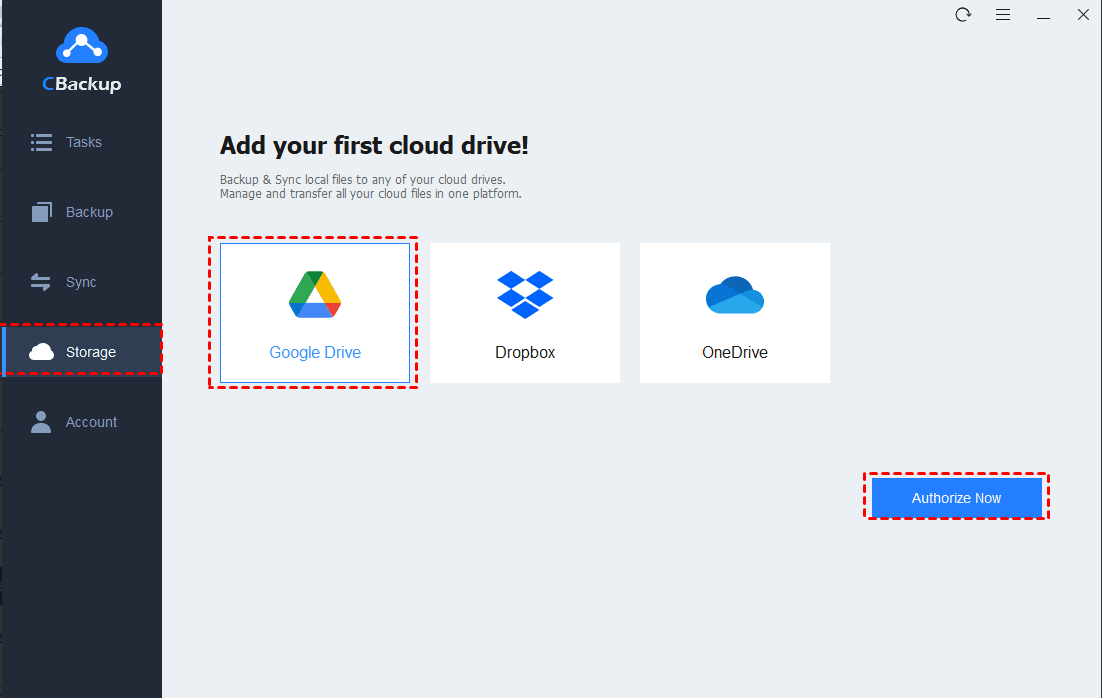
2. Go to choose the Storage tab on the left panel. Then click on Google Drive > Authorize Now in turn. Please give CBackup authorization to access your Google Drive account by following the easy instructions.
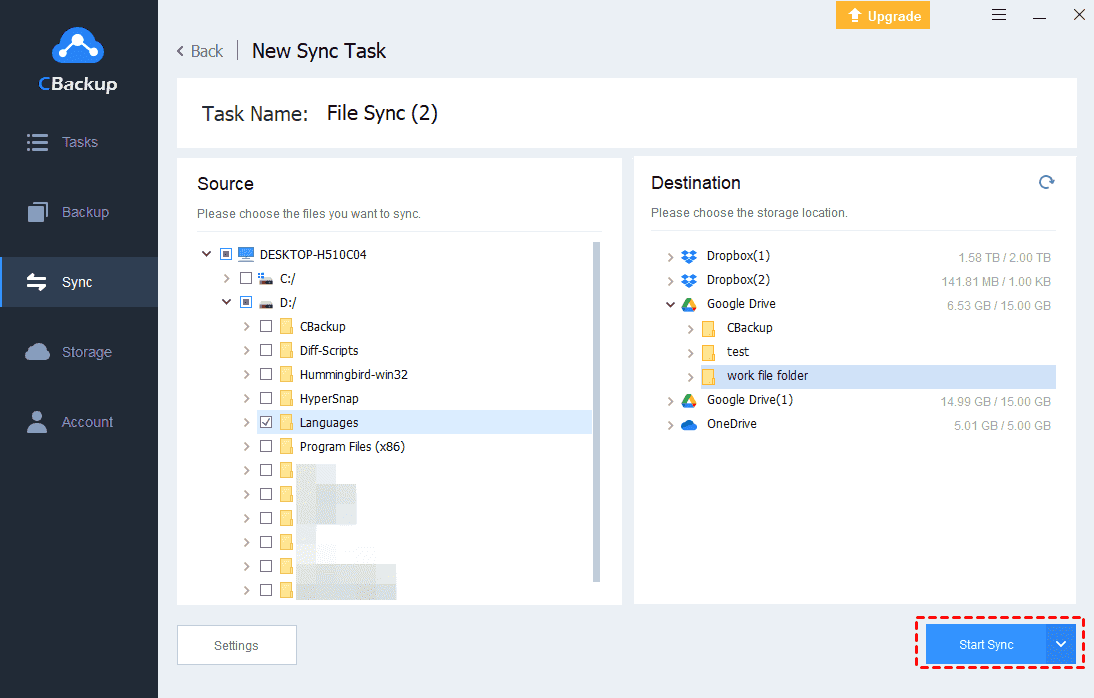
3. Click the Sync tab to go to the Create Sync Task page, and select Sync PC to Public Cloud.
4. Choose files from your computer as the sync source. Then choose any Google Drive folder as the sync destination. Finally, press the Start Sync button to upload your files to the Google Drive folder directly.
As an outstanding cloud service, CBackup offers many other good features for free. You can use them if you need them.
- Combine cloud storage: If you need more cloud storage for your files, CBackup allows you to increase Google Drive storage by merging multiple Google Drive accounts for free.
- Cloud to cloud backup/sync: In this way, you can backup or move files between any two cloud drive accounts on one interface.
- Backup PC to public cloud: CBackup allows you to backup files to Google Drive, Dropbox, OneDrive, etc.
Get more Google Drive storage for free
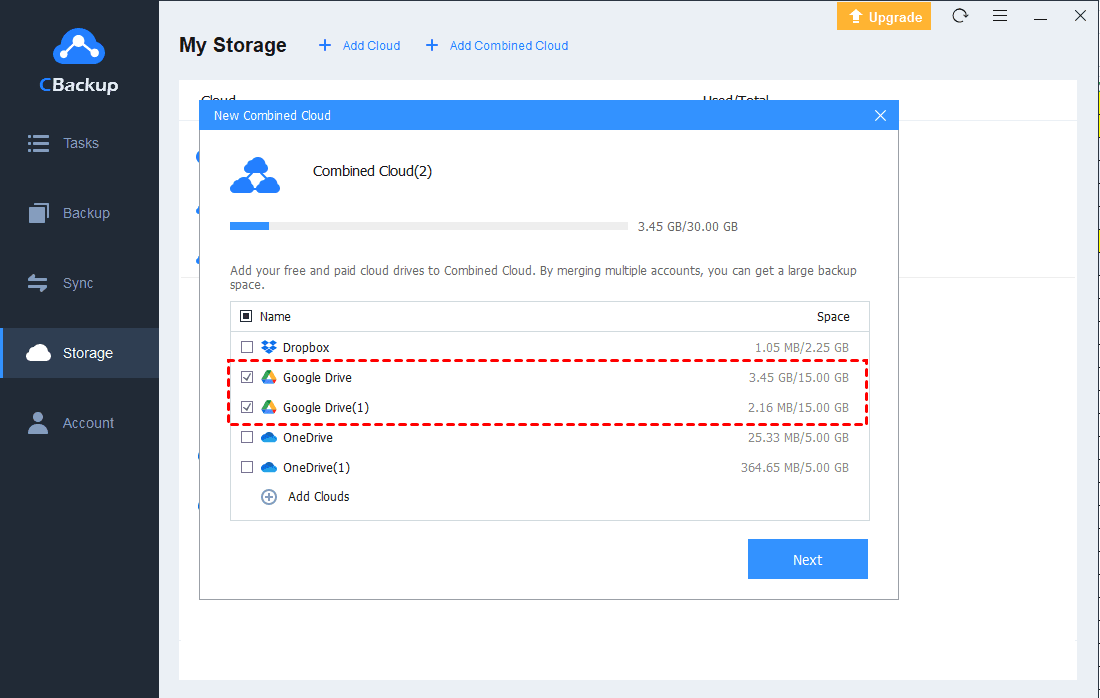
If you find that your Google Drive storage is not enough for more data, maybe you can consider using the combine cloud storage feature in CBackup. It will expand your Google Drive cloud storage by merging as many Google Drive accounts as you have together. Let’s see how to do it:
1. Likewise, add all your Google Drive accounts to CBackup.
2. Click on Storage > + Add Combined Cloud.
2. Choose the Google Drive accounts that you want to merge into a combined cloud. Then click on Next. The order of your Google Drive accounts is decided by yourself, then click on Combine.
After the above, you will have a combined cloud in the cloud list. When you create backup tasks, you can choose Backup PC to Combined Cloud to enjoy unlimited cloud storage for free.
To sum up
That’s all about how to change Google Drive folder location. We have prepared 2 effective ways for you. In addition, there are some useful tips for you to upload files to any Google Drive folder, or get more Google Drive cloud storage for free.
Free Cloud Backup & Sync Service
Transfer files between cloud drives, combine cloud storage to gain free unlimited space
Secure & Free


