Dropbox Save Hard Drive Space with Ease in 3 Ways
In this article, you will learn how to make Dropbox save hard drive space in 3 ways. Please keep reading to learn more details.
Dropbox files take up hard drive space
“My laptop always shows that Dropbox files are taking up space on my hard drive. I am sure they are syncing in the cloud, and I want to let Dropbox save hard drive space instead of taking up too much space. How to save space on hard drive with Dropbox? Thank you.”
Why does Dropbox take up so much space on my hard drive?
Dropbox is a practical cloud storage service that allows users to save files online and sync them to the device. When you use Dropbox to back up and access files, these files stored in the cloud will be synced with all devices connected to your Dropbox account.
Files in the Dropbox folder are available locally, which means it will take up space on the hard drive. If you have a shared folder, it may unknowingly have taken up too much space on your computer. Some problems such as Dropbox not syncing across devices can occur when there is not enough space available on the calculator's hard drive.
So how to let Dropbox save hard drive space automatically? Dropbox provides two functions, Dropbox Smart Sync and Selective Sync, both of which can save a certain amount of hard drive space. In the following content, learn about the specific steps of Dropbox saving hard drive space.
How to save space on hard drive with Dropbox?
How to save space with Dropbox? If you want to save hard drive space automatically in Dropbox, you can set the files you are not currently using to be online only through Smart Sync or you can use Dropbox Selective Sync to sync only the files you need to save computer storage space. The following are the specific steps of the three methods:
Way 1. Use Dropbox Selective Sync
By default, Dropbox will sync all content from the account to the device. Enable Selective Sync to specify specific folders that need to be synced. Unnecessary folders will not continue to occupy hard drive space.
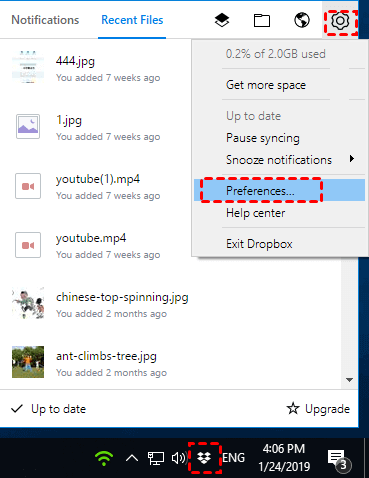
Step 1. Click the Dropbox icon in the desktop task tray. If there is no icon, please go to download Dropbox and log in to your account.
Step 2. Click the gear (Settings) icon in the upper right corner of the pop-up window, and then click Preferences.
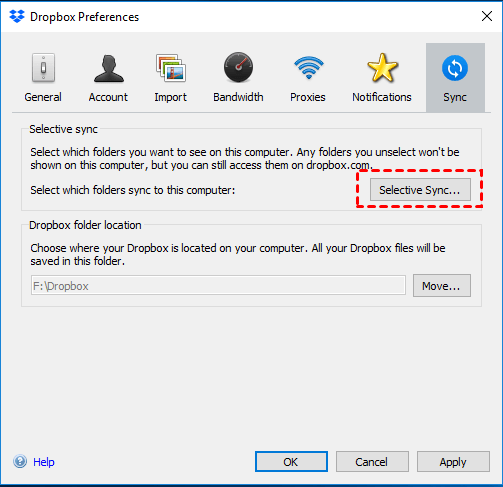
Step 3. Click Selective Sync under the Sync tab, and click OK to continue. (On Windows 10)
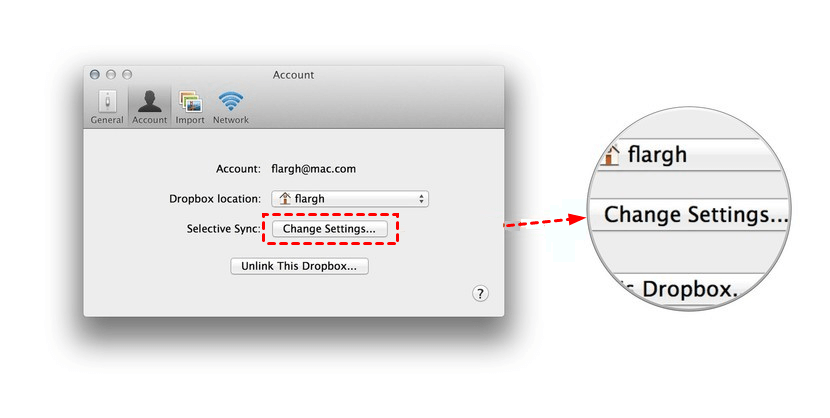
If you are using a Mac, find the Selective Sync option under the Account tab and click Change Settings.
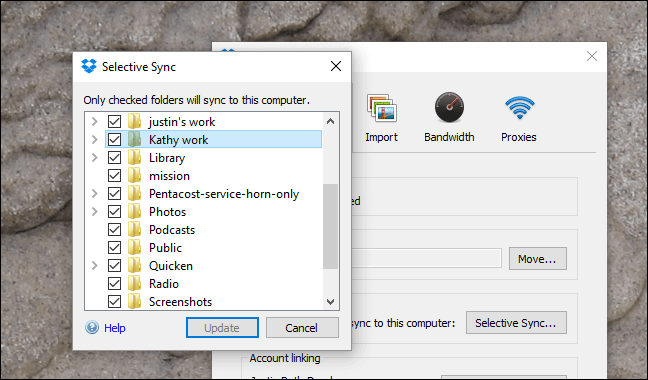
Step 4. Then select only the folders that need to be synced to the computer in the list, and click Update to confirm.
✎Note: If you use Dropbox on multiple devices, you need to set up Selective Sync on each PC.
Way 2. Use Dropbox Smart Sync
With Dropbox Smart Sync, you can set the file to be online only, which means you can browse to all the content in your account on your PC. Only when the file is opened by you will it be automatically downloaded and synced, which only takes up very little disk space.
Smart Sync is only available for Plus, Family, Professional customers, and business plan team members. If you are, you can save space by following the steps below with Dropbox.
Step 1. If you have downloaded Dropbox to your computer, make sure to log in to the correct account.
Step 2. Open File Explorer (on Windows) or Finder (on Mac) and open the Dropbox folder.
Step 3. Find the folders that need to be online only, right-click them, hover your mouse over Smart Sync and click Online Only.
Way 3. Delete files from your hard drive
In addition to the above two methods of saving hard drive space automatically with Dropbox, you can also go to the Dropbox folder and partition disk to delete unnecessary files to save computer space.
Sync folders to larger Dropbox space to free up space
The free space that Dropbox provides for each account is very limited, only 2GB. Syncing files between different devices will not only take up local space, but Dropbox's storage will also be quickly exhausted. If you don't want to upgrade your Dropbox account, you can try a free tool to merge Dropbox accounts to get more backup space.
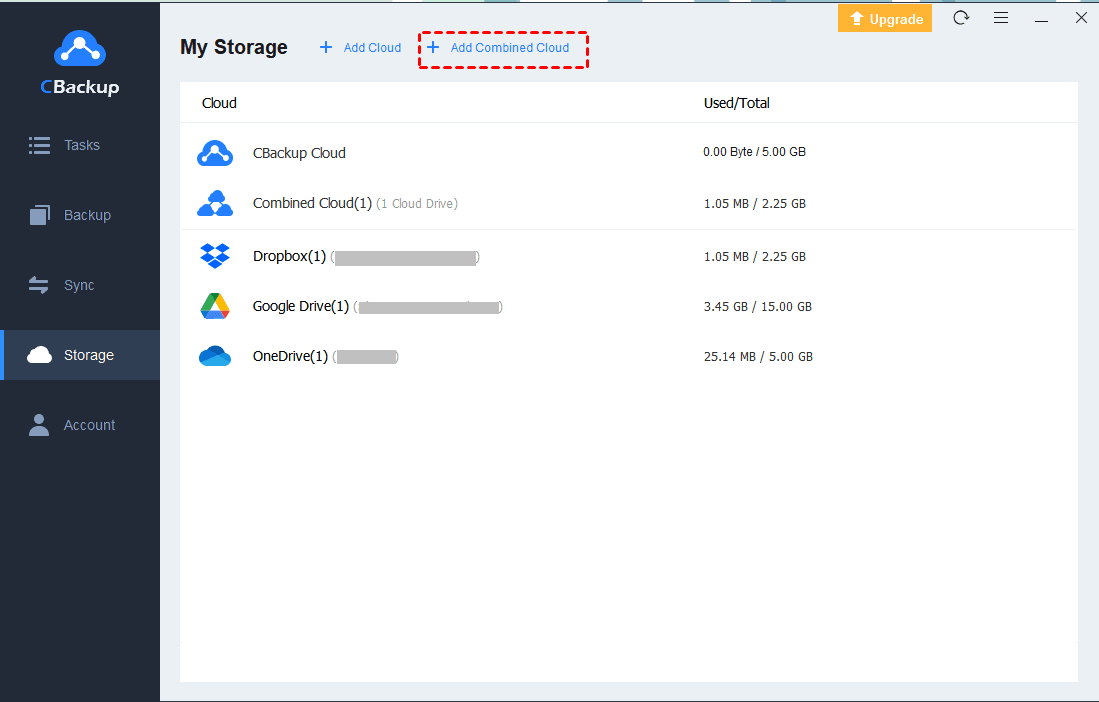
You can rely on cloud backup services like CBackup, which can help you add multiple cloud drive accounts on one platform, including Dropbox, Google Drive, OneDrive, etc., and combine all drive cloud storage into one large backup space, you can make full use of all your free cloud storage.
Besides, CBackup also provides a huge backup storage of CBackup Cloud space for free, allowing users to sync and back up more files to the cloud to free up local storage. Let's see how to use CBackup to expand more available space:
Step 1. Create a CBackup account for free and login to the platform.
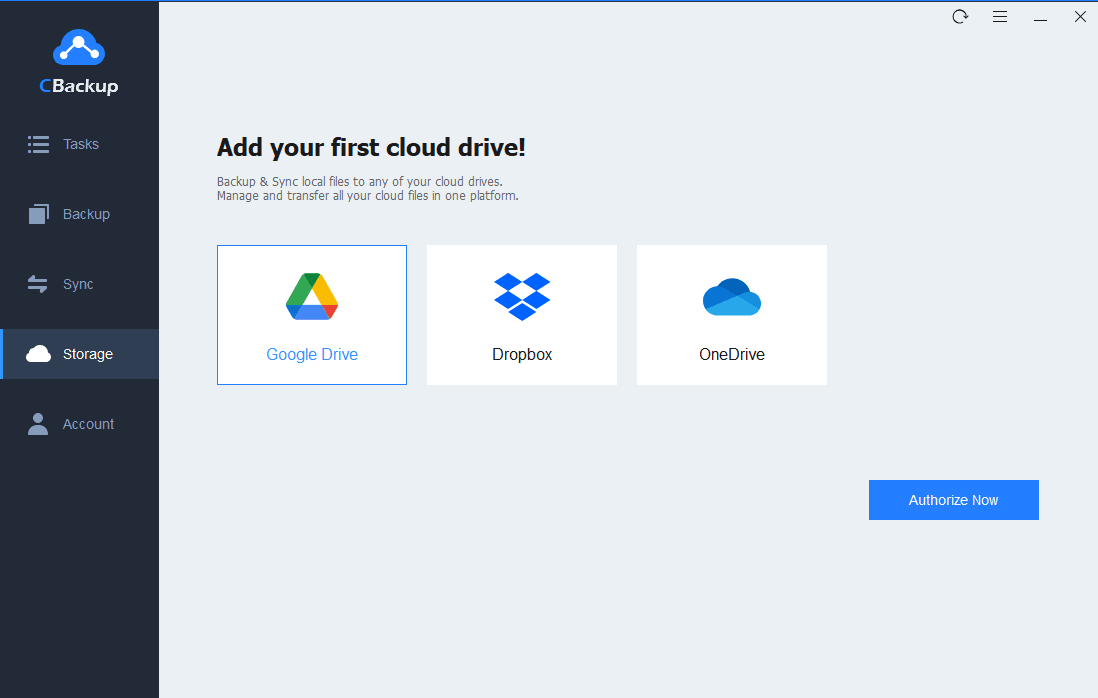
Step 2. Click the Storage tab, select Dropbox and hit Authorize Now. Then allow CBackup to access your Dropbox account.
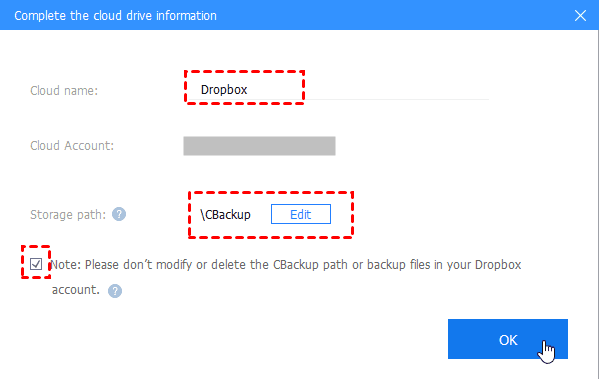
Step 3. Edit the Cloud Name and Storage Path, and tick the Note option, and press OK.
✎Note: Repeat Step 2-3 to add all your cloud drive accounts, even different accounts under the same service, and combine all the free space into a combination cloud.
You can backup files to Dropbox in just a few simple steps through CBackup:
1. Go to Backup on the left side, and customize the Backup PC to Public Cloud.
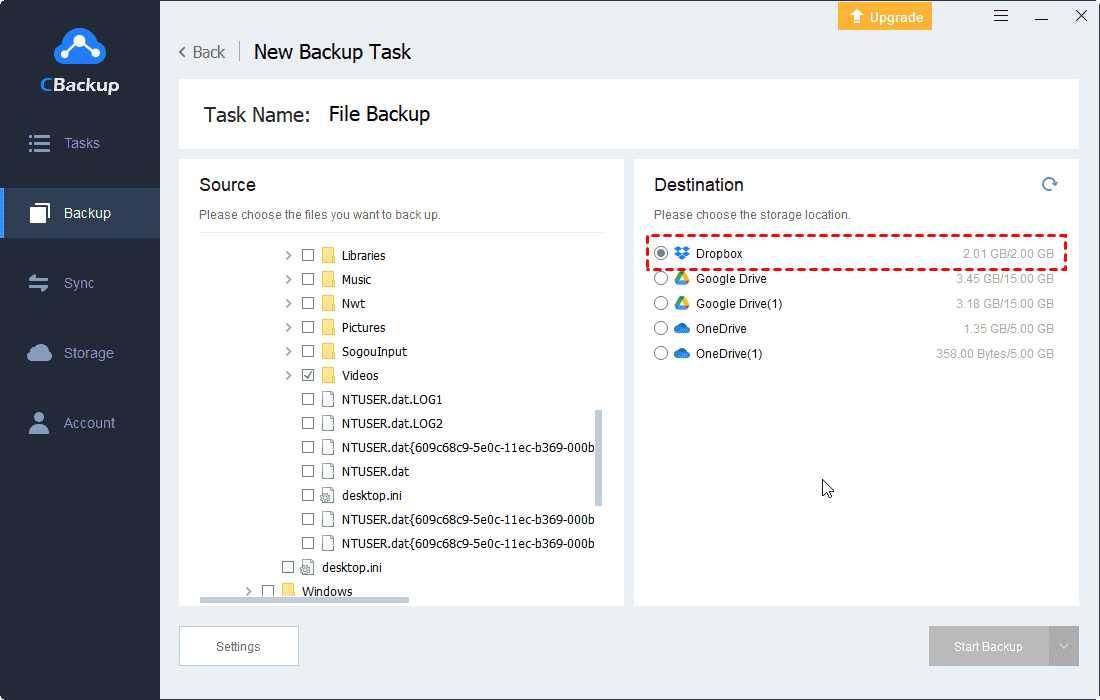
2. Choose your files and select Dropbox as the Destination.
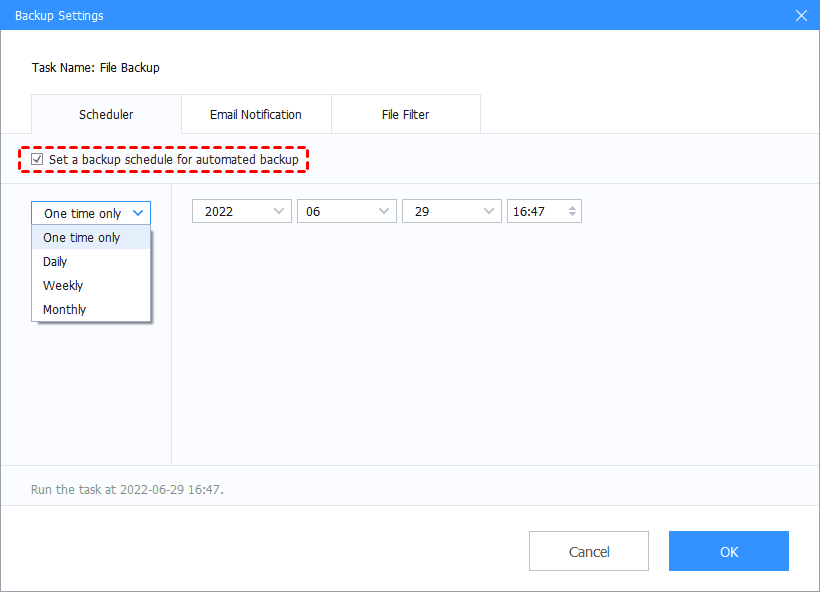
3. If you only want to back up specific folders from your PC, go to Settings > File Filter, select Exclude selected file types/Include the selected file types and specify the types you want or don’t want to backup to Dropbox, then hit OK.
4. Click Start Backup to backup computer to Dropbox.
Conclusion
According to the above content, we can see that if you want Dropbox to save hard disk space, you can enable the Dropbox Selective Sync or Smart Sync function. In addition, you can also delete unnecessary files on the disk to free up space.
If you don't want to upgrade your Dropbox account but need more cloud space, you can try CBackup to consolidate storage space and get more cloud backup space for free.


