Top 2 Ways to Use Google Cloud Storage
This article will answer your questions one by one, including, how Does Google Cloud Storage Work, is Google Cloud Storage Free, and how to Use Google Cloud Storage. Details are below.
Google Cloud Storage vs Google Drive
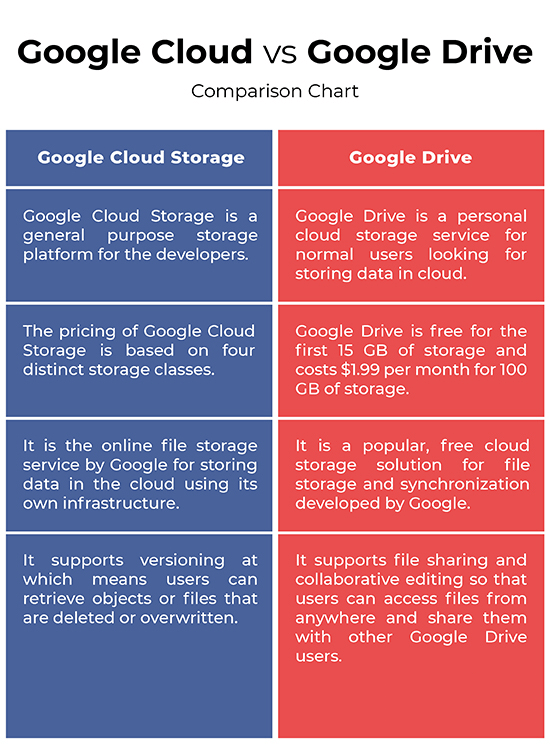
Both Google cloud storage and Google Drive are product released by Google, but they have some difference. In the following, I’ll make a brief introduce for you.
Google Cloud storage is an enterprise online file storage service, which can help you backup unstructured files to cloud using Infrastructure as a Service (IaaS). And it offers users four distinct storage classes including Regional Storage, Multi-Regional Storage, Nearline Storage, and Coldline Storage, and the monthly Google cloud storage pricing per GB are separately $0.02-$0.035, $0.026-$0.036, $0.01-$0.02, $0.04-$0.014.
Google Drive is personal cloud storage for file storage and synchronization using SaaS (software as a service) distribution model and help G Suit users store and share data effortlessly, access anytime anywhere. It offers 15GB space free of charge, but after that, you need to pay for $1.99/month for 100GB storage, $9.99/moth for 1TB, $99.99/month for 10TB
How Does Google Cloud Storage Work?
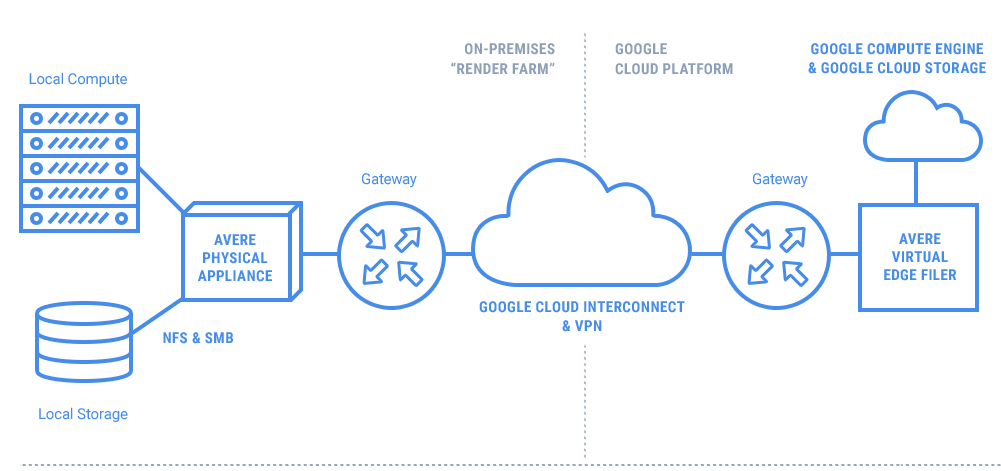
Like other cloud storage service, Google cloud storage provider allows you to store data in a remotely located servers though internet and your data will be forward to multiple servers for storage. And only the authorized users can access data through a web-based browser or command-line interface.
Is Google Cloud Storage Free?
The Google Cloud storage has two free tier. The first is a 12-month free trial with $300 credit to use with any Google Cloud services. The second is always free with limited access to many common Google Cloud resources, free of charge.
How to Use Google Cloud Storage?
Before reading below, you need to make some preparations. No matter what you do with Google Cloud Storage console, the following things are required.
-
In the Cloud Console, on the project selector page, click Create to begin creating a new Cloud project.
-
Make sure that billing is enabled for your Google Cloud project. Learn how to confirm billing is enabled for your project.
Method 1: Create Bucket and Manage Files with gsutil Command Line Tool
In the following, I’ll use gcloud command-line tool to write and read data from cloud storage buckets. Before that, you need to install the latest version of gcloud command-line tool and set a default region and zon.
Step 1. Go to VM instance page and then tick the instance you want connect and click "SSH" in the row.
Step 2. Type "gcloud init" to set up credentials.
Step 3. Use the relate command line in the following to create bucket and manage files. Here, the name of bucket is "my-space" and you can replace it with a unique one.
-
To create a bucket: gsutil mb -b on -l us-east1 gs://my-space /
-
To upload an image named dog.png: gsutil cp Desktop/dog.png gs://my-space
-
To copy the image to a folder in the bucket: gsutil cp gs://my-space/dog.png gs://Ivy/just-a-folder/dog2.png
-
To download the image to desktop: gsutil cp gs://my-space /dog.png Desktop/dog3.png
-
To list contents of a bucket or folder: gsutil ls gs://my-space
-
To list details of the image: gsutil ls -l gs://my-space/dog.png
-
To delete the image from a bucket: gsutil rm gs://my-space /dog.png
-
To give your bucket access to someone else: gsutil iam ch user:xyz@gmail.com:objectCreator,objectViewer gs://my-space
-
To make the image publicly accessible: gsutil iam ch allUsers:objectViewer gs://my-space
Note:
>> When you give or remove access to public or someone, you need to type an email address.
>> If you want remove permission, just add "-d" parameter before user or allUsers.
Method 2: Create Bucket and manage files with web interface
Compared with command line tool, web interface is much easier. If happend to need an easier way, just see the steps below.
#1 Create Buckets to Store Files
Step 1. Go to Google Cloud Storage Browser, then click "Browser" and "CREATE BUCKET" at the top.
Step 2. Under "Name your bucket" tab, type a unique bucket name and click "Continue" to complete the rest steps. The name must start and end with a letter or number.
Step 3. Select a storage class and click "Continue". The default cloud storage is applied to all uploaded objects. All classes offer high availability and low latency, but different class has different performance, cost and location.
Step 4. Choose a location for your buckets and click "Continue". It’s suggested to choose a location that is close to the service where you need to access your data.
Step 5. Click "Create".
#2 Upload Files to Google Cloud Storage
Step 1. Open the created bucket.
Step 2. Drag and drop files you want to upload into the bucket.
#3 Transfer Files between Google Cloud Buckets
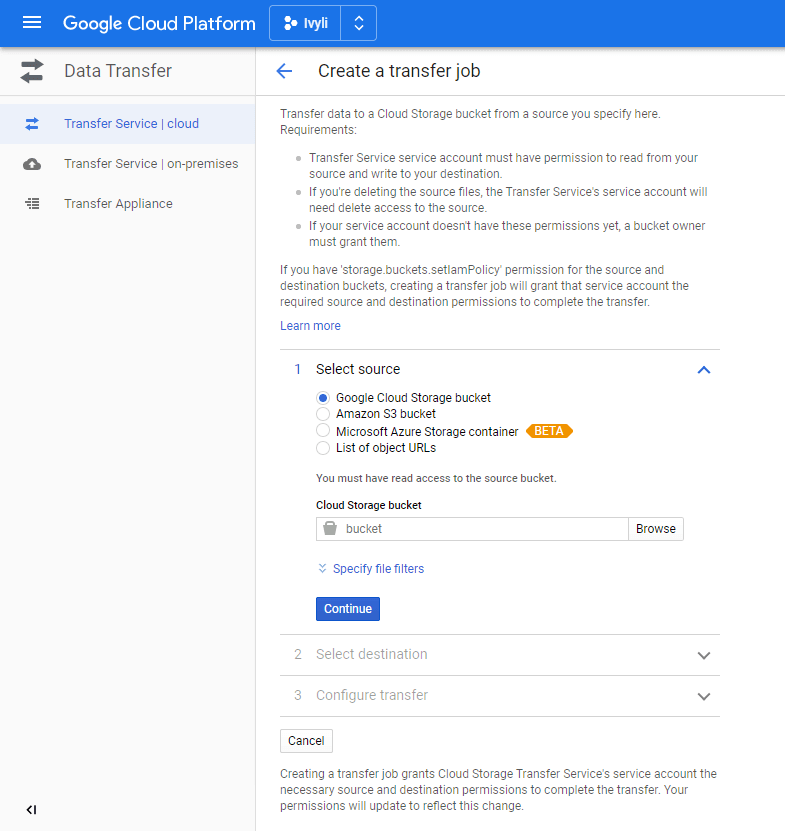
Step 1. Select "Transfer" in the lefthand menu, then click "YES, CONTINUE TO DATA TRANSFER" if you are told that the cloud storage’s data transfer products have moved.
Step 2. Click "Create transfer" to open the next window.
Step 2. Select one source from the following Google cloud storage options, then click "Browse" to find your bucket and click "Continue" to move on. Also, you can specify file filter to find your online data quickly if you choose "Google Cloud Storage bucket" or "Amazon S3 bucket".
Step 3. Click "Browse" to select a destination bucket and click "Continue". By default, Google Cloud storage will only overwritten files if source and destination version is different.
Step 4. Click "Create".
Note: The Transfer feature is moved, but you still can use it. But if you are not assured, you can go to Google Cloud backup and restore and follow its challenging methods, including exporting and importing entities, snapshot feature.
Free and Simple Alternative to Google Cloud Storage
If you are a personal user and want an easier way with more advanced features, you could consider using CBackup, and here are some reasons why I say so.
-
It can free you from manual backup via daily, weekly, and monthly backups.
-
It allows you to backup data during off-peak hours via specific time backup.
-
It helps you backup files with certain file extensions by file filter.
-
It can make full use of the free space in cloud disks and help you get unlimited cloud storage. You only need to connect enough cloud disks to CBackup.
-
It backs up files from computer to cloud, like Google Drive, Dropbox, OneDrive, CBackup Cloud, etc.
-
It’s free and easy to use.
You could transfer files between Google cloud storage accounts if required and CBackup will do you a big favor. Then, please do the following preparations first.
1. Please create a CBackup account with the "Sign up" feature, and then sign in.
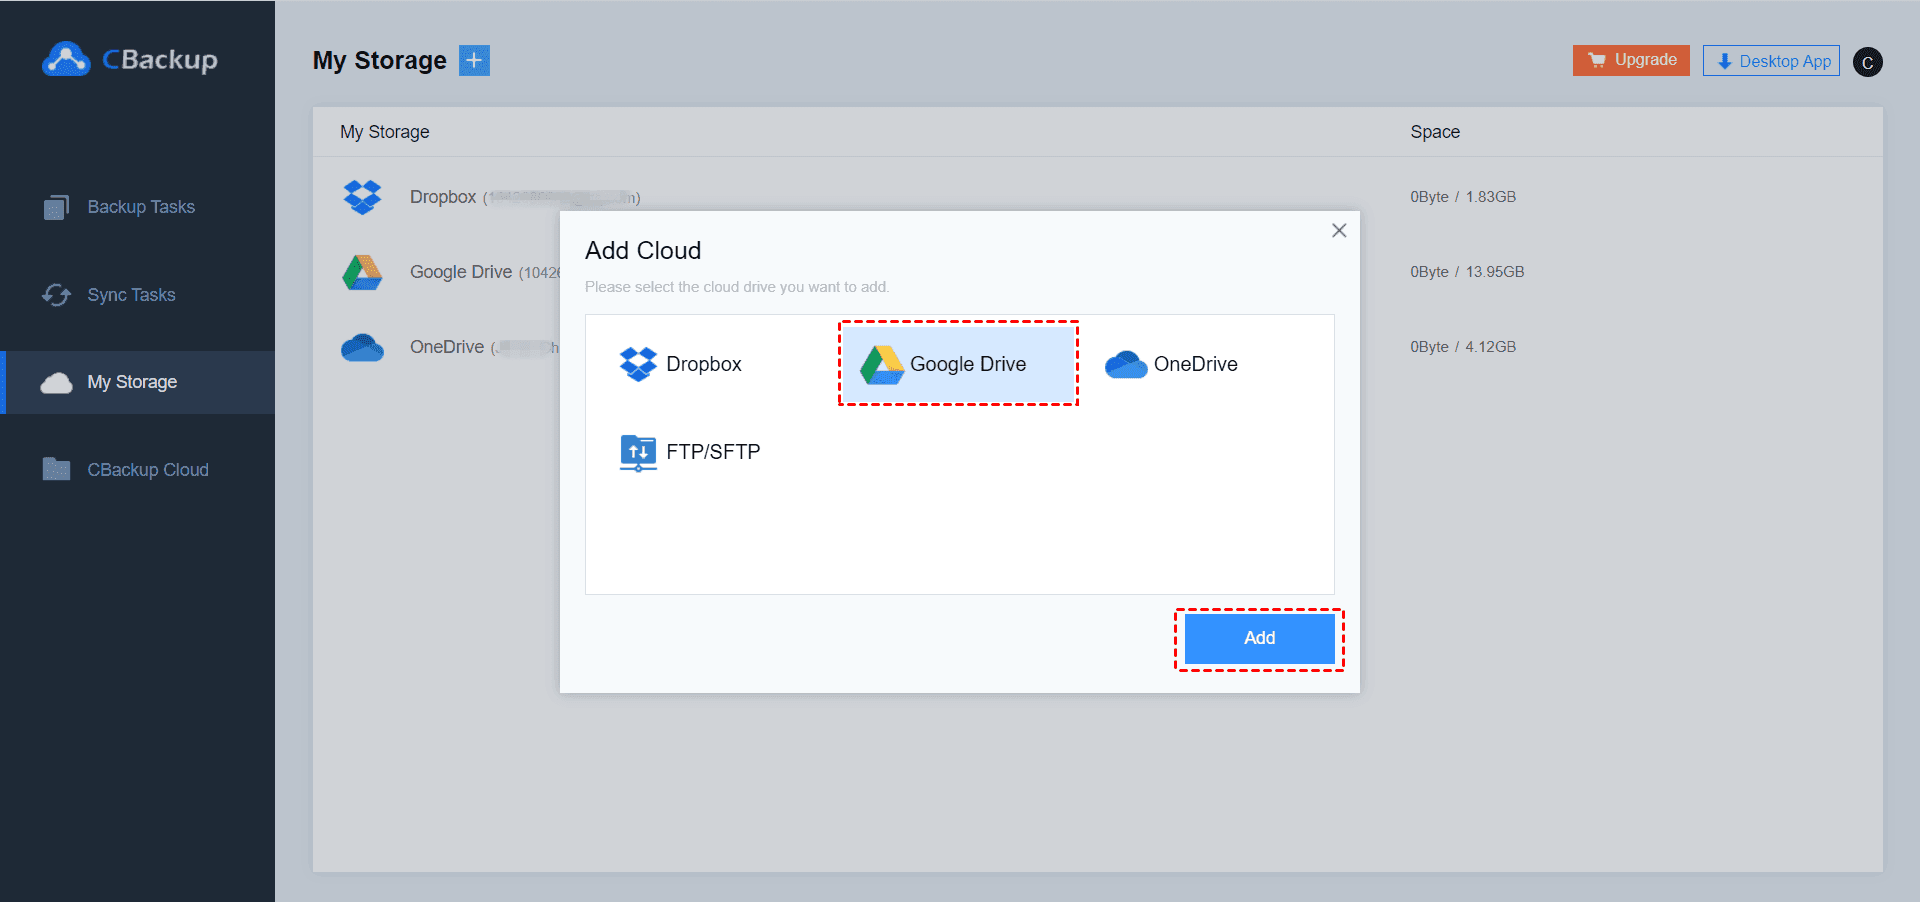
2. Navigate to the My Storage tab, click "Add Cloud", and select "Google Drive" to click "Add" to continue, then grant authority to CBackup to access Google Drive files. then modify the cloud name and storage path for backup, tick the checkbox before "Note" and click "OK" to add Google Drive.
Repeat the process above to add other Google Drive accounts. Now, you have the steps to backup files between Google Drive accounts:
Step 1. Click "Backup Tasks" and "New Task" subsequently.
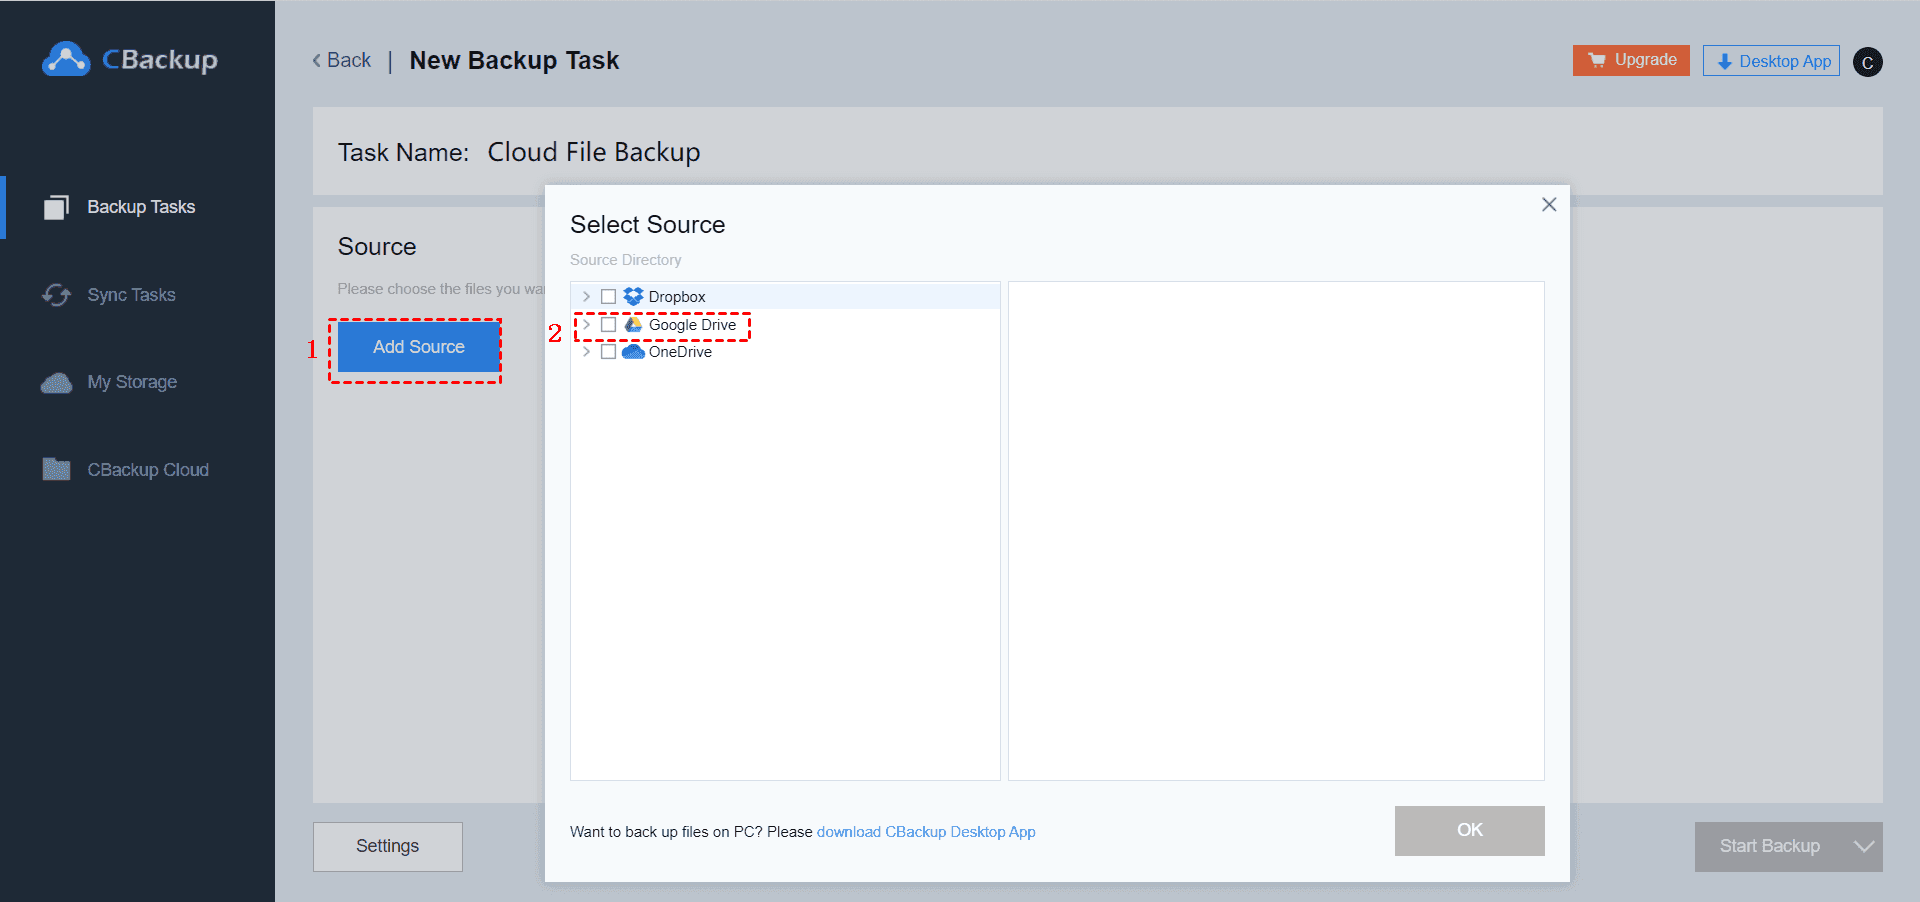
Step 2. Click "Add Source", then tick "Google Drive" and click "OK".
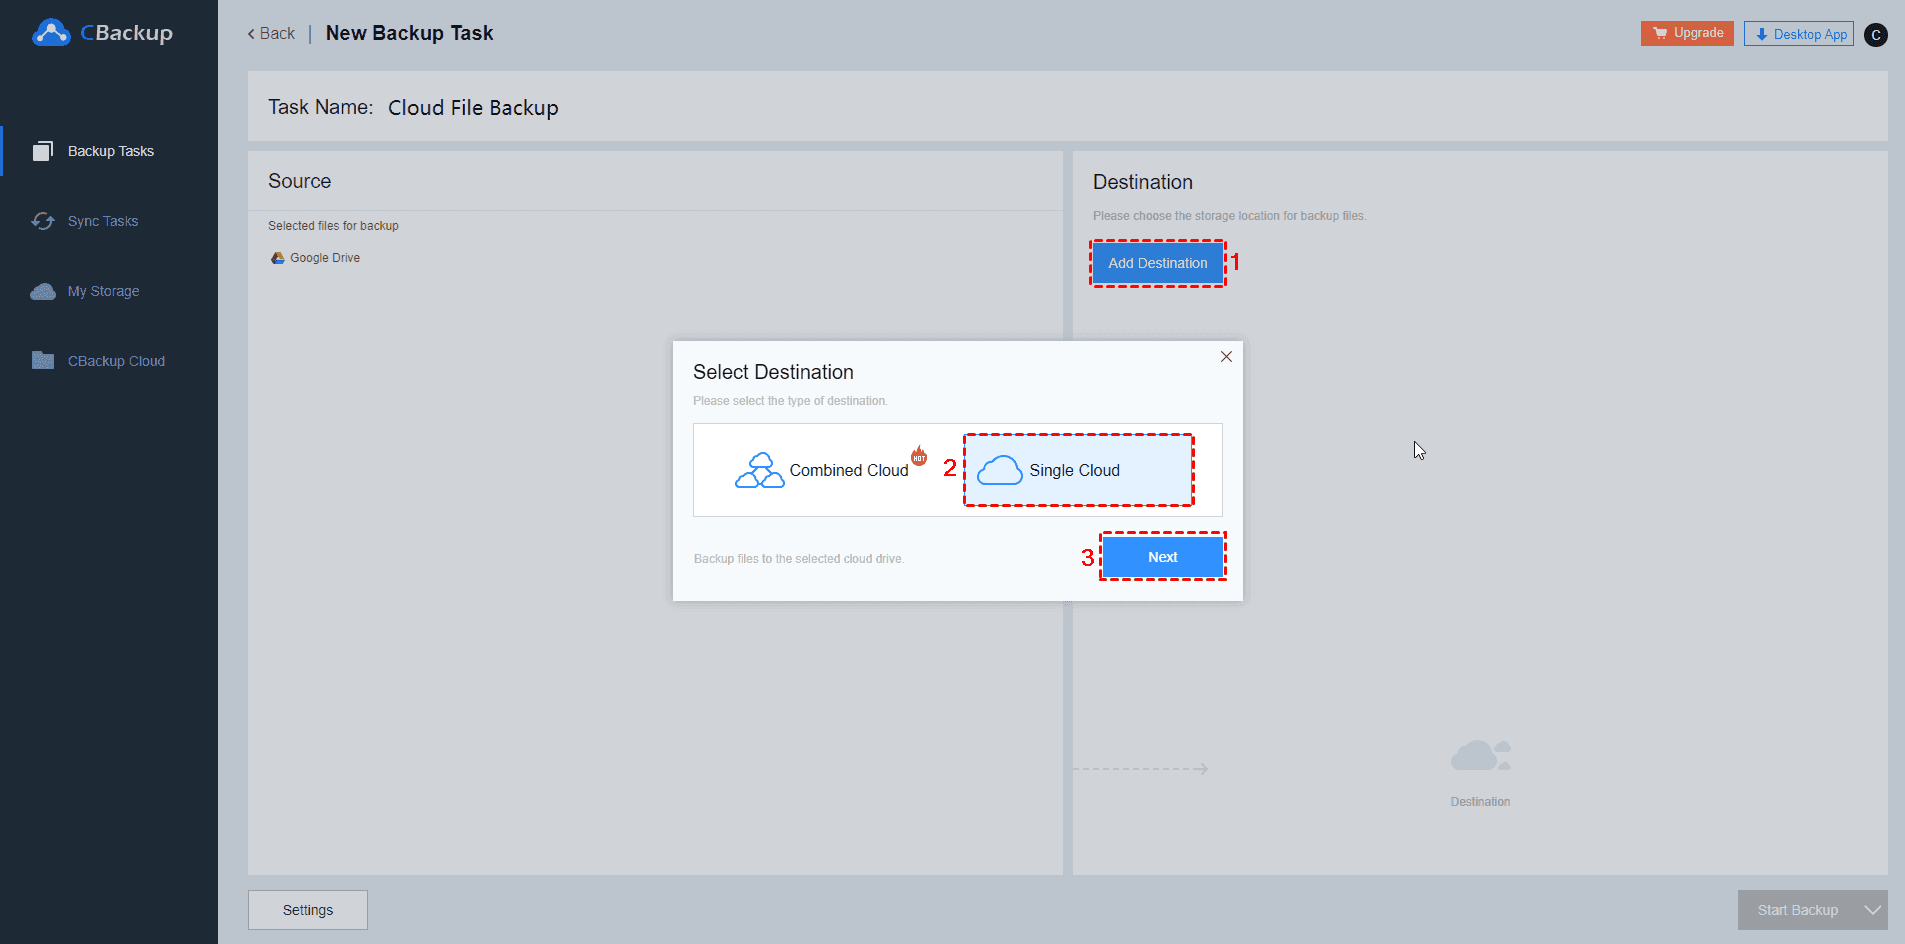
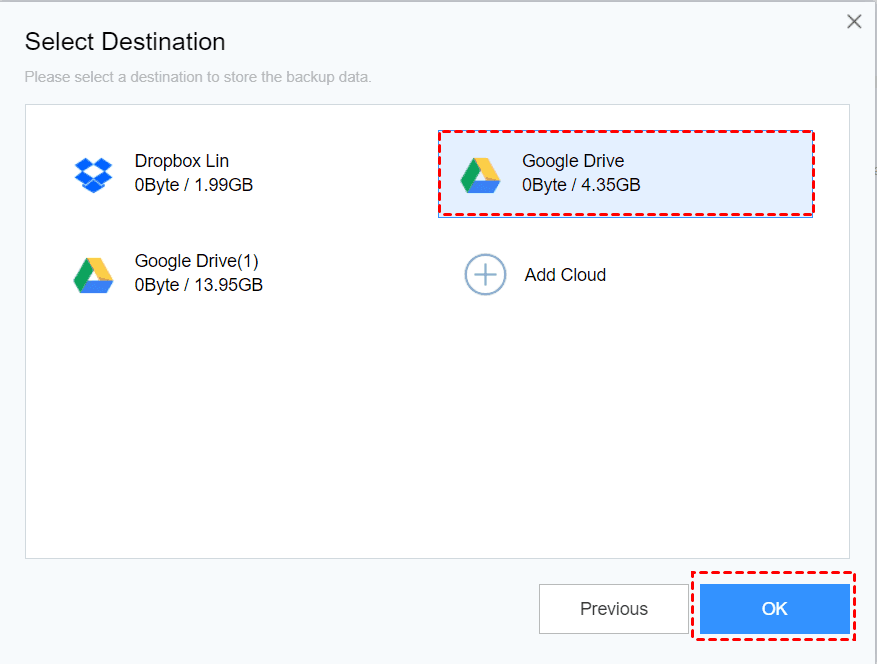
Step 3. Click "Add Destination" > "Single Cloud" > "Next" > another "Google Drive" > "OK",
Step 4. Click "Settings" and "Schedule" to set backup settings and then click "Start Backup".
Besides, you could download the CBackup desktop app to backup files to Google cloud storage for free, and you could combine multiple Google Drive accounts into a large Google cloud storage, even unlimited cloud storage,
Final Thoughts
Google cloud storage is suitable for business user or enterprise while Google Drive is more inclined to personal users. For how to use Google cloud storage, you can go back to the above and use either command line tool or web interface. But if you are a personal user, you can use CBackup. It's a free and simple cloud backup & transfer tool and can help you get unlimited storage.
Free Cloud Backup & Sync Service
Transfer files between cloud drives, combine cloud storage to gain free unlimited space
Secure & Free


