Manage A Google Doc Version History Easily | 3 Tricks + 2 FAQs
Do you want to know how to work with a Google Doc version history? Please follow our step-by-step guide to managing Google Docs easily and learn 2 tips about this problem.
About Google Docs Version History
Google Docs, as an online word processor, provides you to create and edit documents easily, so that you can work with other people conveniently, and it supplies an important feature - Google Doc version history. It is a useful function that helps you to review previous versions of any file that you have been stored in the Google Docs cloud. And, there is no limit to the number of revisions for files in Google Docs.
Following, we will present you with some tricks to manage Google Docs history with ease.
Work with Google Docs Version History with 3 Tricks
To help you manage a Google Doc version history quickly, we provide you with 3 tricks. You can get how to see version history in Google Docs, how to restore older versions of Google Docs, and how to delete Google Docs version history in this part. Before that, it is important to know that, for files in Google Docs, Google Sheets, and Google Slides, you can do the same operations.
Trick 1. Access Older Versions of A Google Doc
Firstly, let's learn the ways to acquire Google Doc history of edits of your file.
Way 1. Access Google Doc versions through the file menu
1. Open the file that you want to access older versions.
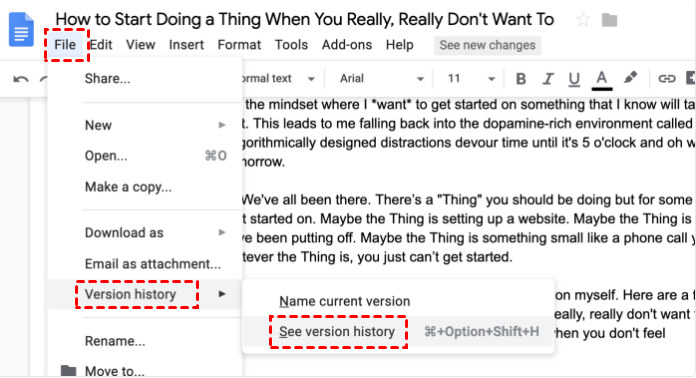
2. Click the File position to open its drop-down menu and tap Version History > See version history.
3. Then, you can find all your Google Docs reversion history on the right panel.
Way 2. Access Google Doc versions via Last Edit
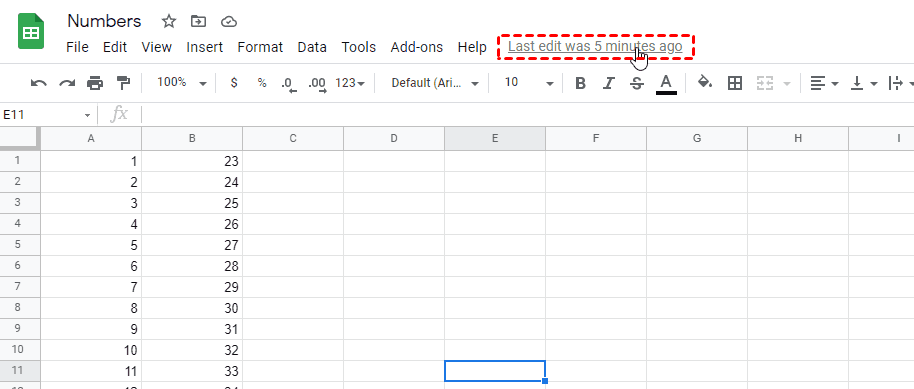
When you open a Google Doc reversion history by clicking the Last edit was* ago button directly. It is usually located directly above the document.
Trick 2. Restore Older Versions of A Google Doc
To restore a version of Google Docs, please follow the steps below:
Way 1. Restore Google Docs old version via More options
1. Navigate to the Version history referring to the steps above, choose a version that you want to restore, and hit More Options (the three-dots icon).
2. Choose the option Restore this version.
3. The version of the file you stored will be saved to the folder you selected.
Trick 3. Turn off to View A Google Doc Version History
In fact, Google Drive doesn't give a direct way to remove any Google Doc reversion history. Here we provide you with how to turn off view history for files instead:
1. Open the file and click the Tools position at the top.
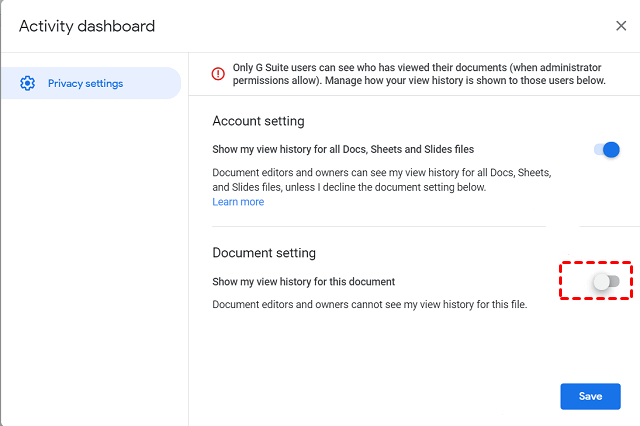
2. Then, hit Activity dashboard privacy.
3. Turn off Show my view history for this document.
Frequently Asked Questions about Google Doc Version History
In addition to the above-mentioned information, there are some frequently asked questions about Google Docs app version history that may be helpful.
#1. Why Is My Google Doc Version History not Showing Changes?
There are many possible reasons that cause the changes of Google Docs not saving. You can take these methods as references.
Way 1. Check your Internet Connection
No or unstable network connection will influence Google Docs automatic save function. When you make changes to a Google Doc, you should make sure of your Internet connection.
Way 2. Block of Antivirus Software
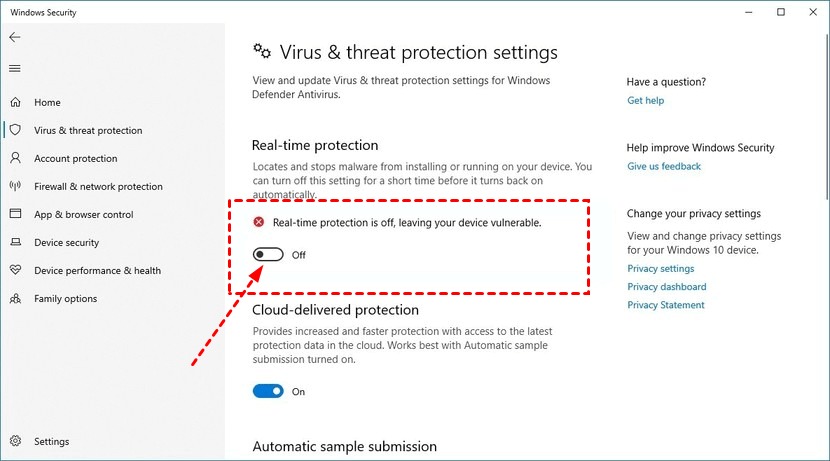
Sometimes, your antivirus software will not save the files that you have changed. You can turn off your Antivirus Software for a short time. Just click the Start button to Open Windows Security Center. Then, click on Virus & threat protection > Virus & threat protection settings to turn off the protection.
#2. Why Can't I See Version History in Google Docs?
If you can’t see a Google Doc version history, it probably means that you don’t have access rights. This implies that you only have “can view” rights to the file. You can ask the person who is managing the file to modify your access rights to “can edit”, or “can organize, add and edit”.
Increase Google Drive Storage Space for Free with CBackup
Each Google account is provided with 15 GB of free storage shared across Google Drive, which encompasses Google Docs, Google Sheets, and Google Slides, Google Photos, and Gmail. Although Google Drive previously stated that it provides unlimited cloud storage for Google Docs, Google Sheets, Google Slides, however, according to Google Drive announcement, starting June 1, 2021, any new Docs, Sheets, Slides file will begin counting toward the free 15GB of allotted storage or any additional storage.
Thus, with various documents, photos, and videos, this free space would be taken up quickly. Is there a way to increase Google Drive storage without paying for the advanced plan? The answer is yes!
With the help of a free cloud backup service, CBackup, you can merge multiple Google Drive accounts to increase Google Drive storage space for free. For example, if you have 10 Google Drive accounts, you can get 150GB of free storage. If you have more Google accounts, you can even get unlimited space. What’s more, it supports you to backup any PC files to the combined Google cloud, or other public clouds, like OneDrive, Dropbox, and so on.
Now, follow the steps below to expand Google Drive storage freely:
1. Create a CBackup account first. Download CBackup client and sign in to it.
2. Click the Storage position on the left to hit Google Drive > Authorize Now subsequently. Then, follow the on-screen instructions to give authority to CBackup, which means to allow CBackup to access your files in Google Drive.
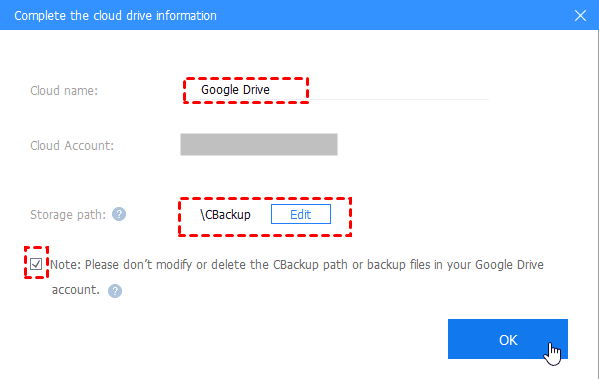
3. You can customize the Cloud name and Storage path for your added Google Drive for your needs. Then, check the box next to Note: Please don't modify the CBackup path or backup files in your Google Drive account And click OK.
You have finished adding one Google account. Afterward, you can repeat the steps to add more Google Drive accounts to CBackup.
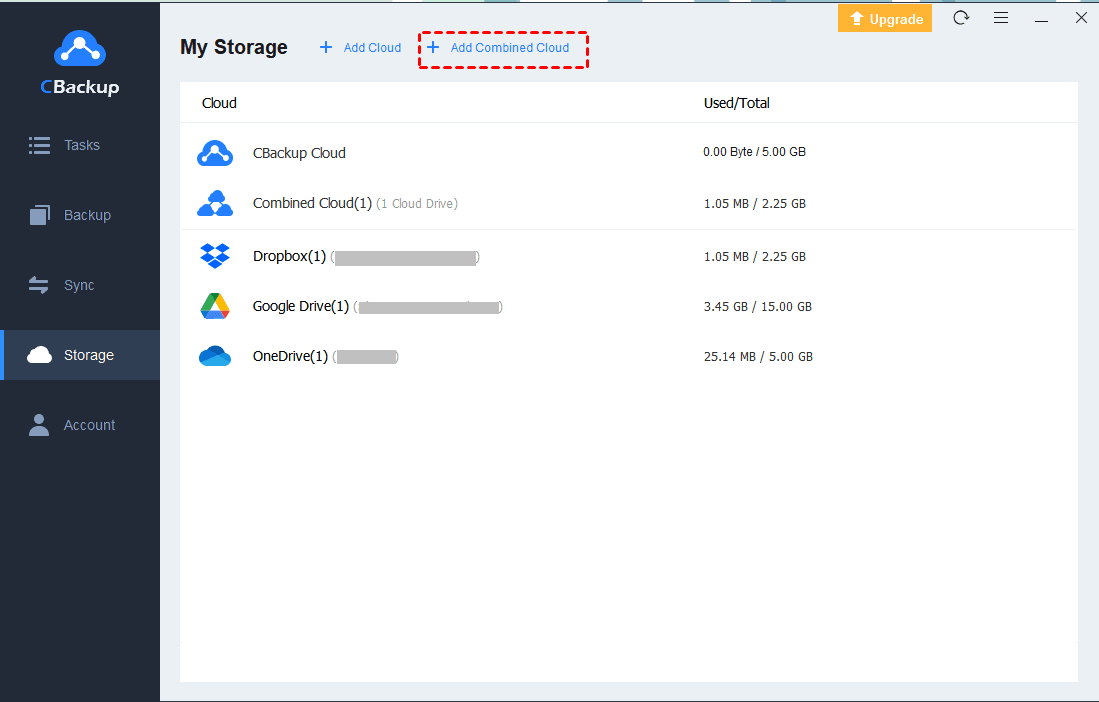
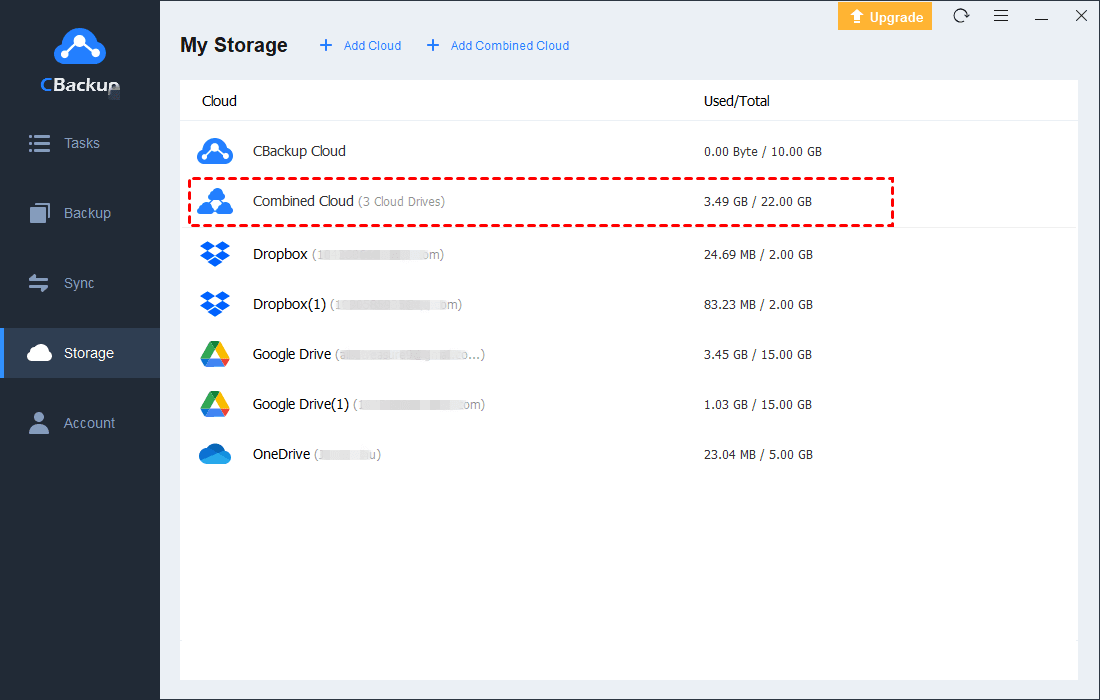
4. Navigate to the Storage tab, click + Add Combined Cloud. Then, you can tick all your added Google Drive clouds and press Next > Combine.
5. After that, your Google Drive storage space has been increased for free.
How to backup Windows to Google Drive and Google combined cloud with CBackup? After you finish the combination of Google clouds:
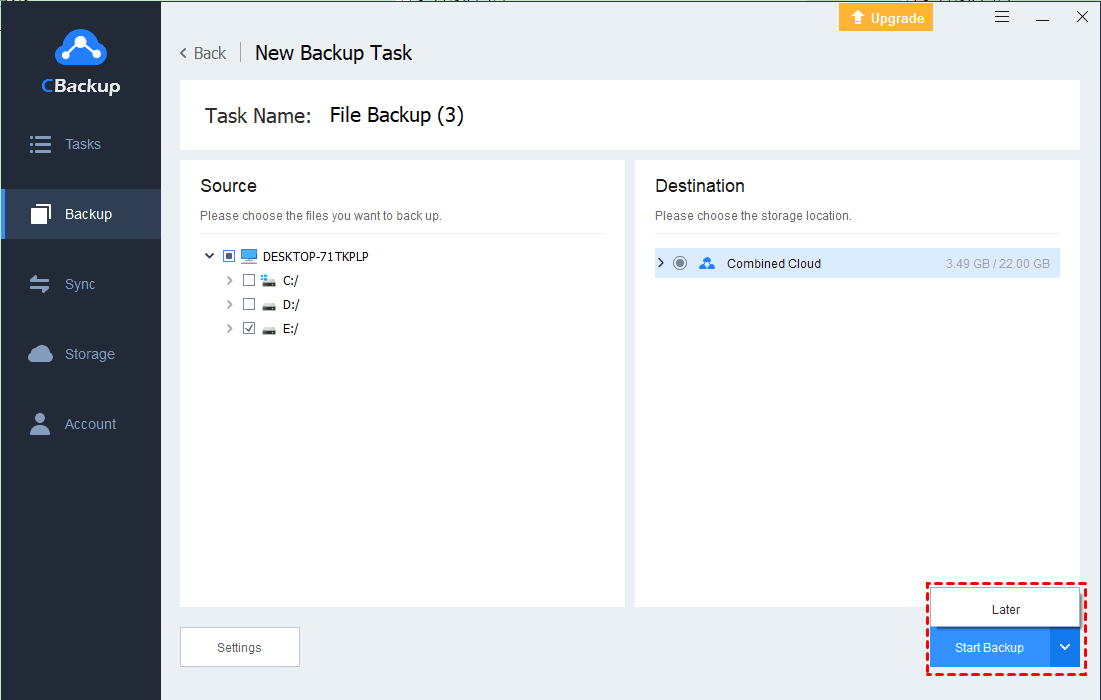
1. Go to the Backup tab and click Backup PC to Combined Cloud.
2. Modify the Task Name and select the local directories you want to backup. The Combined Cloud will be chosen by default.
3. You can click Start Backup to execute the backup task immediately; or you can click the down-arrow icon to hit Later, then, you can run the backup task later.
Conclusion
How to manage a Google Doc version history easily? There are 3 tricks and 2 frequently asked questions for you to work with Google Docs version history handily. If you are troublesome with Google Drive storage full problem, you can try the cloud backup and restore solution - CBackup, which allows you to expand storage space for free and back up any Windows files with ease.
Free Cloud Backup & Sync Service
Transfer files between cloud drives, combine cloud storage to gain free unlimited space
Secure & Free


