Fix the Google Drive Empty Trash Not Working with 4 Ways + 2 Tips
This article shows methods to fix the Google Drive empty trash not working issue, and provides the right way to empty Google Drive trash all at once.
Google Drive can't completely empty trash!
“I saw many files I have deleted for a while on Google Drive trash. I have clicked ‘empty trash’ on the web and ‘empty bin forever’ on iPad but after I have clicked those options no matter on the iPad or my mac, the files just came back to the bin and trash! My Google Drive empty trash not working, and anyone can tell me what to do about it?”
4 Fixes to Google Drive empty trash not working
When you try to empty the Google Drive trash, sometimes it seems that Google Drive empty trash does not work. When the page is reloaded, these files still exist and space is not released. It actually takes a while for Google Drive to delete the files in the trash, which may take several hours to delete all files.
If you still find that Google Drive does not delete files after a while, you can try the following 4 repairs.
Fix 1. Clear the Chrome browser cookies and cache
Cookies and cache accumulated in Google Chrome will slow down the running speed of web pages even cause stuck, including the speed at which Google Drive clears the trash. It may not be that Google Drive not deleting trash. Cleaning up the browser may solve your troubles.
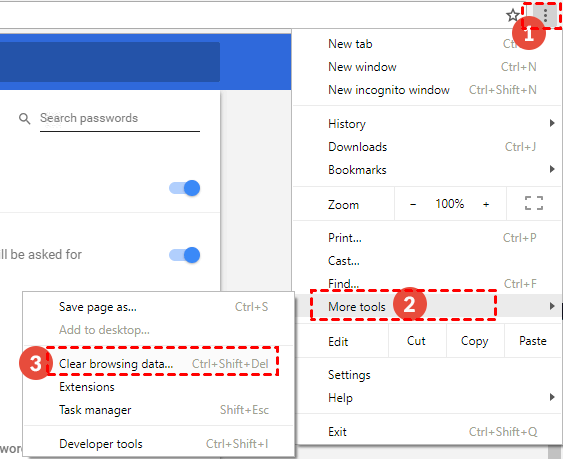
Step 1. On your computer, open Chrome. At the top right, click the More icon.
Step 2. Click More tools and then Clear browsing data.
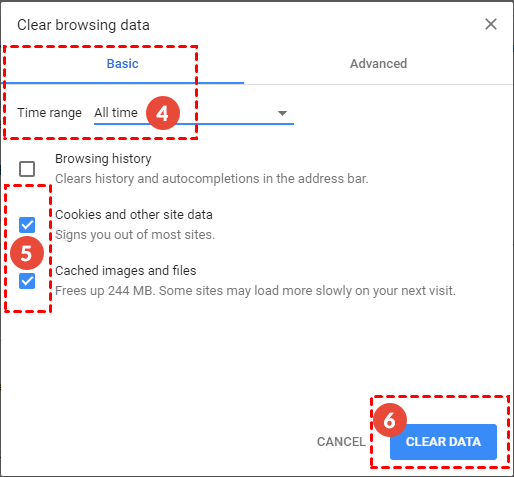
Step 3. At the top, choose a time range. To delete everything, select All time.
Step 4. Next to "Cookies and other site data" and "Cached images and files," check the boxes, and click CLEAR DATA.
Step 5. Go back to the Google Drive web app and check whether the speed of deleting trash is accelerated or whether the trash bin has been emptied.
Fix 2. Turn off all extensions
Also, enabling too many extensions will slow down the running speed of Google Drive web applications. You can try to turn off all extensions to fix Google Drive cannot empty trash.
Step 1. On your computer, open Chrome. At the top right, click the More icon.
Step 2. Click More tools and then Extensions. Alternatively, type chrome://extensions/ in the address bar.
Step 3. Select the extension, click Remove or toggle the switch under the extension to delete or disable the extension.
Step 4. Go to Google Drive and try to empty the trash again.
Fix 3. Delete files one by one
If you try to delete the trash all at once in Google Drive and encounter some problems, the problem may be with individual files. Sometimes, damaged files may prevent Google Drive from emptying the trash bin normally. Therefore, if there are not many files, you need to try to delete one file at a time to successfully empty the trash.
Fix 4. Try on a different device
Sometimes, if you can’t empty the trash from the same computer, it may be because they only reappear on the web, you can try to access Google Drive from your phone.
To empty your Google Drive trash using a mobile device, you should follow these steps:
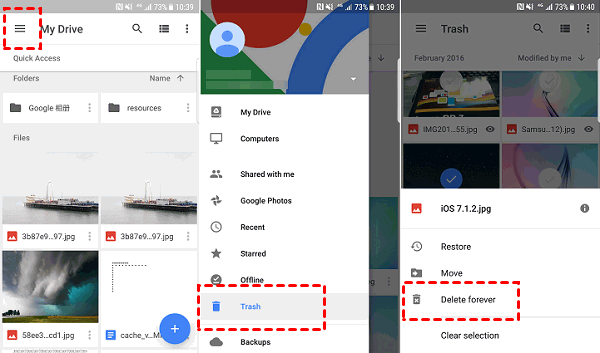
Step 1. Launch the Google Drive app and log in to the correct account. Click the menu icon to open the Bin/ Trash folder.
Step 2. In the Trash folder, select the file to be deleted or select all files at once.
Step 3. Click the three-dot icon in the upper right corner, click Delete forever, and the file will be permanently deleted from the drive.
2 Tips to replace Google Drive “Empty” operation
If the above method still does not solve your problem, then the error may be caused by complicated reasons. You can try the following two tips to replace the Empty button in Google Drive to empty the garbage.
Tip 1. With emptyTrash page
You may have thought about: “How do I empty Google Drive trash all at once?” Files deleted from Google Drive will remain in the "Trash folder" unless they are permanently deleted. If you have any issues during the process of clicking “Empty” Google Drive trash, you can try to empty Google Drive trash all at one time according to this method.
Step 1. Click to go to the emptyTrash page, then click Execute.
Step 2. Select the correct Google account to log in, and click Allow to grant permission.
Step 3. You need to wait for the deletion process to complete, depending on the number of files stored. When you see the 204 code, the script has been executed successfully.
Step 4. Go to the Google Drive Trash folder to see if all files have been permanently deleted.
Tip 2. Switch to other cloud storage services
There is no doubt that Google Drive is indeed a very useful cloud storage service, but many users have reported that they have encountered successive problems. It is great trouble that Google Drive freezes or crashes due to different reasons.
Many other cloud drives can replace Google Drive in effect, which are equally easy to use and have better stability. For example, the popular OneDrive and Dropbox are all good options. Use them to save time and effort for repairing various issues in Google Drive.
Backup Google Drive to other cloud drives
After switching to another cloud drive, it is necessary to back up Google Drive to achieve two goals:
☛There may be very important data in your original Google Drive account. You can transfer it to another drive for access and use.
☛If you use multiple cloud drives at the same time, the data stored in Google Drive may be lost or damaged when the error occurs again. You can back up to other cloud storage services in advance to prevent accidents.
You can use the free cloud backup tool - CBackup to help you easily automatically backup Google Drive files to another cloud storage service. The whole cloud to cloud backup operation process is simple and safe:
Step 1. Get Started to create a CBackup account for free and sign in.
Step 2. Add and authorize your cloud drive accounts (here is Google Drive and OneDrive) under the My Storage tab.
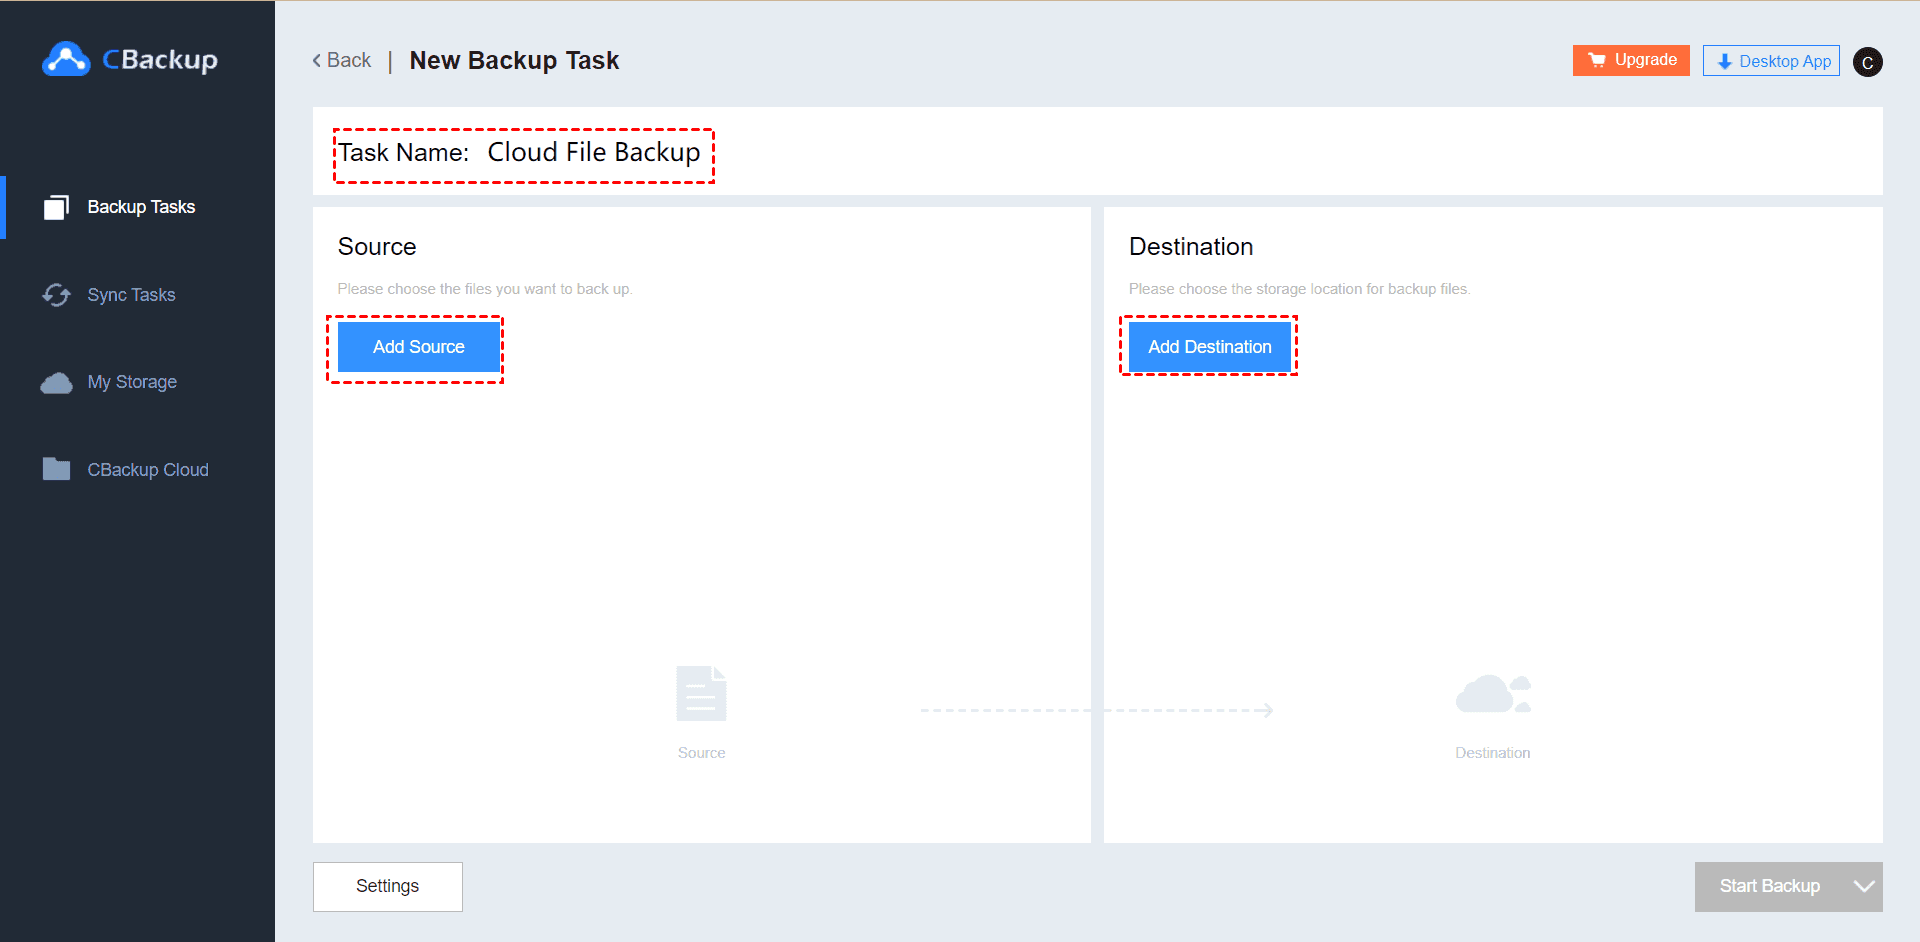
Step 3. Click the Backup Tasks tab at the top of the page, then click the New Task button to create a backup task.
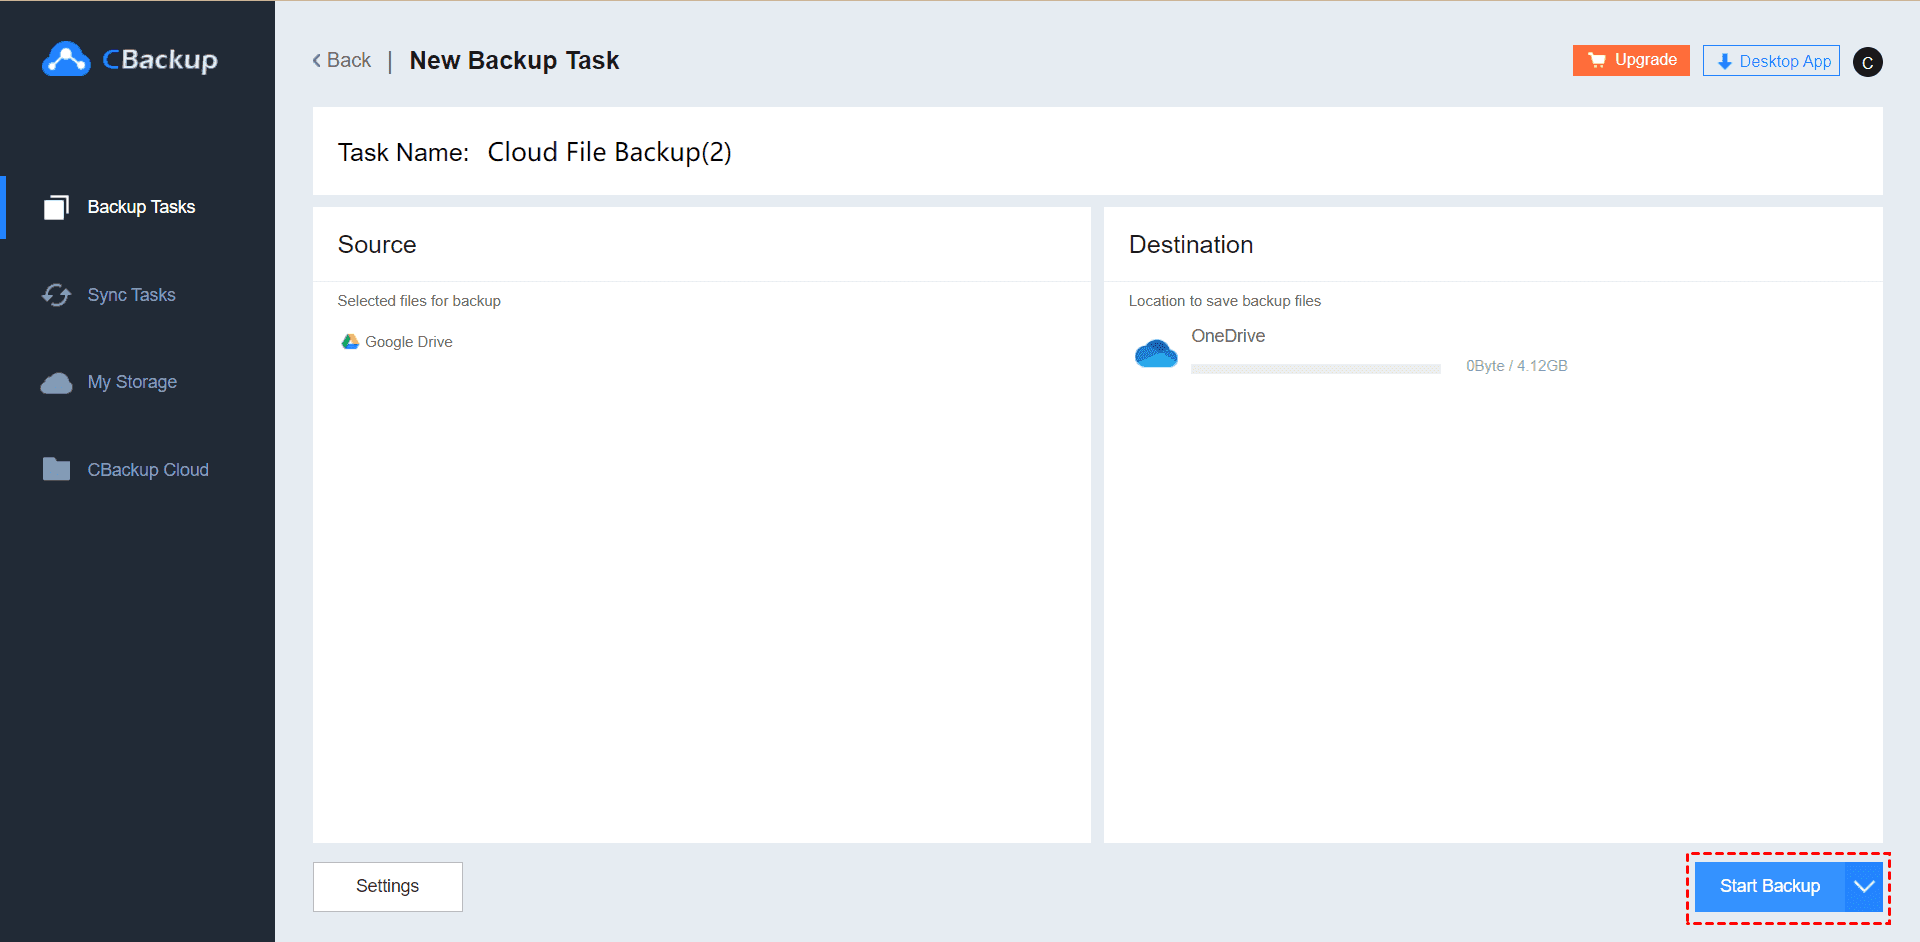
Step 4. Name your backup task, and click the Add Source button to add Google Drive as the backup source. Similarly, click the Add Destination button to add OneDrive as the backup destination.
Step 5. (Optional) Click the Settings button to create a schedule backup task. Then, click Start Backup in the lower right corner to perform the task and prevent Google Drive empty trash not working forever.
CBackup desktop app also provides backup Windows PC to cloud service, you can back up all files on your PC to Google Drive/Dropbox/OneDrive and CBackup Cloud in a professional way with just a few simple clicks.
If you meet the Google Drive is full error while using, CBakup will also do you a big favor, which allows you to merge multiple Google Drive accounts to get more free Google cloud stroage space for free.
Final words
Effective fixes to the Google Drive empty trash not working issue has been shown to you in the contents above, and you can try these methods to solve your problem. If you want to switch to other cloud storage services for use, don't forget to back up Google Drive files to other drives with CBackup to avoid Google Drive data loss.
Free Cloud Backup & Sync Service
Transfer files between cloud drives, combine cloud storage to gain free unlimited space
Secure & Free


