Ultimate Guide to OneDrive Files On-Demand On Windows or Mac
Do you want to use OneDrive Files On-Demand in Windows or Mac? In this article, you will learn how to enable OneDrive Files On-Demand in Windows or Mac with detailed steps.
What is Files On-Demand in OneDrive?
Files On-Demand is a useful feature in OneDrive that can help you access all your files in OneDrive without having to download all of them and use file storage space on your Windows device. Users can enable this feature in OneDrive to have all OneDrive files visible in File Explorer and get new information about each file.
Some things to know before using Files On-Demand
☛Only Windows 10 Fall Creators Update (version 1709 or later) or Windows Server 2019 and OneDrive build 17.3.7064.1005 or later support OneDrive Files On-Demand. If needed, you can upgrade to this version of Windows 10 through the standard Windows update process.
☛OneDrive Files On-Demand requires Apple File System (APFS) formatted volumes to synchronize files. If you have been using the previous file system, it will be automatically updated when you upgrade to Mac OS Mojave.
☛Files On-Demand settings are unique to each device. So, if you work on multiple Windows PCs or get a new Windows PC, you should make sure you turn it on for each device where you want to use it. Otherwise, you may find your OneDrive Files On-Demand is not working.
How do I use OneDrive On-Demand in Windows?
Follow the steps below to enable OneDrive On-Demand for Windows:
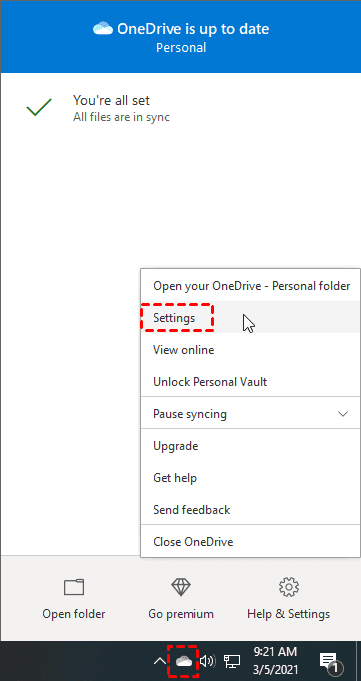
Step 1. Select the white or blue OneDrive cloud icon in the Windows notification area.
Step 2. Select OneDrive Help and Settings icon > Settings.
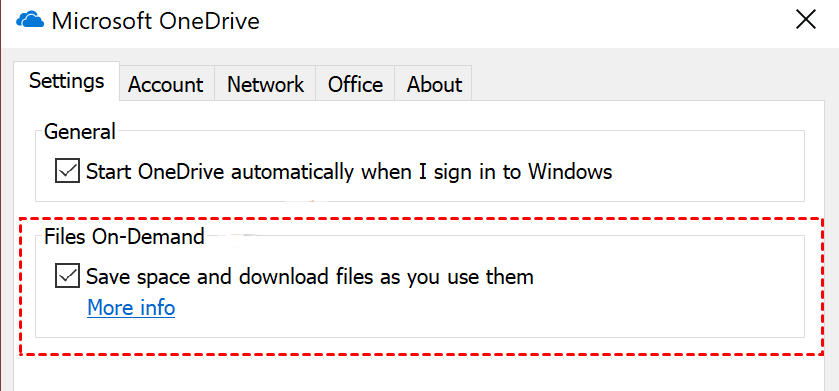
Step 3. Under the Settings tab, tick the box next to Save space and download files as you use them.
How to change whether a file or folder is available offline?
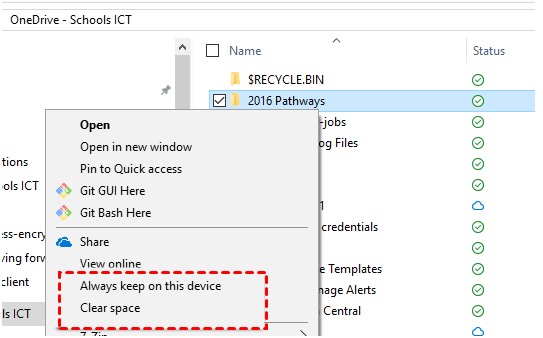
Step 1. In Windows Explorer, right-click a file or folder in your OneDrive folder
Step 2. To mark a file as Online-only (Blue cloud icon) click on Clear Space. To mark a file as Always Available (solid green circle) click on Always keep on this device.
How do I use OneDrive On-Demand on Mac?
Here are the steps to enable OneDrive Files On-Demand on Mac:
Step 1. Download and install OneDrive Files On-Demand for Mac.
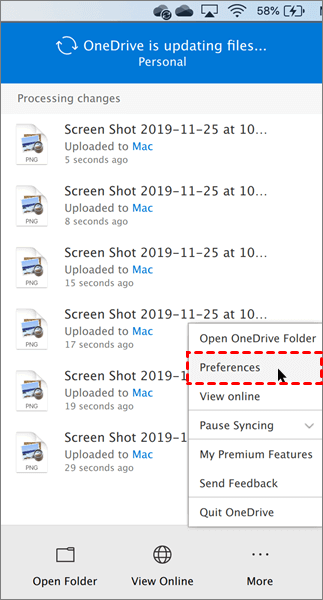
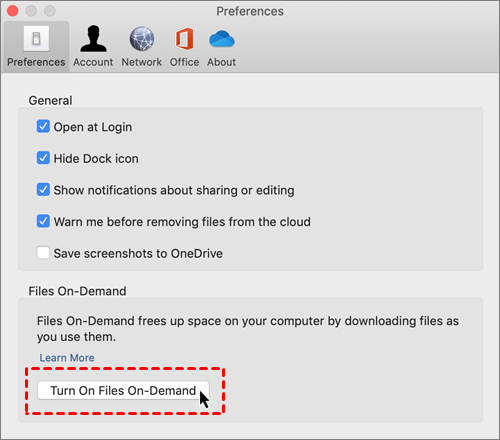
Step 2. For new OneDrive accounts on Mac OS Mojave, Files On-Demand is turned on by default when you set up OneDrive. Existing users need to turn on Files On-Demand in OneDrive Preferences.
Step 3. Click the Turn on Files On-Demand button.
How to change whether a file or folder is available offline?
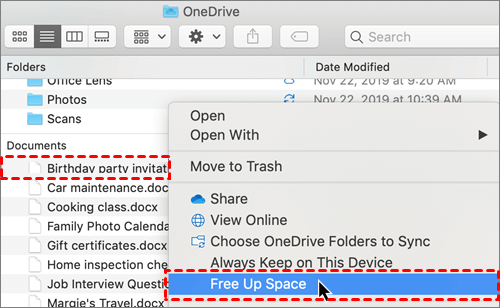
Step 1. In Mac Finder, right-click a file or folder in your OneDrive folder
Step 2. To mark a file as Online-only (Blue cloud icon) click on Free Up Space. To mark a file as Always Available (solid green circle) click on Always keep on This Device.
Tip: How to expand your OneDrive space for free?
With OneDrive Files On-Demand feature, you can save the local space by making all files available online only. Actually, the space of the OneDrive cloud is also limited. Generally, you can enjoy 5 GB of free storage space as long as you sign up for a OneDrive account. If you need more storage space, you should pay for an advanced storage plan.
However, buying storage space is a long-term expense and some users are seeking ways to get more space for free. If you need more backup space without paying, you can rely on CBackup to merge OneDrive accounts.
CBackup is a professional cloud backup service for Windows PCs. With its combine cloud storage feature, you can combine the cloud storage of multiple OneDrive accounts and then help you backup PC files to this combined cloud to enjoy huge space.
As long as you have multiple OneDrive accounts, don’t hesitate to merge them with CBackup. And besides this feature, CBackup also offers features to backup computer files to OneDrive, Dropbox, Google Drive, CBackup Cloud, etc., cloud to cloud backup, and so on. Let’s see how to combine cloud storage for OneDrive with CBackup:
Step 1. Download CBackup and install it. Sign up to create a CBackup account and log in.
Step 2. Click Storage on the left side, then choose OneDrive and hit Authorize Now. And follow the on-screen guide to allow CBackup to access your cloud storage.
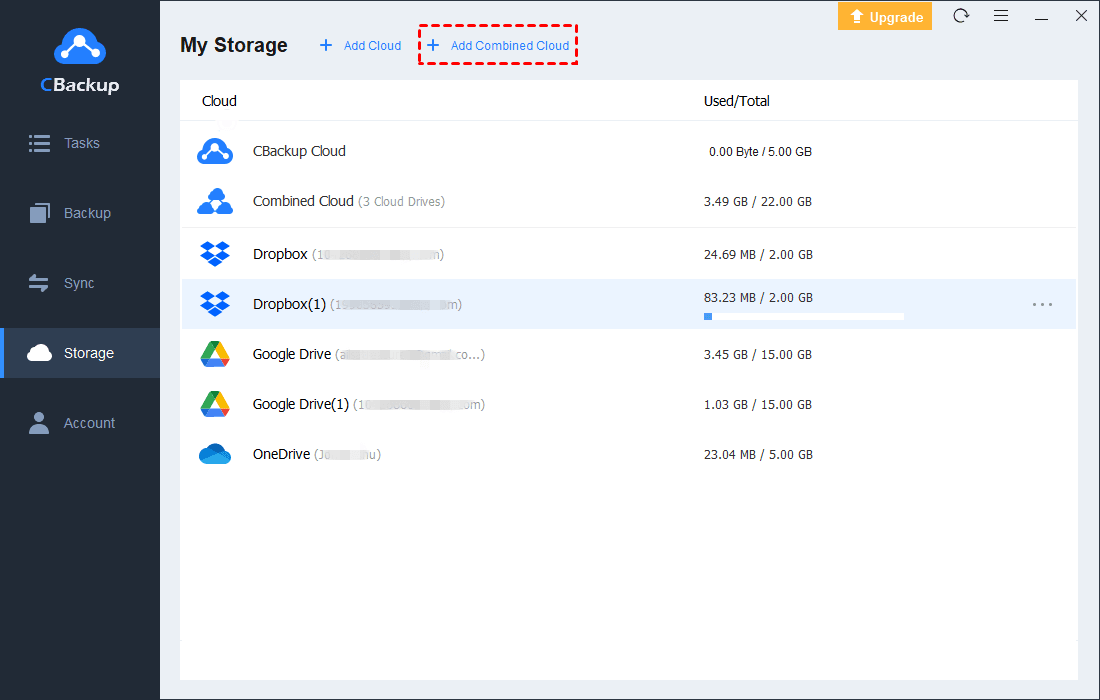
Step 3. After adding, all your OneDrive accounts are listed in the Storage tab. Click the + Add Combined Cloud option.
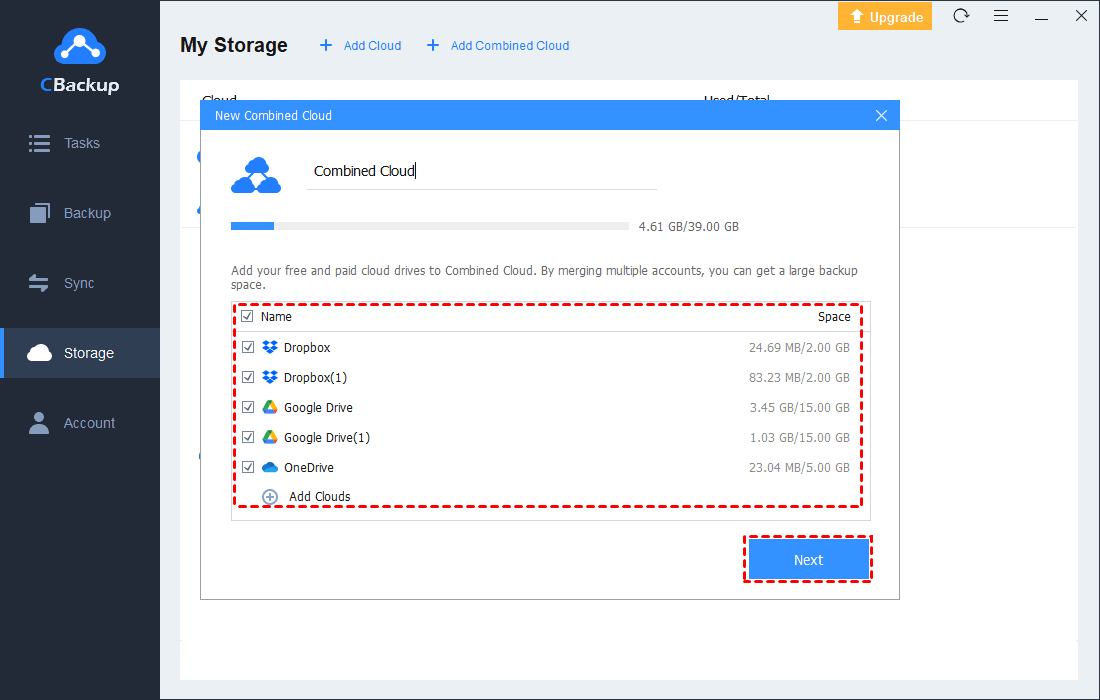
Step 4. Tick the box next to the cloud storage account that you want to combine. After checking, click on Next > Combine.
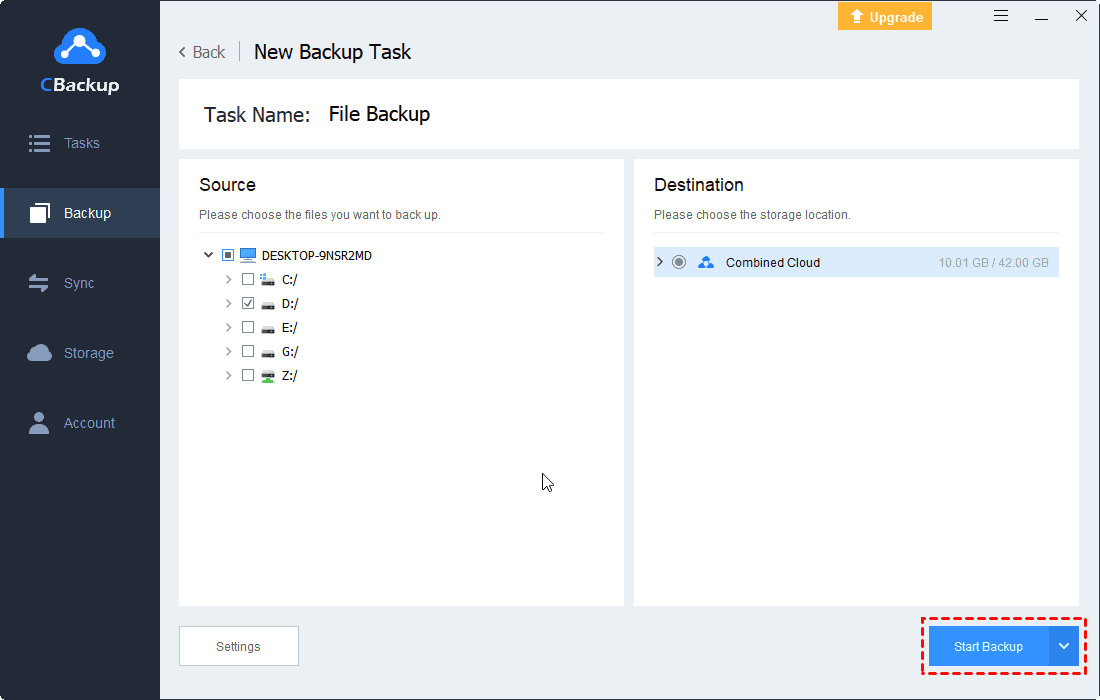
Step 5. Then, you will have a Combined Cloud in your clouds list. You can choose the Combined Cloud as the backup destination to enjoy huge backup space.
Conclusion
After reading all the contents above, you must know what is OneDrive Files On-Demand and how to enable this feature on both Windows PC and Mac. And if you want to expand your OneDrive backup space for free, CBackup is a free and great tool for you.
Free Cloud Backup & Sync Service
Transfer files between cloud drives, combine cloud storage to gain free unlimited space
Secure & Free


