5 Fixes: OneDrive Shared with me Not Showing on Desktop/in Explorer
This article will show you how to solve the OneDrive "share with me" not showing on desktop or in explorer issue, as well as the condition that the “shared with me” not showing on OneDrive. Read this article for solutions.
Help! OneDrive “Shared with me” not showing on desktop
“I have just installed OneDrive for my computer (MacBook) and during install, it asks which folders I want to sync but my Shared folders are not even an option on the list. The only files I need are shared folders. How do I get the ‘Shared with me’ folders on this list to sync and why OneDrive ‘shared with me’ not showing on desktop?”
OneDrive “Share with me” not showing in explorer or on desktop is indeed a strange problem, it doesn't happen often, but you encounter this issue, it will definitely make you very distressed. We have collected some possible solutions for the OneDrive issue and hope that at least one of them will help you.
5 Fixes for OneDrive “shared with me” not showing
Why is a shared folder not showing up on OneDrive? Not being able to find OneDrive "Shared with me" or sharing folders is not a common problem, but compatibility issues with the system and software, vulnerabilities in older versions, or excessive blocking of antivirus software and firewalls may cause problems. The following 5 methods can effectively solve this problem.
Fix 1. Update to the latest Windows version
It is possible that your Windows version has not been updated for a long time that causes the OneDrive “shared with me” folders not showing in Explorer. Many OneDrive compatibility issues are actually resolved in the new Windows version.
Step 1. Press the “win+I” key to open the Settings on the computer.
Step 2. Click Update & Security > Windows Update, and then click the Check for updates button.
Step 3. If an update is available, download it.
Fix 2. Update OneDrive manually
Under normal circumstances, the OneDrive application will automatically update, but some users will turn off the automatic update in the settings. The outdated OneDrive application may continue to have new problems, including OneDrive "Shared with me" missing, and you could manually update the OneDrive application.
Step 1. Go to the OneDrive website, click Download, and install the latest version of the application to the computer.
Step 2. Click the Start button on the computer. Type OneDrive in the search box, click on the topmost result to start it.
Fix 3. Reset OneDrive application
Resetting OneDrive is a common method to fix various problems of OneDrive, but it is also one of the most effective methods.
✎Note: After resetting OneDrive, all tasks will be restarted, including resyncing all files.
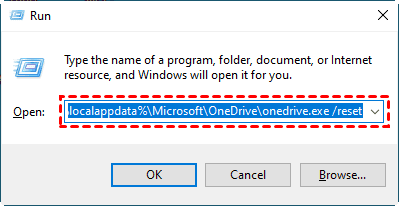
Step 1. Press the “Win + R” key simultaneously to open the Run dialog.
Step 2. Then enter: %localappdata%\Microsoft\OneDrive\onedrive.exe/reset, and click OK to continue.
Step 3. Sign in with your account information to connect to OneDrive, right-click the OneDrive icon in the taskbar, and click Settings.
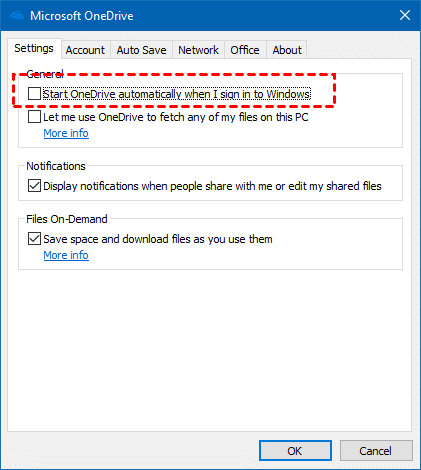
Step 4. Under the Settings tab, check the Start OneDrive automatically when I sign in to Windows, then click OK.
Fix 4. Disable security features
In rare cases, anti-virus software and firewalls may block OneDrive by mistake, and certain functions of the application may not work properly. If you suspect this is causing the Shared folders not showing on OneDrive for desktop, please temporarily disable the security features to confirm.
☛Disable antivirus software
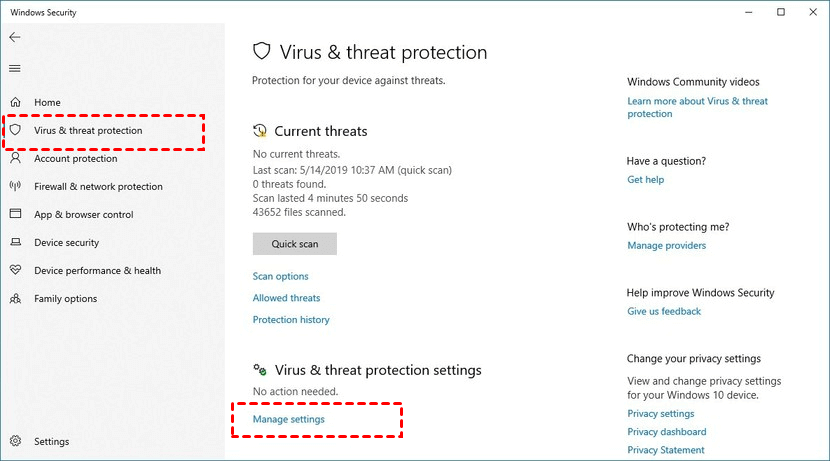
Step 1. Go to Windows Security, click Virus & threat protection on the taskbar of left, then find Manage settings at the bottom and click it.
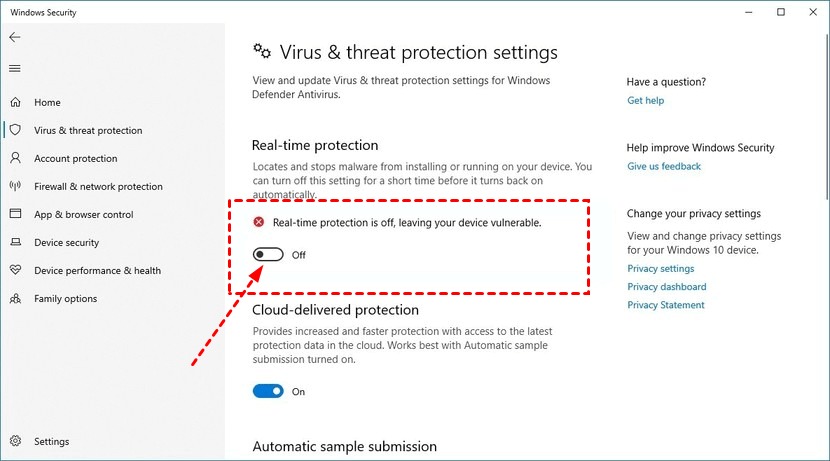
Step 2. Toggle the switch to turn off the Real-time Protection.
☛Disable firewall
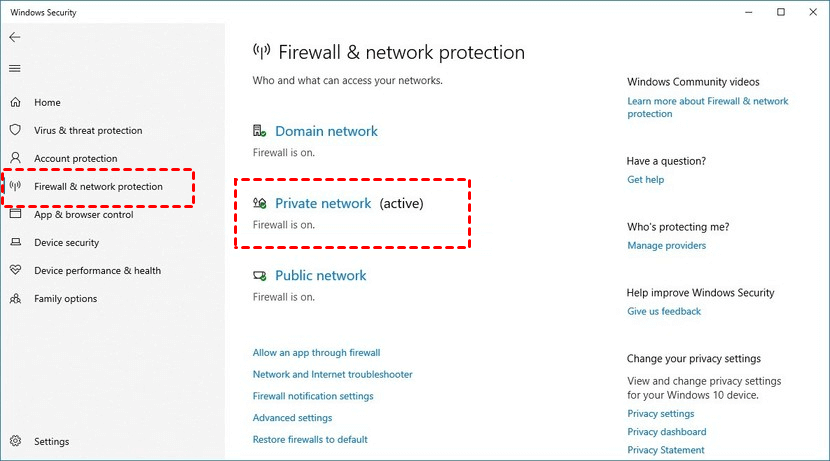
Step 1. Go to Windows Security, click Firewall & network protection on the taskbar of left, and click Private network on the right.
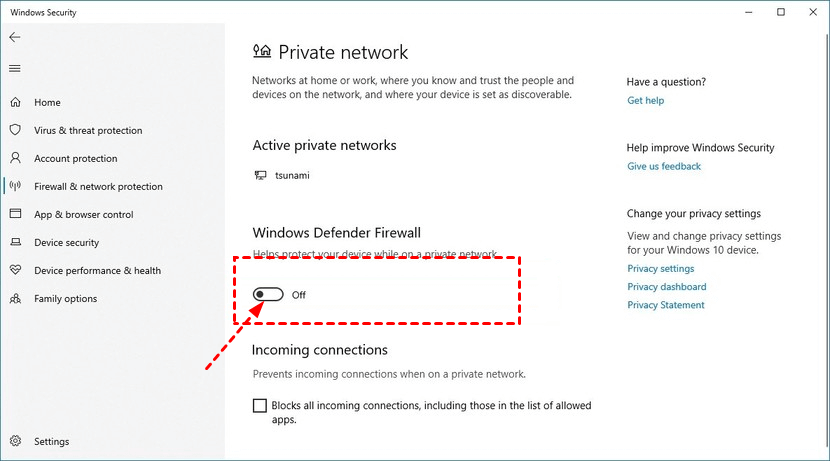
Step 2. Toggle the switch to turn off the Windows Defender Firewall.
Fix 5. Remove all OneDrive entries from registry
If the OneDrive “Shared with me” folder not showing in explorer, you can try to delete all the OneDrive entries from the registry.
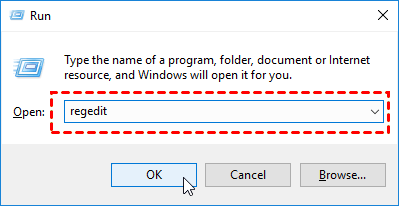
Step 1. Press the “Win + R” key to open the Run dialog, and type regedit, and press Enter.
Step 2. Go to the Edit tab, then click Find.
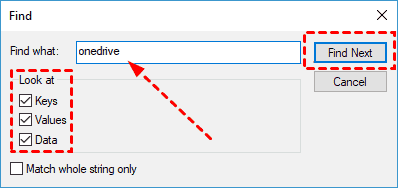
Step 3. In the Find window, enter onedrive and make sure to check all Look at options. Now click Find Next.
Step 4. After finding the OneDrive entry, delete it, and repeat the previous step. Repeat this process until all the OneDrive entries in your PC are deleted.
✎Note: Generally, there may be about 20 entries on the PC, so this process may take a while. If you are using Windows 7 or 8.1, you can solve this problem by simply deleting the OneDrive entry from the registry.
Bonus tip: switch to OneDrive alternative - CBackup
Many users have reported various problems with OneDrive, such as "OneDrive isn’t connected", "OneDrive not syncing" and so on. When OneDrive crashes or is not working, users need to spend a lot of time solving these problems. If you are tired of taking a lot of energy constantly to solve OneDrive issues, you can switch to a OneDrive alternative to backup files to the OneDrive cloud.
You can also use cloud backup software that is more professional to protect your data. They are often more stable than cloud storage services and use more professional backup methods to transfer and protect your data in the cloud. We recommend you a cost-effective and well-used OneDrive alternative - CBackup, its backup method is professional and easy to operate, can meet almost all users' backup requirements.
Users can directly and easily back up PC files to cloud storage services such as OneDrive and Google Drive, as well as a more secure cloud space - CBackup Cloud with a large cloud space, and it offers 5GB of free cloud space for users to protect more files.
Let's see how to backup files to OneDrive easily with CBackup:
Step 1. Download and install the CBackup PC client, then sign up for a CBackup account freely.
Step 2. Click the Storage tab on the left, tap OneDrive, and click the Authorize Now button. Then sign in to your OneDrive account and authorize CBackup to access your OneDrive files.
Step 3. Click the Backup PC to Public Cloud under the Backup tab.
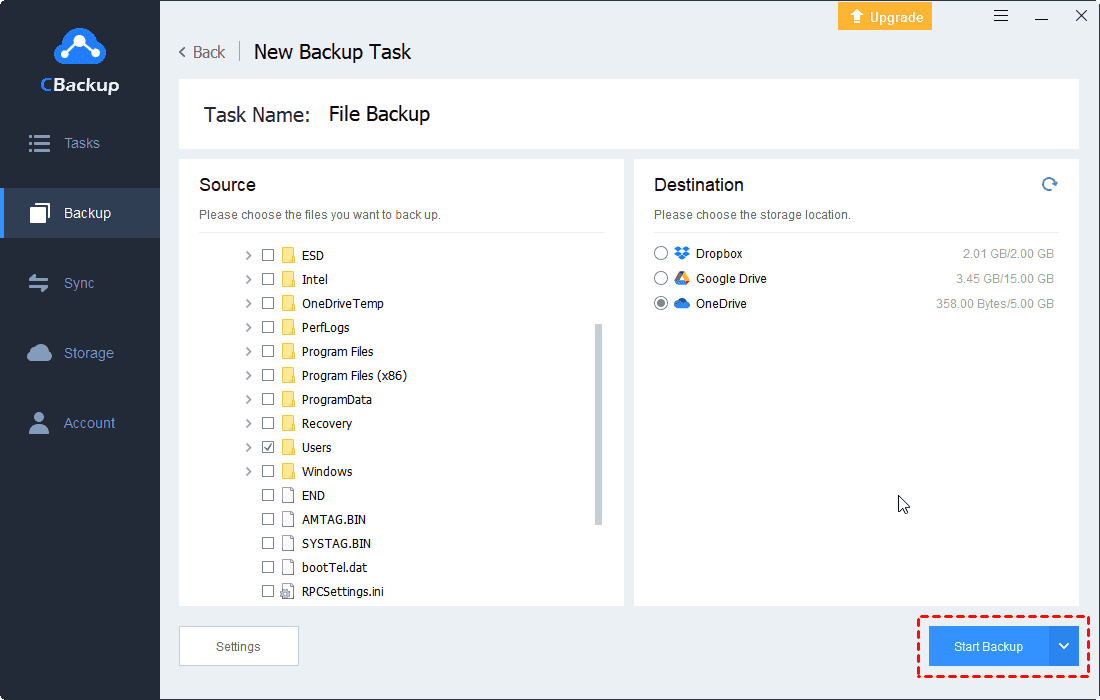
Step 4. Then select the files to be backed up, and select OneDrive as the backup destination.
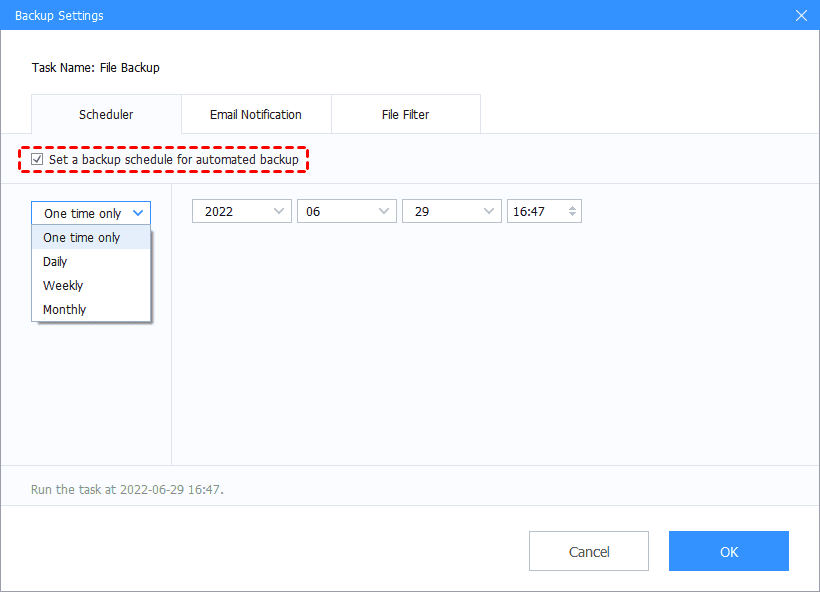
✎Note: You can click on the Settings button in the lower-left corner and go to Scheduler to set up OneDrive automatic backup to avoid forgetting to back up important data to the cloud in a timely manner.
Step 5. And then click Start Backup at the bottom right.
Backup OneDrive files to another cloud drive to protect data
Users who are accustomed to using OneDrive may have important data stored in the cloud. When the OneDrive error occurs again, you may not be able to access the data. If you switch to another cloud drive to use, you may also forget the important data in OneDrive. You can back up OneDrive to other cloud drives to help you access and protect the data.
Use professional cloud backup services, such as CBackup, which allows you to add multiple cloud storage accounts, including OneDrive, Google Drive, Dropbox, etc., and can help you automatically back up OneDrive data to another cloud drive easily. Let's see how to use CBackup to backup OneDrive to other cloud storage services (migrate OneDrive to Google Drive here):
The following steps are available in both the CBackup web version and the client version.
Step 1. Go to the CBackup website and sign in.
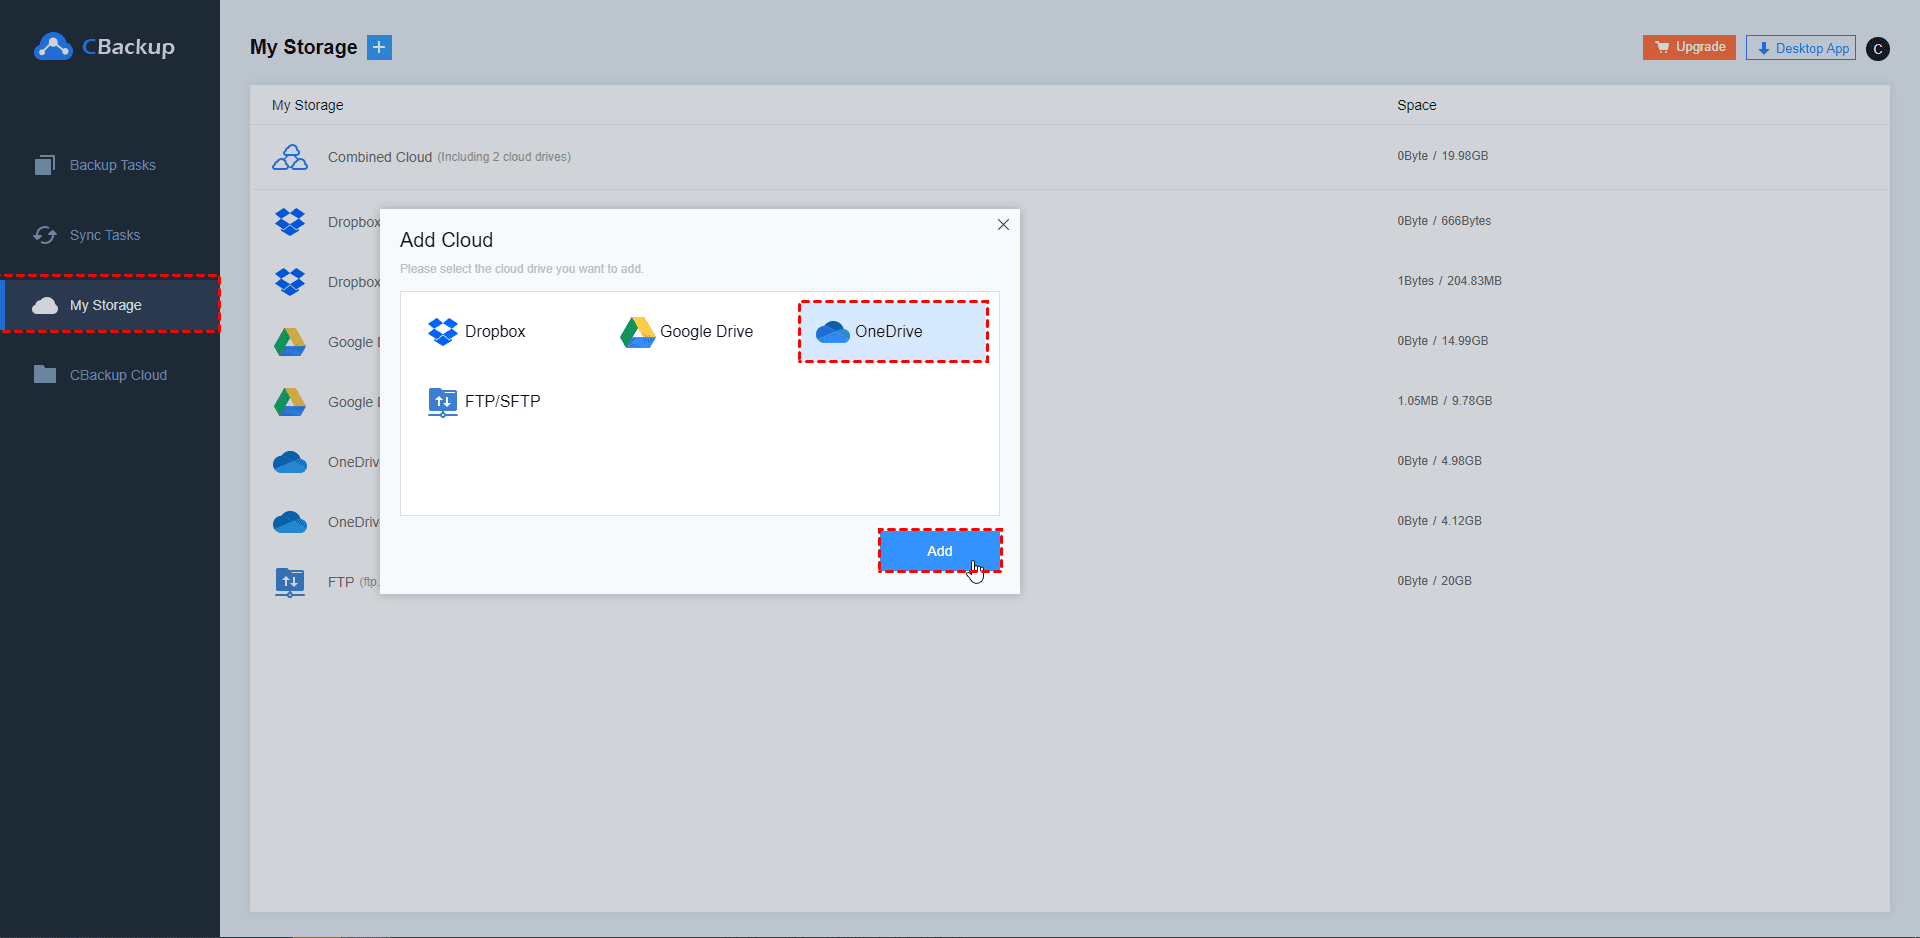
Step 2. Click + on the top and pick Add Cloud under the My Storage tab, then select OneDrive and click Add and complete the authorization, then authorize another cloud drive that needs to be added.
Step 3. To create a cloud to cloud backup task, you need to click New Task under the Backup Tasks tab.
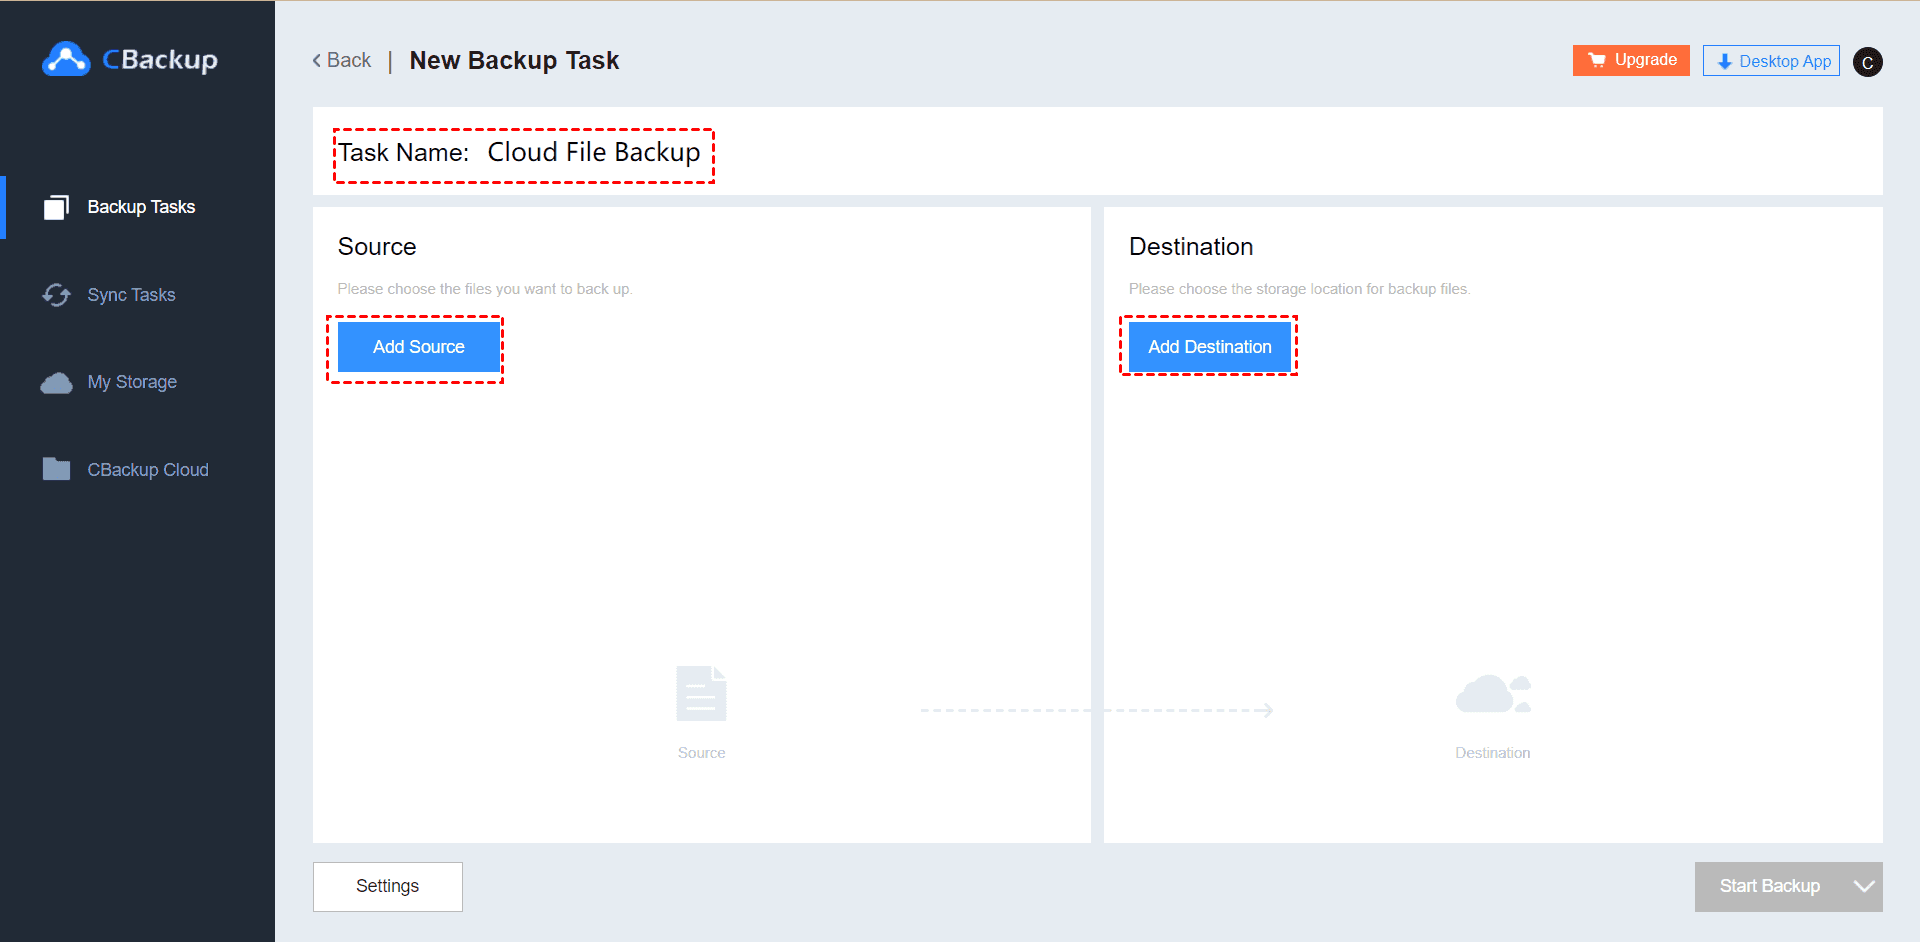
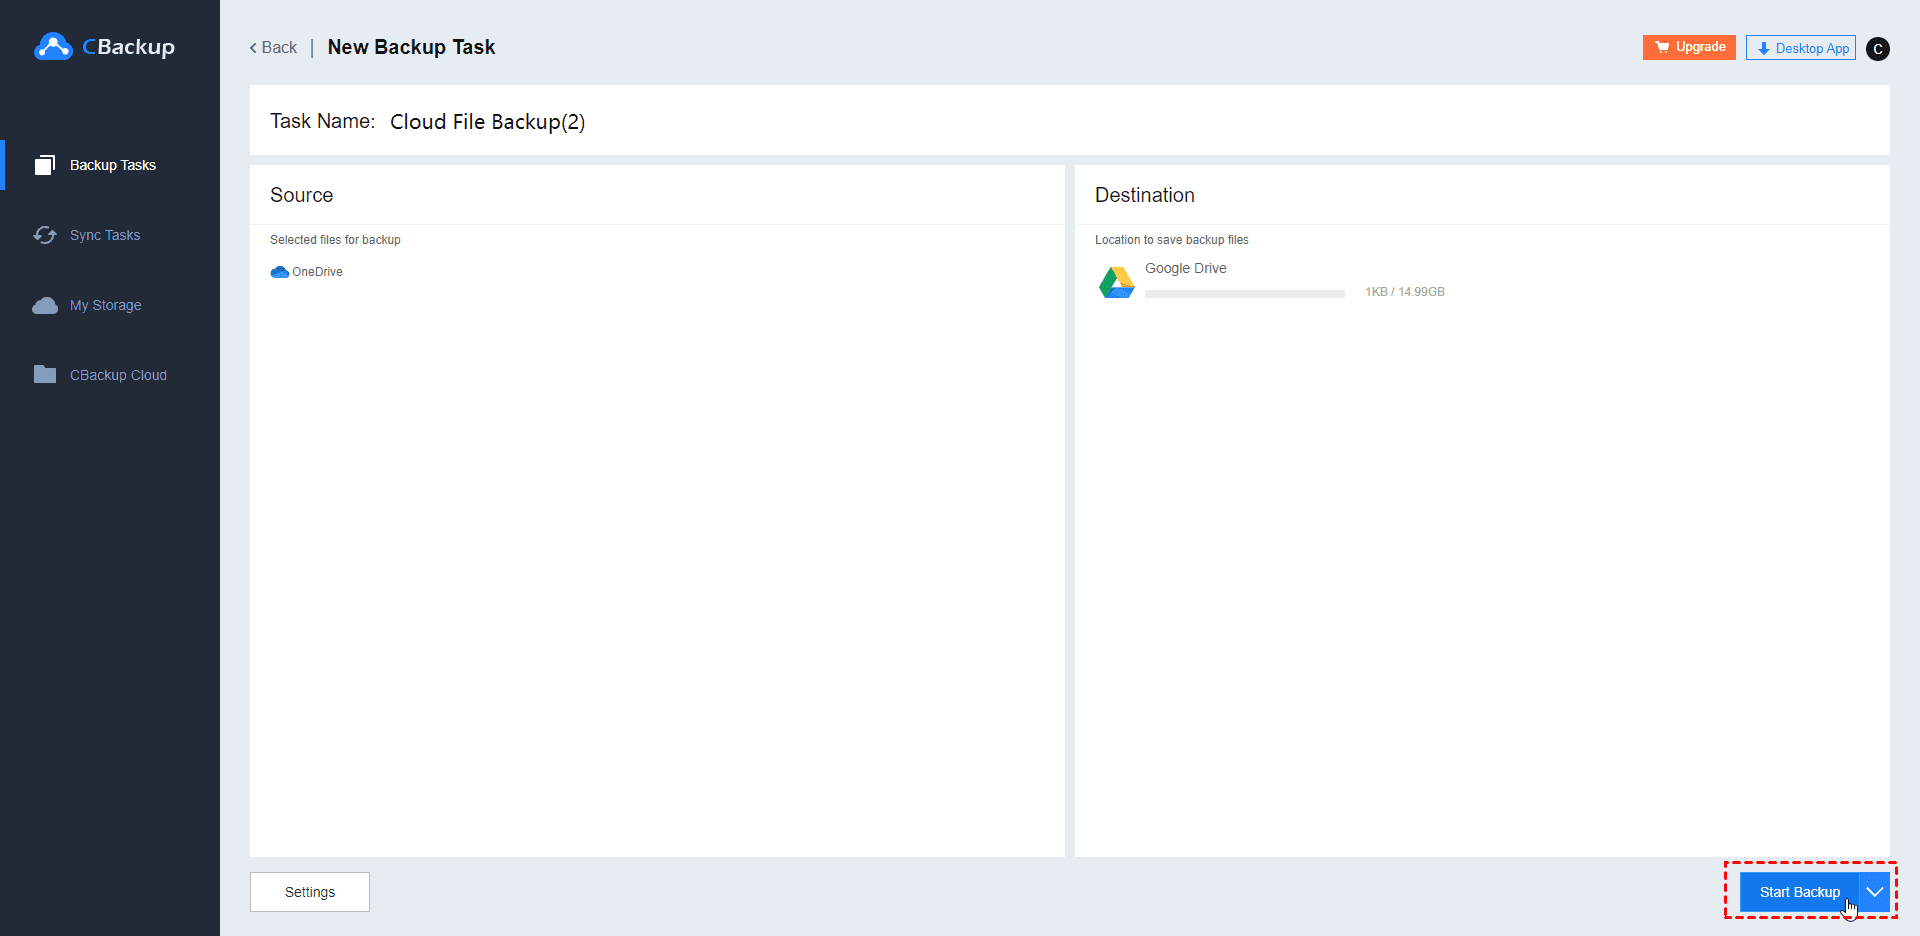
Step 4. Then, name your backup task, and click Add Source to add OneDrive as the backup source, you can also only select certain files on OneDrive. Click Add Destination to choose another cloud storage (e.g. Google Drive) as a backup destination.
Step 5. Click Start Backup to backup OneDrive data to Google Drive.
Final thought
If you meet the “OneDrive ‘shared with me’ not showing on desktop” issue, you can follow the above 5 effective solutions to fix it. Generally, the listed methods can solve most of OneDrive problems. Also, you can consider switching to a more stable cloud backup software such as CBackup for use. If you decide to switch to other cloud storage services, don't forget to use CBackup to backup OneDrive files in advance, which is free and easy to use.
Free Cloud Backup & Sync Service
Transfer files between cloud drives, combine cloud storage to gain free unlimited space
Secure & Free


