How to Sync OneDrive Shared Folders to PC with Ease?
This post shows you how to sync OneDrive shared folders, and introduces the reasons for shared folder not showing. Scroll down to get more information.
Sync a OneDrive Shared with me folder to PC
My colleagues and I are using Onedrive for Business to share a folder, which is on the PC of one of the employees, and other employees should be able to access it to read/edit the files. We were able to share the folder and all the employees can access the shared folder, but they need to do it using the browser. We want the folder to be accessible from Windows Explorer. Is it possible? How to sync OneDrive shared folder to computer?
OneDrive, enabling you to store, protect, share your files, and access them everywhere, is a free cloud storage service launched by Microsoft. OneDrive shared folders refer to these files and sub-folders that people share with you or you share with others, which makes items move between folders easily, and access up-to-date files handily.
How to sync OneDrive shared folder locally?
By default, the OneDrive client only syncs these files that update in OneDrive to PC. But now, you can also get sync shared folders that others have shared with you. It’s important to note that only items that people share with you marked the “Can edit” permission can be synced, and moved within the shared folder. Let’s see what to do to sync OneDrive shared folder to PC.
Step 1. Visit the Microsoft OneDrive website and log in to your OneDrive account.
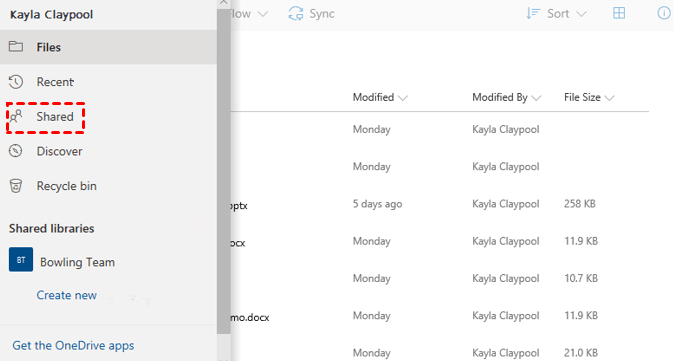
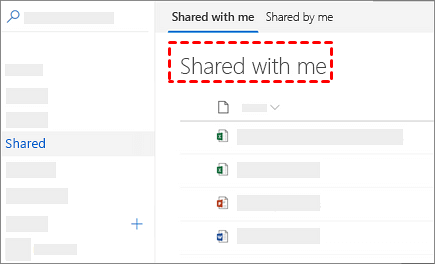
Step 2. Click the “Shared” position on the left panel, and click “Shared with me” to find the files that have been shared with you.
Step 3. Select the file to make OneDrive sync shared folder to PC. Then, click the “Sync” button on the top.
Step 4. Go back to your file explorer, and you will see the folder that synced just now. Generally the local file path is: C:\Users\{login user name}\SharePoint\.
- Note:✎...
- If your shared folder is shared via Microsoft Teams or SharePoint, you can find the folder by selecting the appropriate group under Under Shared libraries. Generally, Documents is the default location for Microsoft Teams or SharePoint shares.
Frequently Asked Questions about OneDrive shared folders
In the process of syncing OneDrive shared folder to Mac or Windows PC, you may encounter problems related to OneDrive shared folders. Here are some of them and their answers.
#1. Why are my OneDrive shared folders not showing?
OneDrive shared with me not showing is usually due to incompatibility of the system and software, and blocking of antivirus software. You can use the following methods to have a try:
Method 1. Update OneDrive
Step 1. Go to Windows setting by pressing hotkey “Windows+I”.
Step 2. Click on the “Update & Security” > “Windows Update”>”Check for updates”.
Method 2. Reset OneDrive
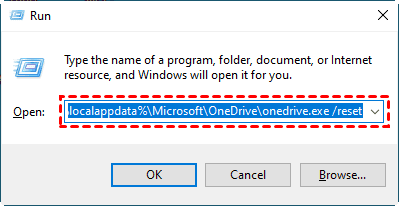
Step 1. Press “WinKey + R” to bring up the “Run dialog”.
Step 2. Enter/paste %localappdata%\Microsoft\OneDrive\onedrive.exe/reset, and click OK. Then restart your OneDrive.
Method 3. Break through the block of antivirus software
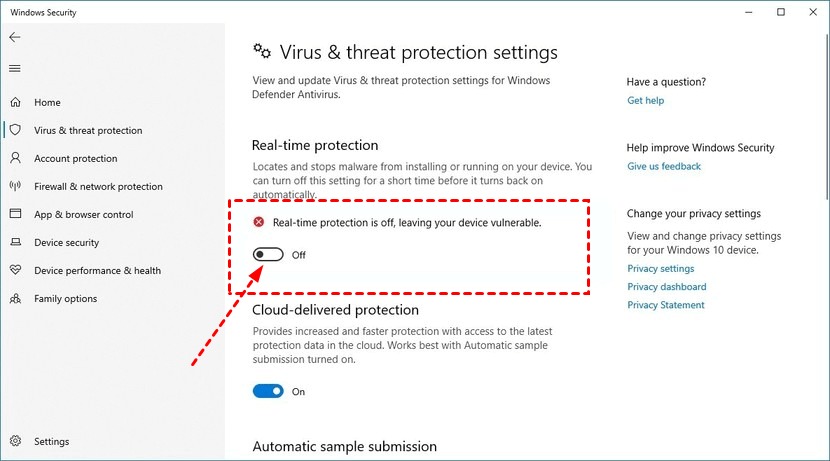
Step 1. Go to the Windows setting, and find “Windows Security” to turn off antivirus software protection temporarily.
#2. Why there is no “sync” option for my OneDrive shared folder?
When you can not find the Sync option on the OneDrive top menu, please refer to the following reasons, just take it for a reference.
1. You have selected more than one folder. Please tick only one folder, since it is not available to sync multiple folders at one time.
2. The item you are trying to sync is not a folder, but an individual file.
Backup files to another secure cloud - CBackup
When you fall into the difficult situations of OneDrive not syncing shared folder, OneDrive not running on Windows, OneDrive not open on Windows, OneDrive isn’t connecting, etc., you may find it is troublesome to deal with the problems every time. Actually, you can avoid this kind of situation by saving files to another secure cloud backup service. Fortunately, there is a free backup tool - CBackup, which can help make your backup task much easier.
CBackup is a free cloud backup tool for Windows. You can backup your PC files to its CBackup cloud, and public clouds, such as Google Drive, Dropbox, OneDrive, and so on. After backup, you can restore data from CBackup to the original location or a new destination whenever you want.
With a reasonable price of CBackup, you can enjoy its user-friendly features of CBackup:
-
Automatic backup: CBackup offers scheduled cloud backup for Windows PC. You can set up it depending on your needs. There are 4 scheduled modes: specific time, daily, weekly, and monthly.
-
Cloud to cloud backup: With CBackup web version, you can backup files between two storage clouds, so that it is possible to migrate data between clouds and create a copy of your cloud data to another cloud with ease.
-
Combine cloud storage space: CBackup allows you to combine multiple clouds into one storage space so that you can make optimal usage of any small, idle storage space.
Now, let’s see how to backup files to CBackup Cloud.
Step 1. Download and run CBackup on your computer.
Step 2. Sign up for a CBackup account, and sign in to the client app.
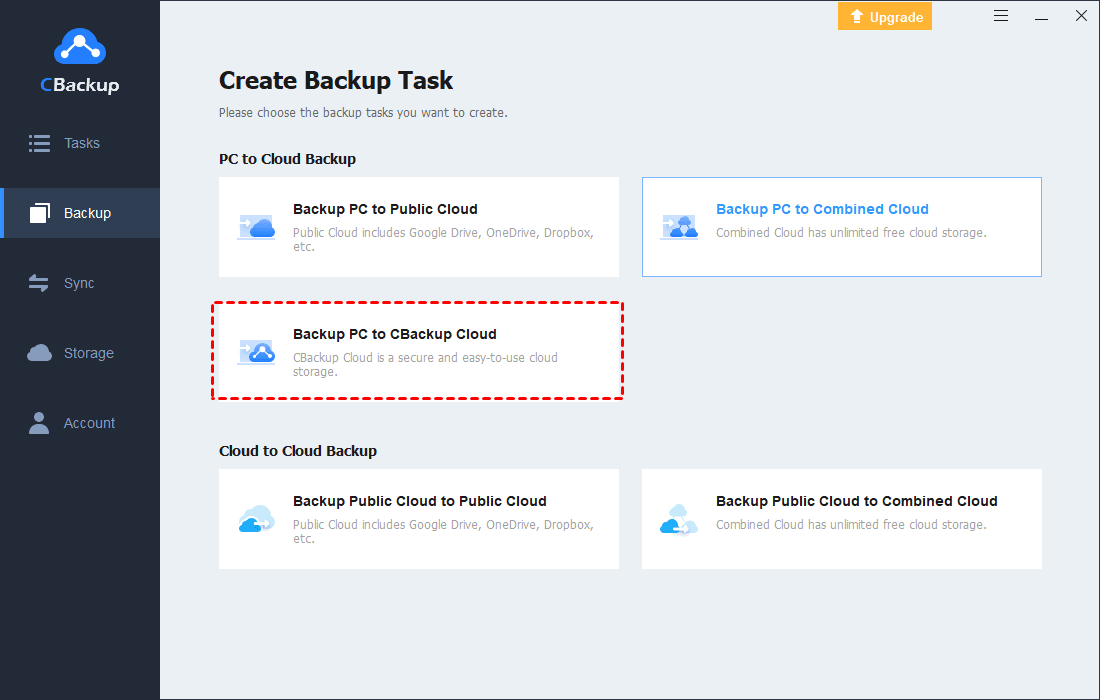
Step 3. Click on the “Backup” button, and hit the “Backup PC to CBackup Cloud” position.
Step 4. Modify the task name. Under the Source tab, navigate the files/folders you want to backup. Finally, click “Start Backup” to get PC cloud backup.
- Note:✎...
- Connecting CBackup with the cloud drive needs your authorization. But you can take great security of it for granted, since it is based on the OAuth authorization system, and will never save your login message.
Written in the end
After learning how to sync OneDrive shared folder and some frequently asked questions about OneDrive shared folder, you are supposed to have mastered the solution to them. If you are interested in trying other backup software, you can give CBackup a try, which will protect your data in a reliable way.
Free Cloud Backup & Sync Service
Transfer files between cloud drives, combine cloud storage to gain free unlimited space
Secure & Free


