Windows 10/11 Code 0x81000019: What Causes It & How to Fix It
If you meet Windows 11 code 0x81000019 when creating a backup, don’t panic. Here we explain the causes of this issue and list several methods that can help you fix it.
Backup Failed: Windows 11 Error Code 0x81000019
“I am creating a backup on my Windows 11 computer until I receive an error message that says: A shadow copy could not be created. Please check "VSS" and "SPP" application event logs for more information. Why would this occur? How can I fix it? Please help!”
If you get a message that reads "A shadow copy could not be created" when you create a backup on your PC, and this Windows 11/10 code 0x81000019 is associated with VSS and SPP event logs, please read this post for solutions to this error.
Why Does Error Code 0x81000019 Occur?
By reviewing the user reports and analyzing them, we have concluded that the Windows 11 error code 0x81000019 usually occurs in the following cases:
◆Insufficient space in the system reserved partition. There is not enough space to run the Windows backup tool.
◆Interference of third-party antivirus software. Your third-party anti-virus software is preventing the Windows Backup Tool from running.
◆Incorrect settings on the Volume Shadow Copy service. The Volume Shadow Copy service is set to manual resulting in the backup being interrupted.
◆Corrupted system files. There are corrupted system files to prevent the backup service from running.
How to Fix Error Code 0x81000019 on Windows 10/11
If you are struggling with the error 0x81000019, please try the methods below to quickly fix it.
Way 1. Reset the Volume Shadow Copy Service
First, please check if Volume Shadow Copy Service (VSS) is running correctly in the background. In most cases, a copy of the computer file cannot be created successfully because you have set VSS to Manual. You can follow the guide below to restart this Windows backup service and fix the error code 0x81000019 on Windows 10/11.
✎Note: Volume Shadow Copy Service, abbreviated as VSS, is a tool for creating copies and snapshots of Windows computer files and drivers so that users can restore data when needed.
Step 1. Tap on Windows + R to open the Run dialog box and type “services.msc” to click OK.
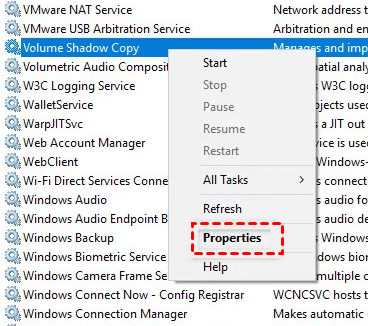
Step 2. Then, locate Volume Shadow Copy in the Service windows, right-click it, and select Properties.
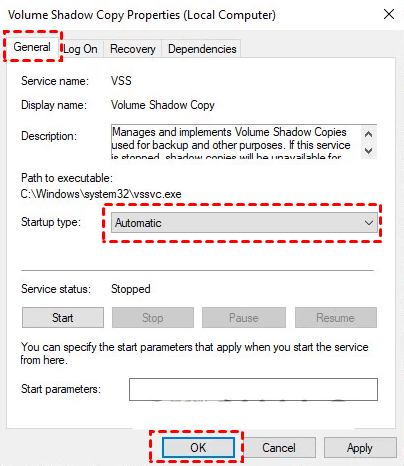
Step 3. On the Volume Shadow Copy Properties (Local Computer) screen, choose Automatic on the drop-down menu of Startup type.
Step 4. If the Service status is Stopped, tap on the Start button, please.
Step 5. Click on Apply > OK. Then, reboot your device to run a backup for your computer again.
Way 2. Delete Temporary Files on Windows
When running the Windows backup tool, it is required to keep sufficient space both at the backup destination (where you want to save backup) and on the computer. If your backup destination has sufficient available space, it is possible that the computer is running out of space. Please run the Disk Cleanup utility to free up storage space on your PC.
Step 1. Input “cleanup” in the Windows search box and click on Disk Cleanup.
Step 2. Select C: drive for cleanup and click on OK.
Step 3. Tap on Clean up system files at the lower-left corner.
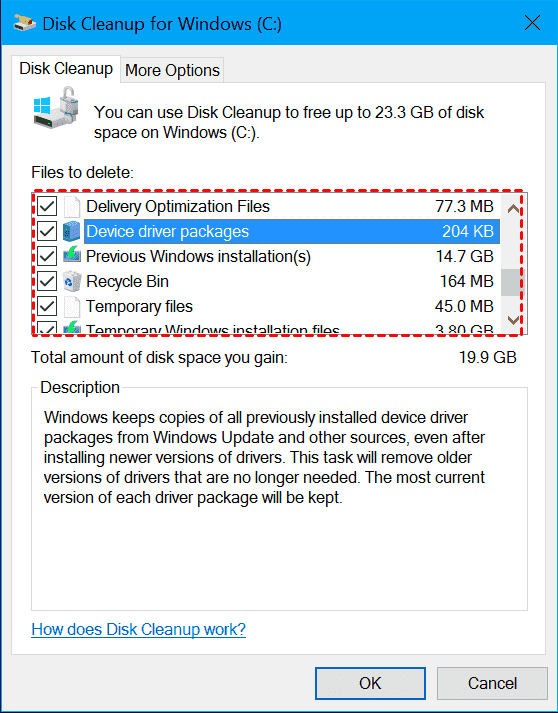
Step 4. After that, re-select C: drive and tick all checkboxes under Files to delete and click OK. And, confirm it.
Step 5. Succeeding after, restart your computer to check if the backup error code 0x81000019 on Windows 11/10 comes back.
Way 3. Remove Useless Restore Points
If you've created many restore points before, they undoubtedly will take up a lot of computer space as well. You can clear redundant restore points to solve the Windows backup failure with error code 0x81000019.
Step 1. Type and search for “System protection” in the Windows search box. And click on Create a restore point.
Step 2. Click the Configure position on the System Properties tab.
Step 3. Tap Delete to remove useless restore points on this PC and click continue. Finally, restart Windows.
Way 4. Delete Unnecessary Language packs
Removing useless language packs is also an effective way to make room for Windows.
Step 1. Head toward Settings > Time & Language > Language.
Step 2. Click the needless language on the right pane and choose Remove.
Way 5. Disable Antivirus Software
If third-party anti-virus software is running on the computer when the Windows 10 backup failed shadow copy error occurs, there is a possibility that this software is preventing the Windows backup tool from running correctly. Please disable the software to see if the backup failed error is fixed.
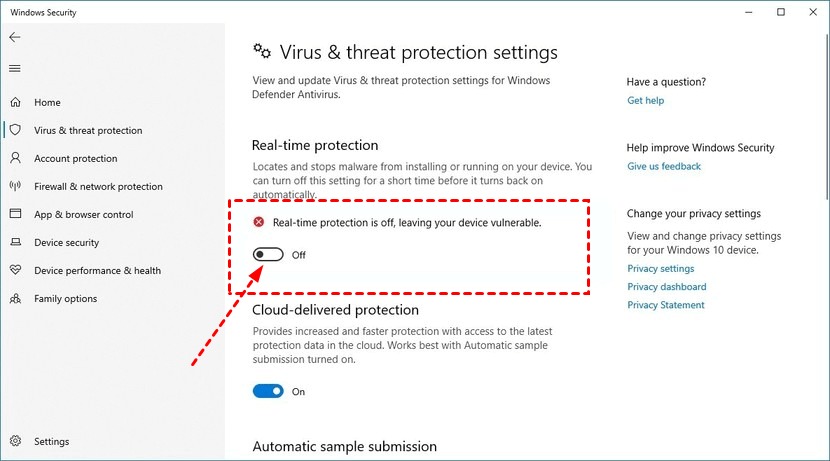
Step 1. Open Windows Settings and click on Update & Security > Virus & threat protection.
Step 2. On the Virus & threat protection settings screen, turn off antivirus software protection for a short time.
Way 6. Run SFC and DISM scans
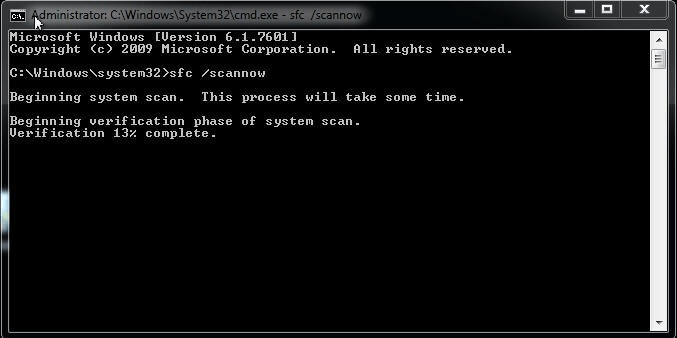
Sometimes, corrupted system files can lead to backup failures and Windows 11 code 0x81000019. Running the SFC and DISM scan/repair programs can help you to repair these files.
Step 1. Press Windows + R to run the Run box and type “cmd” and press on Ctrl + Shift + Enter to click Yes to get admin access.
Step 2. Insert “SFC /Scannow” in the CMD prompt and click Enter.
Step 3. After the scan process is complete, reboot your computer and repeat step 1 to input “DISM /online /Cleanup-Image /RestoreHealth”. And, click on Enter to repair your corrupted files.
Step 4. Subsequently, restart your Windows PC to see if the Windows 11 error 0x81000019 still persists.
Bonus Tip: Use an Alternative Way to Backup Windows Files
If, unfortunately, none of the foregoing solutions works for Windows 11 code 0x81000019, don't worry, you can perform Windows file backups easily with CBackup, a free cloud backup service.
CBackup allows you to move files from computer to Google Drive, OneDrive, Dropbox, and CBackup Cloud. If frequent modification and access to data require you to back up your Windows files regularly, CBackup's scheduled backup feature can help you set up auto backups for files easily and quickly. This free backup software uses an incremental backup method, which can effectively help you save backup space.
Please download CBackup for free and follow the steps below to create backups for your Windows files.
Step 1. Start with creating a CBackup account and signing in to the CBackup desktop app.
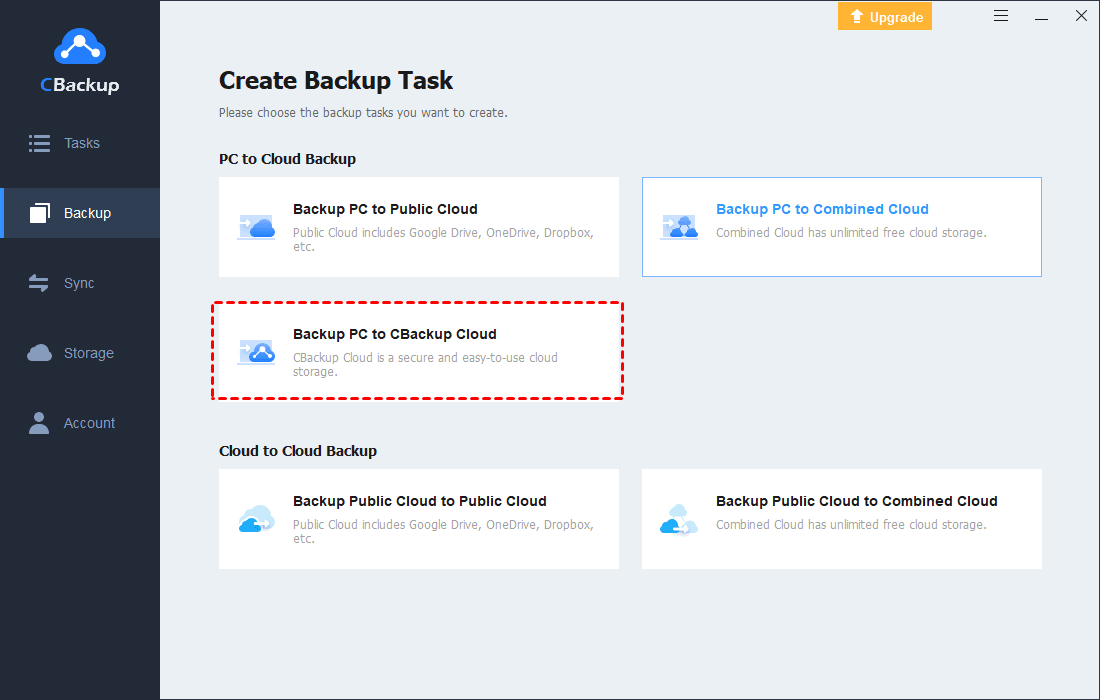
Step 2. Click on Backup on the left, and tap on Backup PC to CBackup Cloud.
Step 3. Modify the Task Name and pick computer files. Then, hit Start Backup to create a backup for your Windows files with ease.
✎Note: Please tap on Settings at the bottom, and set up PC auto backup under the Scheduler tab if necessary.
Last Words
The above solutions may be able to fix the Windows 11 code 0x81000019 and make the Windows backup tool run properly again. If you still can't solve this issue, you can try to use CBackup to complete the backup of Windows files easily.
Free Cloud Backup & Sync Service
Transfer files between cloud drives, combine cloud storage to gain free unlimited space
Secure & Free


