How to Manage Your Cloud Sync Task in CBackup?
With time's goes by, we'll find there are tremendous sync tasks in our CBackup, they seem chaos so that we can't manage them efficient. So it's important to manage these tasks as usual.
Manage Sync Tasks For PC to Public Cloud
Modify Sync Task Name
1. Please move the cursor on the synchronization task, then click the three-dots icon, and then select Details to enter the task details page.
2. Please click the task name to edit, then enter the modified name, and then click the blank space to save the editing result.
Modify Backup Source
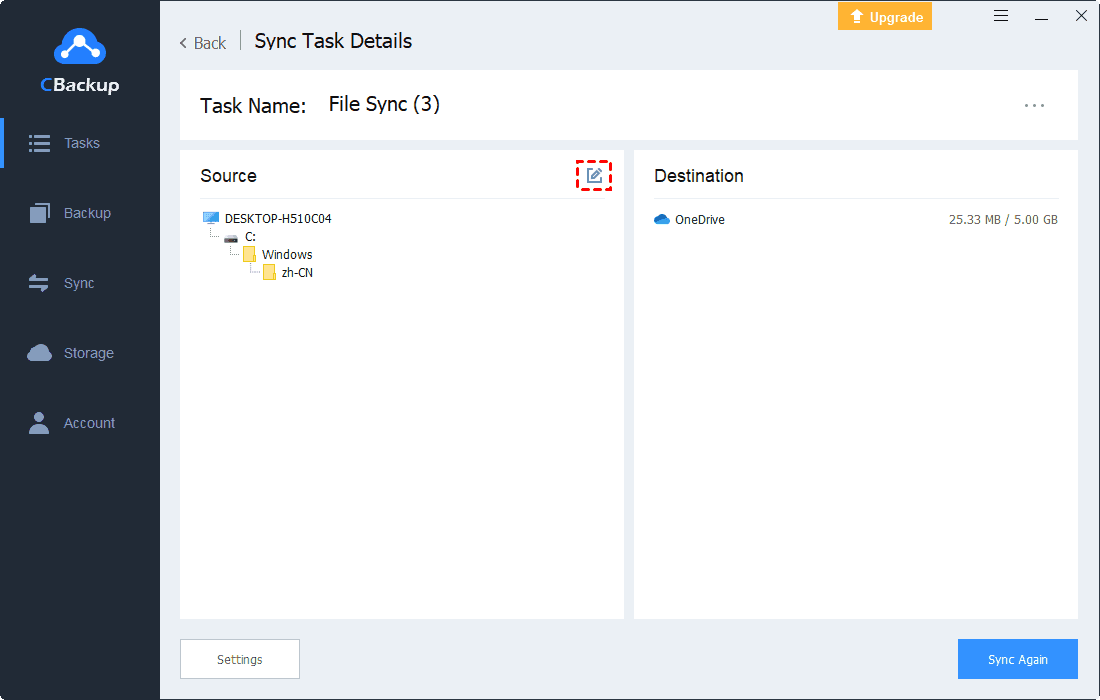
1. Please move the cursor on the synchronization task, then click the three-dots icon, and then select Details to enter the task details page.
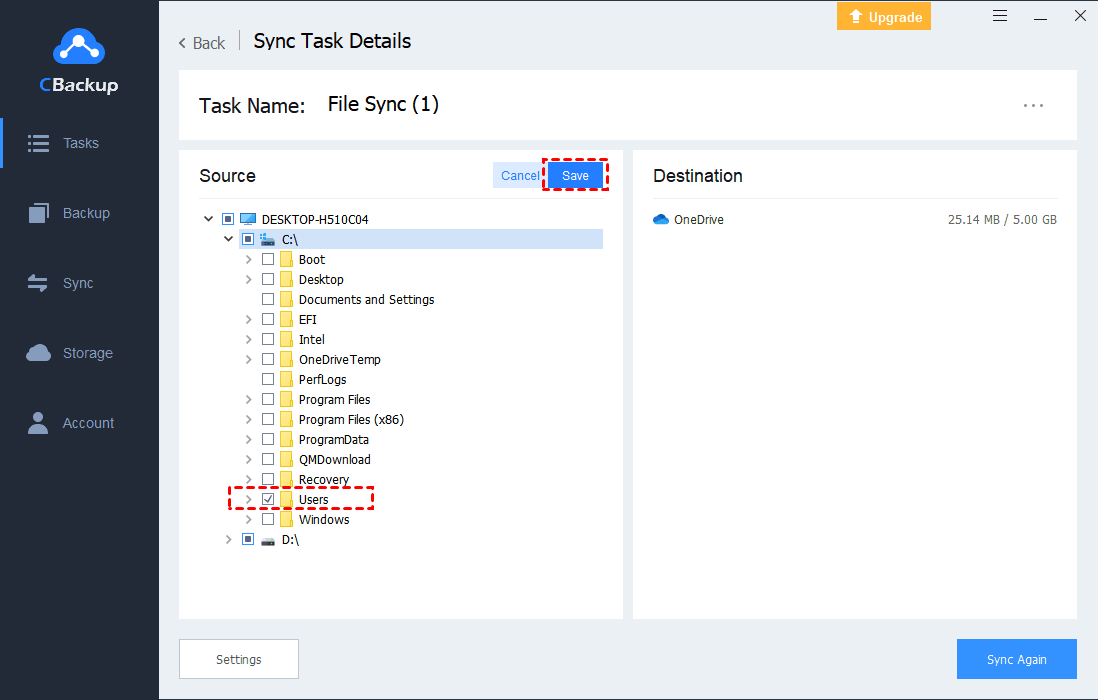
2. Move the mouse to the Source module, and click the edit button to edit the synchronization source.
3. Modify the synchronization source, then click Start Sync. This modification will be performed during the next synchronization.
Modify Sync Destination
The synchronization target does not support modification. If you need to change the synchronization target, you can create a new synchronization task.
Sync Log
Generally, synchronization tasks are different from backup tasks, and synchronization tasks have no version. However, you can view all synchronization logs. You can follow the steps below:
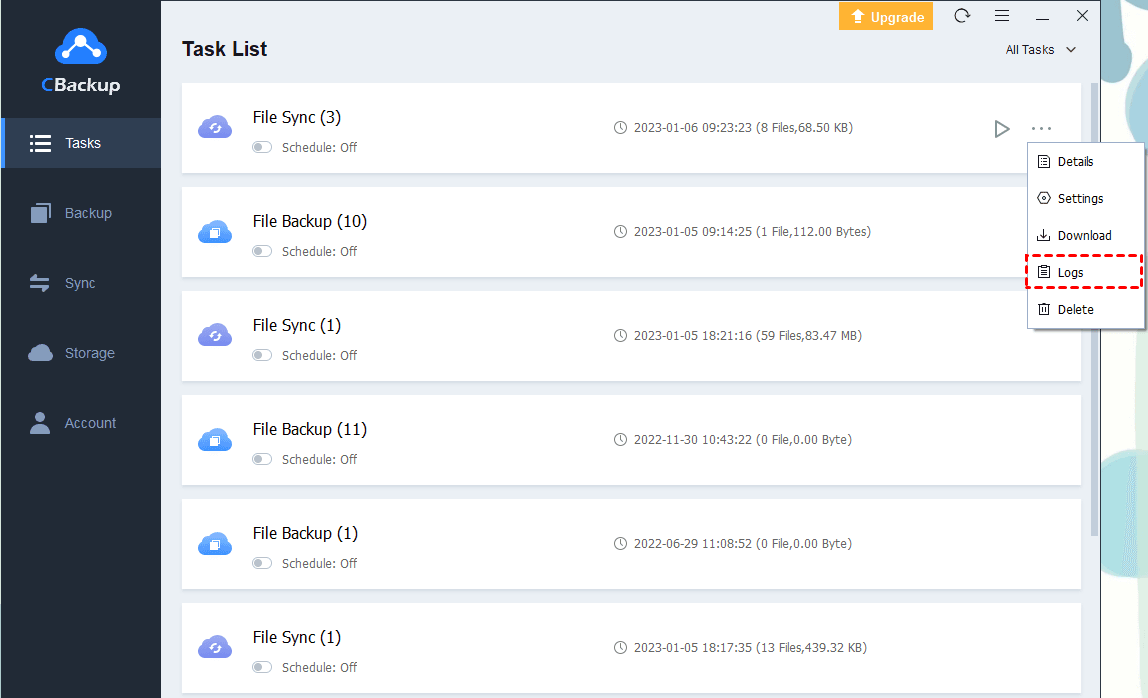
1. Move the cursor on the synchronization task, then click the three-dots icon, and then select Logs to enter the Sync Logs page.
2. Next, you can view all the synchronization details of the task. CBackup will only keep the latest 30 logs for a sync task.
Remove Sync Task
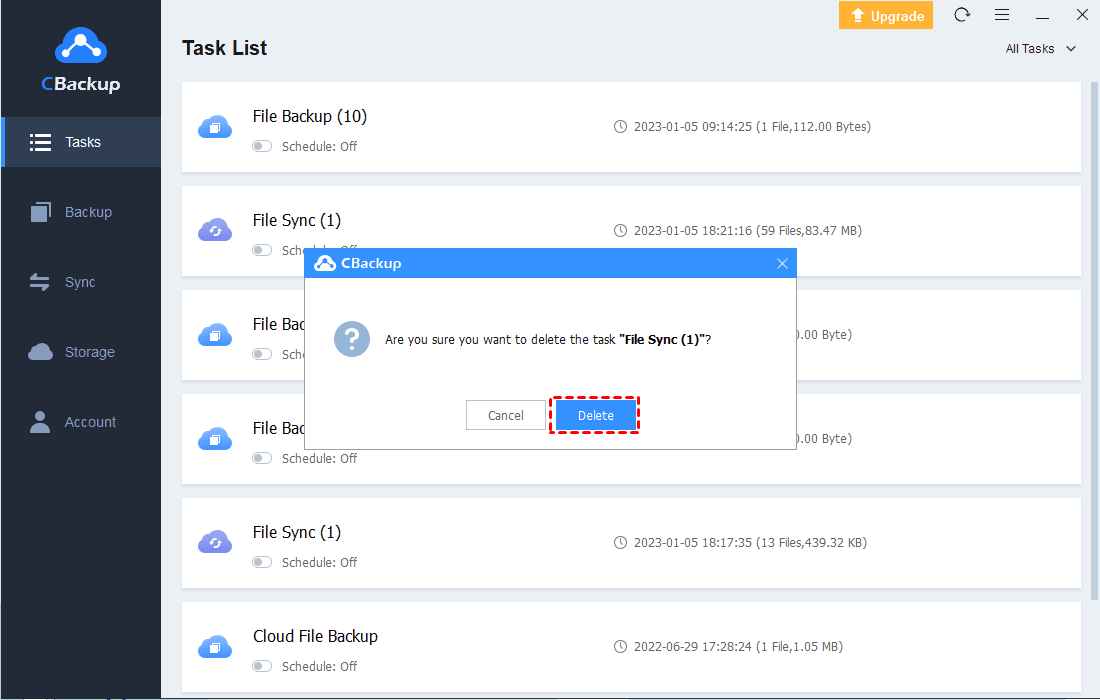
1. Move the cursor on the synchronization task, then click the menu button, and then select Delete to delete the task.
2. Deleting the synchronization task will remove the task and its chained backup files in the source and target locations. If you are sure you want to delete the task, click the Delete button in the pop-up prompt box. Otherwise, click Cancel.
Download Sync task
If you want to copy the synced files back to local, you can download the sync task, and you may follow the steps to do,
1. Move the cursor on the synchronization task, then click the three-dots icon, and then select Download to download the task.

2. Select the file you want to download then select the Download Destination
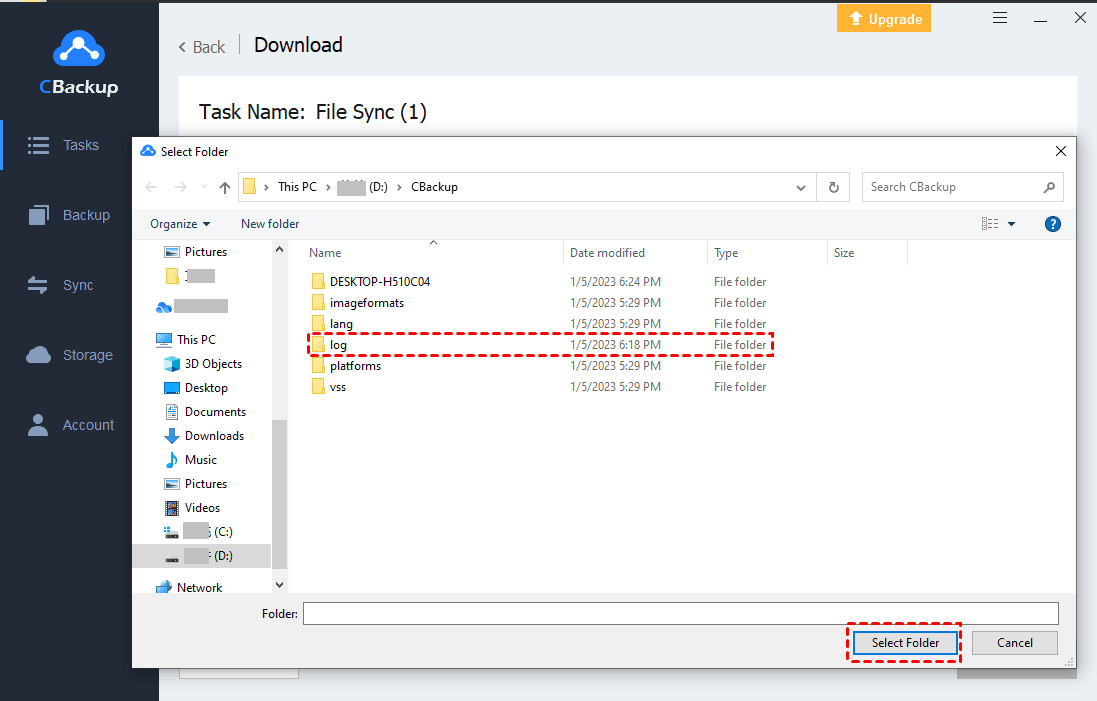
3. Please select a target log folder, then click Select Folder.
4. Next, please click Start Download.
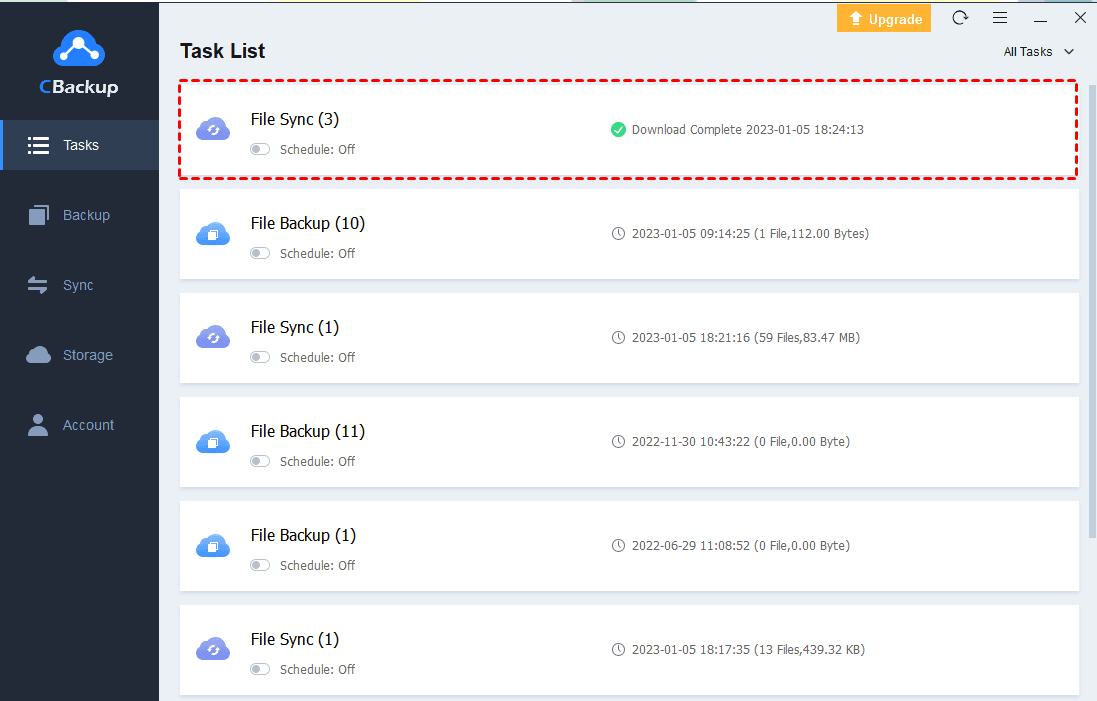
Then it will start to download.
5. Finally, you can open the target location to check if the folder has been downloaded here.
Manage Sync Tasks For Public Cloud to Public Cloud
For Public Cloud to Public Cloud tasks, we can only manage them in Cbackup Web App. And you may follow the steps to do.
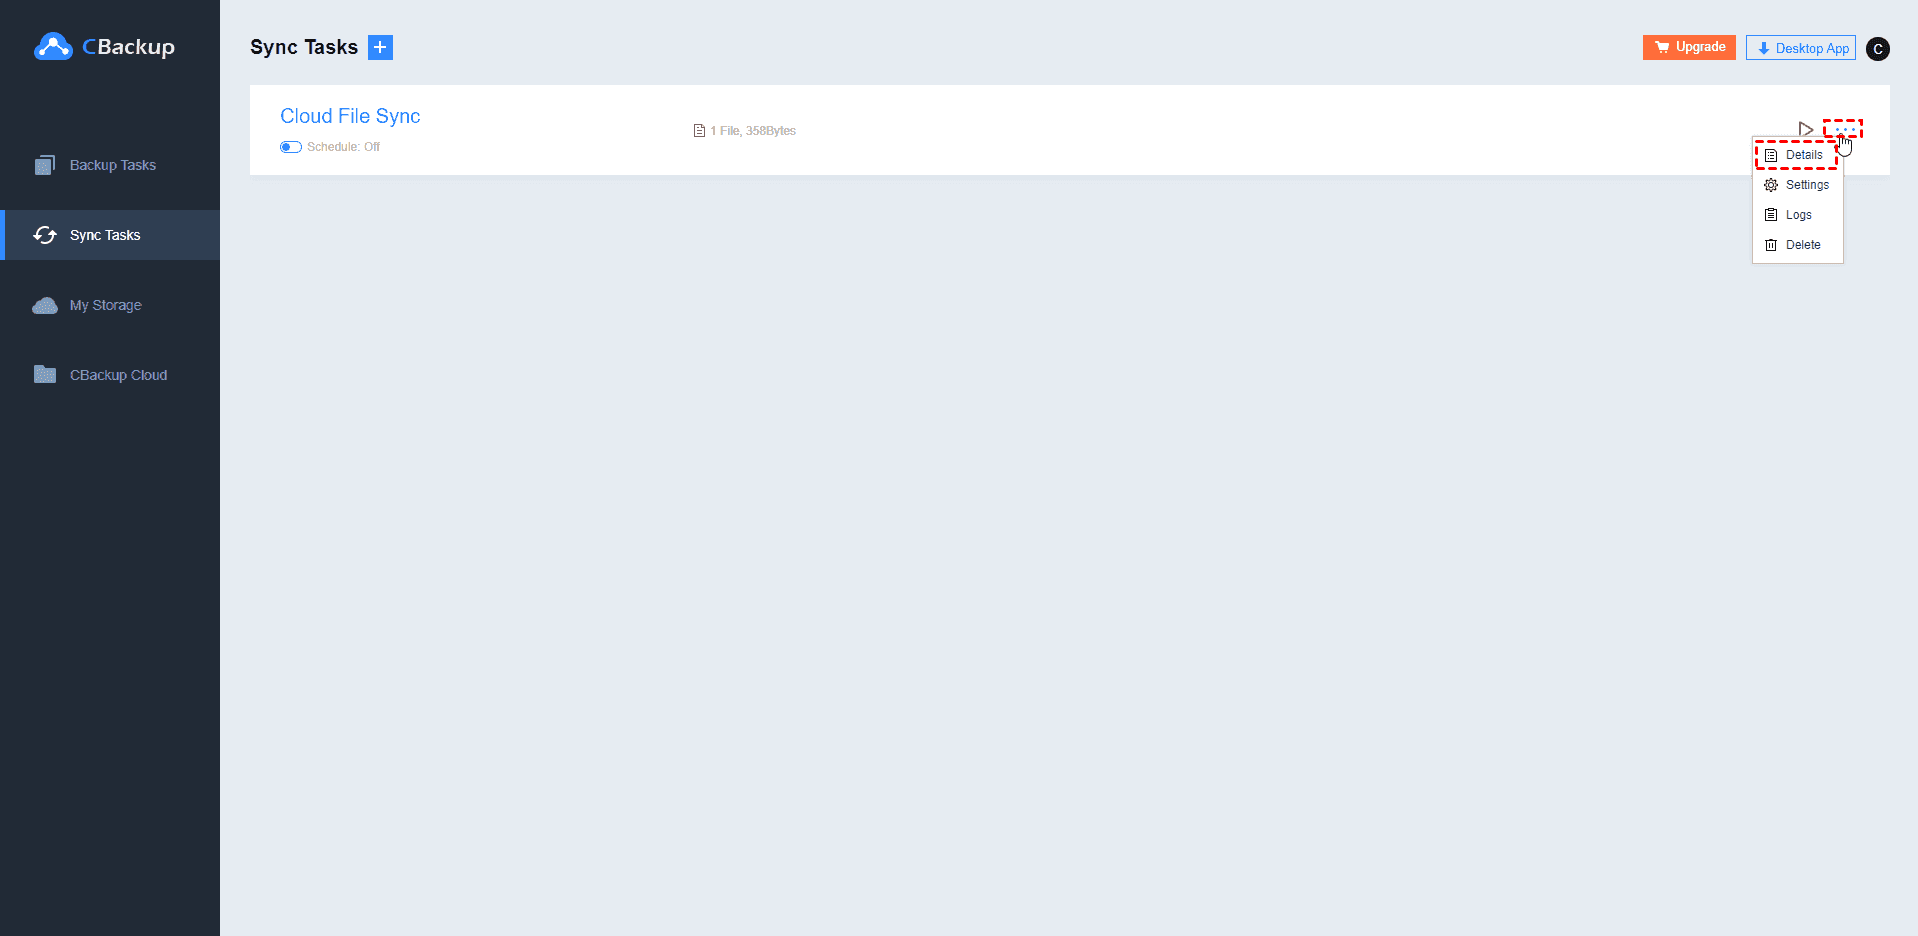
1. Sign in to your CBackup account from CBackup official site, next, switch to the Sync Tasks page then find the sync task.
2. Please move the cursor on the synchronization task, then click the three-dots icon, and then select Details/Logs/Delete, and these operations are the same as the operations in CBackup Desktop App. But for the Public Cloud to Public Cloud Sync task, there is no Download task option.
Free Cloud Backup & Sync Service
Transfer files between cloud drives, combine cloud storage to gain free unlimited space
Secure & Free


